
The DRZ400/KLX400 Starter Motor....
Woefully short on photos for this post and i apologize for that.
When powder coating all of the engine cases, i found it necessary to powder coat the starter housing as well for continuity. this mean taking the starter apart.
No big deal, it is a simple motor. It was working before.
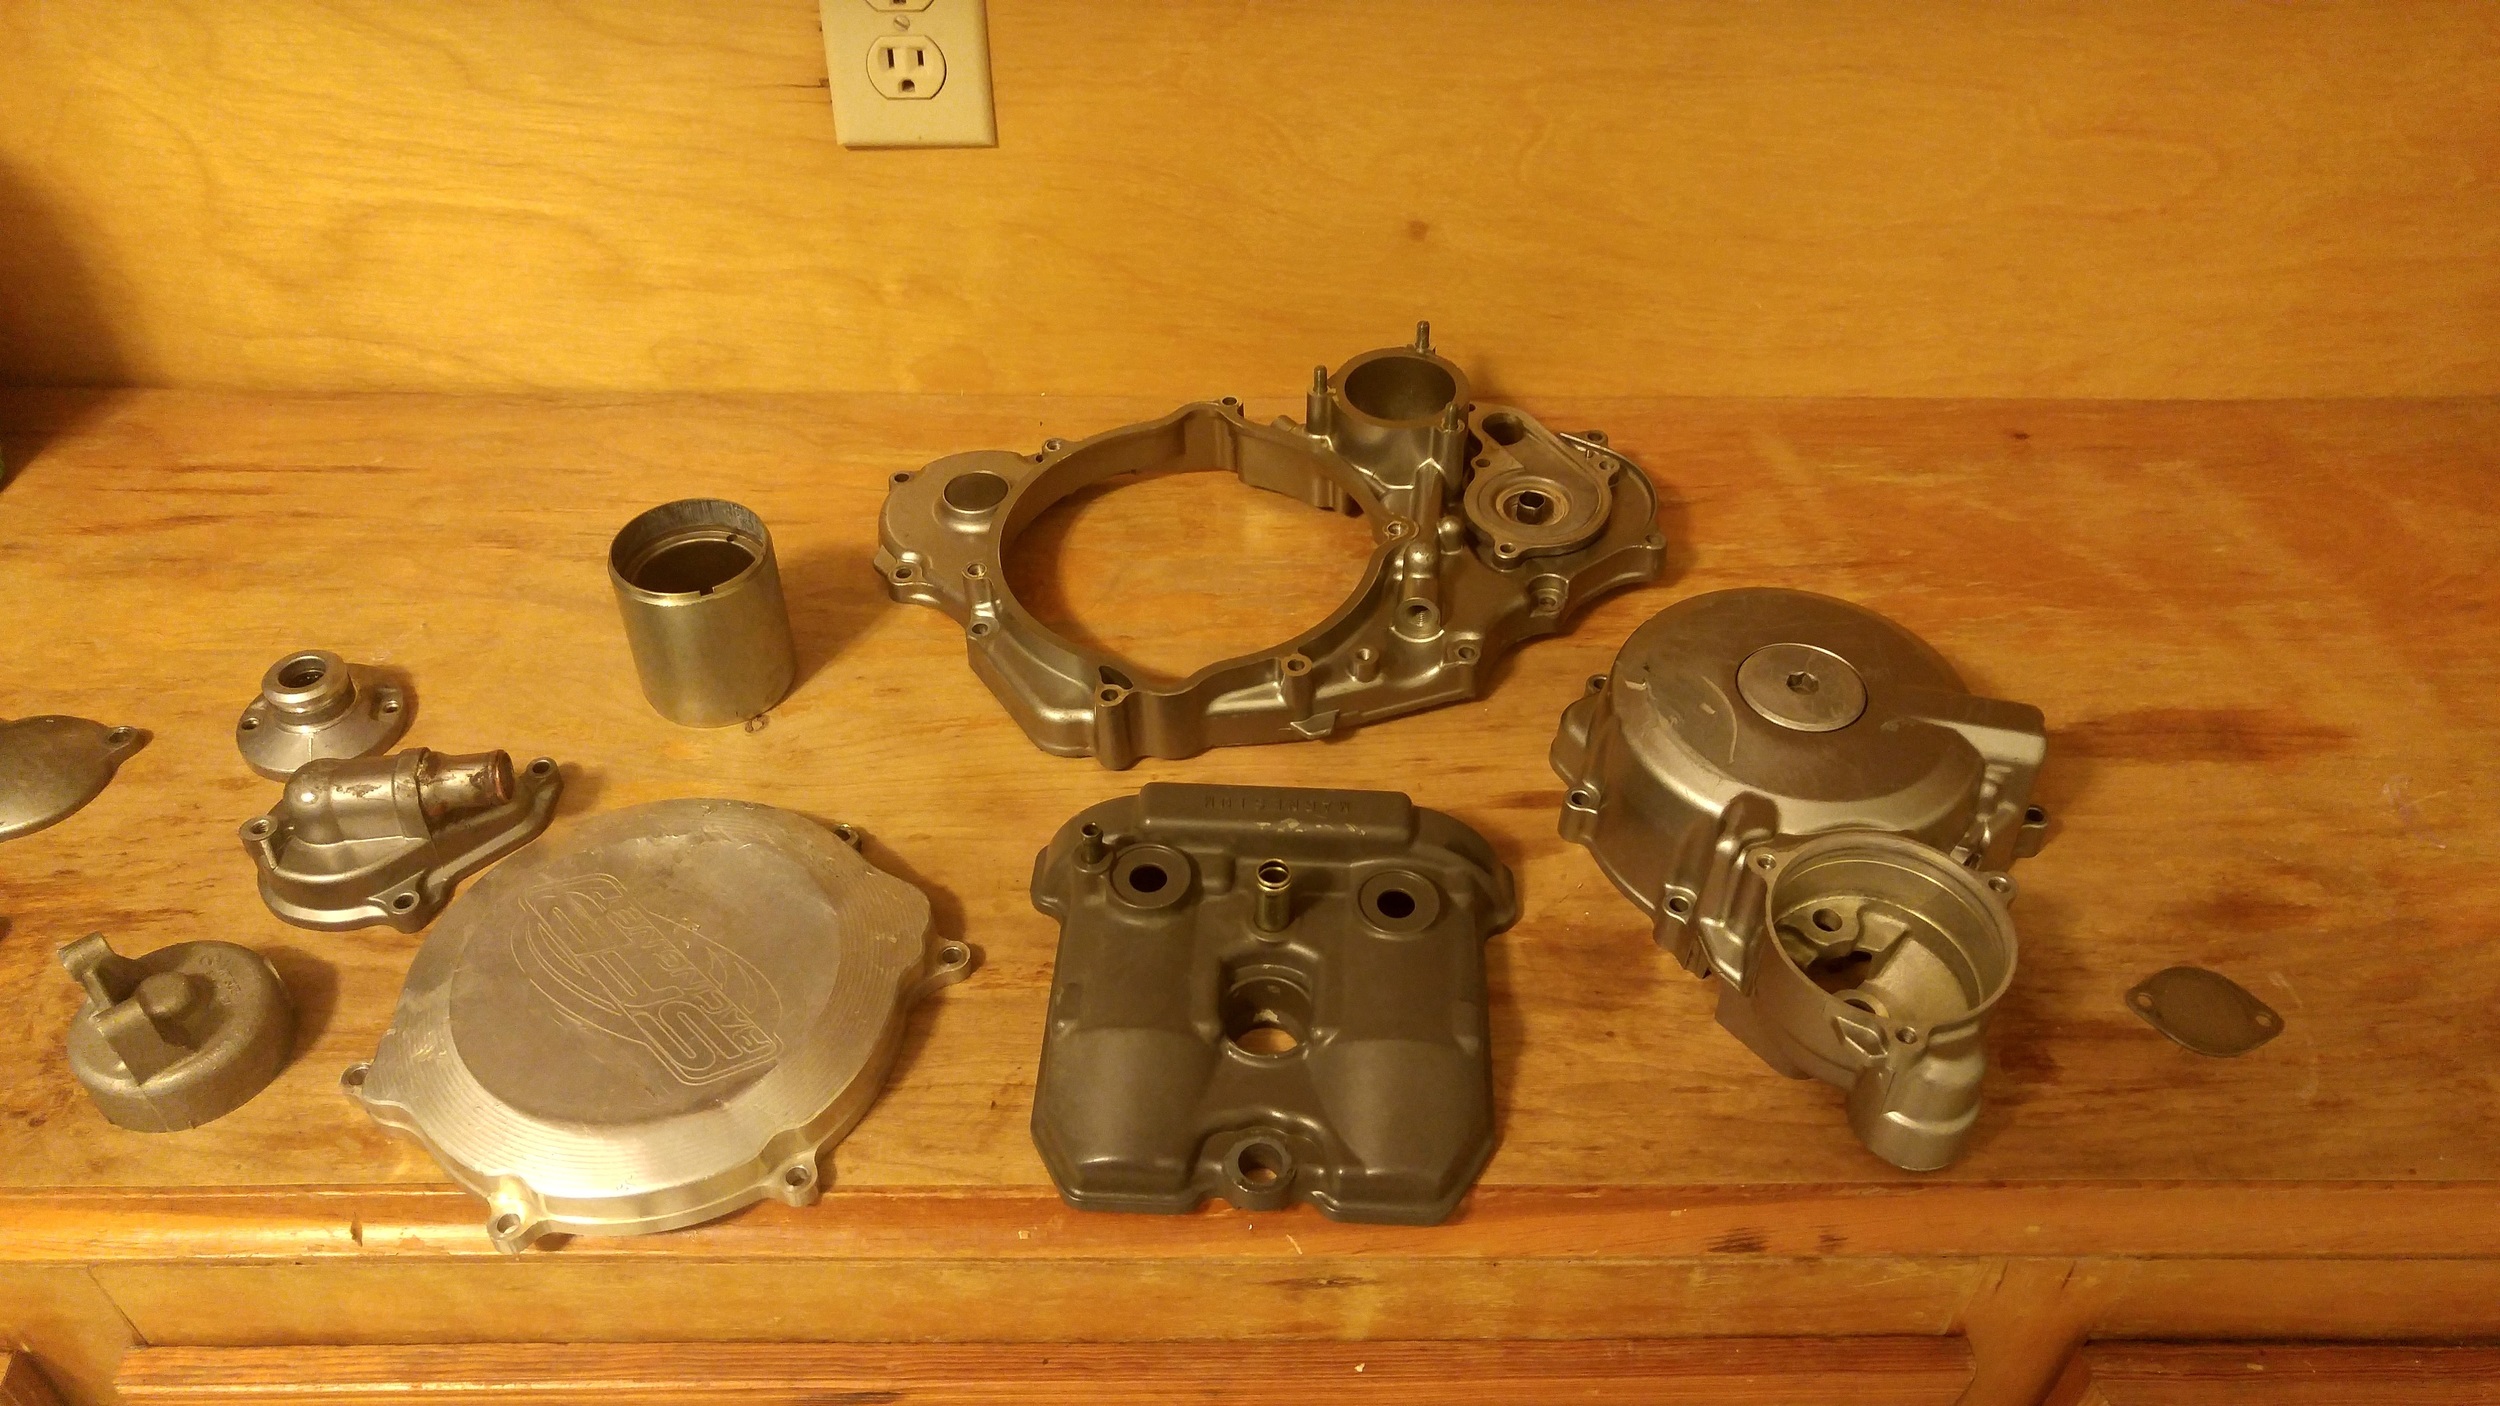
Engine bits, including starter motor parts before powder coating.
So out come two long 7mm bolts that hold the 3 pieces together.
There's the drive shaft housing- and aluminum part with an O ring on the outside diameter of it where it plugs in to the magneto case. this is the part that turns the torque limiter, idler gear, and flywheel.
There's the magnet housing. Heavy cylindrical tube. nothing going on here but some strong magnets.
And there's the starter brush housing. This is there the 12v+ cable comes in. it goes to one "brush" that contacts the motor itself.
There is another brush that grounds to the housing. It's 1000000% critical that the 12v lead be 100000% insulated from touching anything metal, otherwise it will short out when you hit the starter button resulting in sparks, heat, and blown fuses and the like.

this is the actual motor. Brushes ride on the left hand copper area. Insulated washers, metal washers, and a 10mm nut also pictured
Ok. Set that story aside for a moment.
When I bought the bike, it had no blinkers. I wanted blinkers. but i didn't want to mess with making a rats nest of a wiring harness. So i ordered a harness off ebay from a "DRZ400" for like $20.
In a bit of a miracle- it plugs in to everything important. The computer, the throttle positioning sensor, the regulator. The hand controls, however, arent compatible.
My bike that a single push button for the starter. The harness I had acquired was for a DRZ400SM - a more street oriented version.
Long story short here: instead of cutting and splicing the harness to work with my hand controls, i just bought the correct plug and play switches (nice working on a super popular modern era bike where parts are plentiful)
The tricky part- The DRZ SM had a bunch of things mine never had, and some things that i don't even want. Namely engine starting lock out features-
Neutral switch, kickstand switch, radiator fan switches.
I researched and was able to jump the kickstand switch.
after some thought, the neutral "switch" should just be an indicator
And the fan wiring is tucked out of the way.
So i hooked everything up , turned the key on, put the engine to run, and hit the starter.
I hear a "click."
This is good. very good. I let the battery charge and tidy up some stuff like the routing of the starter cable.
Upon rerouting this cable, i accidentally touch it to the 12v+ battery lead.
Sparks and noise...
If you're paying attention (and i should have known better at that moment but it took me a while to diagnose) instead of sparks, the starter should have turned over.
Further diagnostics were very bad.
The "clicking" from the starter relay stopped.
Jumping the 12v battery terminal directly to the starter lead created only sparks.
Hooking the 12v+ stater lead to a battery charger only created sparks.
Okay. 2 issues going on here.
The wiring isn't working because i'm not getting the click from the starter relay anymore
The starter is bad. or not working. something is wrong inside of it.
Reluctantly i take the starter out. Had to make a trip to get a 10mm and an 8mm end wrench because space is too tight in the middle of the motor. WIth the help of those tools, i got the starter out and took it back apart to make sure i put it back together right.
A- i didnt. part of it was assembled wrong.
B- the brush assembly looked as it did when it came apart, but i could see an area i suspected where the 12v wire was grounding directly to the inside of the case.
Lucky me, the previous owner replaced the starter at some point and had a spare. I took the spare apart to see how the washers and spacers and internal bits SHOULD look.
(The 12v power components in the starter have a series of insulated washers to keep everything far away from the grounded starter body)
The brush assembly on this other starter (the original one that he removed because he suspected it was bad) was FAR more insulated. It had a thick nylon encased insulator on the base of the bolt and a nice thick rubber washer.
The old starter....a bent aluminum washer and a worn, flat rubber washer.
So i ended up taking the internals from this other starter and putting them in to my powder coated starter cases. Before installing i hooked a ground to the starter body and a 12v battery charger clamp to the 12v+ starter lead.
it whirred to life.
Starter problem solved.
Maybe this would magically fix the wiring harness problem. Machines sometimes work that way...
Put everything back together, go to hit the button- nothing.
So at this point I KNOW it's a wiring harness deal. I plug and unplug things, check things with the volt meter, jump the kickstand switch.
nothing, nothing nothing.
In a parting bit of frustration, i hit the starter button a little harder and the engine spins over
The problem was the switch......A loose connection inside the switch.
It's a good lesson in multi-variable trouble shooting and a good reminder that sometimes it is the things you dont think can go bad- starter buttons, and previously working starters.
All part of the fun of diagnostics and troubleshooting. This means i'll have to take off the switch and fix it at some point, but right now it's working.
Things left to do-
Torque magneto bolts
Mount Trail tech
Hook up tach
Weld radiator guard
Powder coat rad. guard
Install Radiators
Fill with coolant
Remove shift shaft seal
Install shift shaft bearing (turns out i left this out on reassembly, but i think i can install it without splitting the cases)
Install new shift shaft seal
Fill with oil
Mount new tires
Bleed front and rear brakes
Mount magnetic speedo pickup
Find and hook up some blinkers
Mount plastics
Ride
Motor
Tear down of the engine will be covered here. In 3 separate posts I’ll talk about rear suspension, brakes, and frame.
I’ve learned the right tools are the difference between success and failure. Here’s are the special tools I used to break the engine down and build it up:
Amazon Product links below to the thing I ended up buying and using. So it gets my endorsement on some level. I don't get a damn thing if you buy from amazon or not. Links are just there for reference.
The goal with any tool should be to buy it as cheap as possible while being as good as possible. Amazon reviews help in discerning that ratio.
Required:
Snap ring pliers
More common, essentially hand things-
3 cents
Zip ties
Zip Lock bags
Service Manual
Work smarter not harder
Hammer drill with a ¼ adapter on it
Handful of magnets
A large chunk of cardboard or poster board
The tusk tools are REALLY good and make easy work of what seems like a hard job. The case splitter is a fantastic engine bearing remover as well (unless they are blind bearings...) Both tools come with adapters and different sized parts to work in a variety of applications. Tusk offers a bundle (both the splitter and puller) where you can save a bit.
Take a little while to work this wrench in before trusting it. The clicking mech didn't work for me at first. Given the chance, i'd go back and just buy a digital torque adapter for a bit more money.
Cheaply made. Not very heavy, thread interface isn't very precise but it does exactly what you need it to do. Fine quality for a tool i'll use once ever 5 years.
Another TUSK level quality tool. Heavy, well made. Must have. I had to crank down pretty hard to break my flywheel loose, for the record.
If you're no an idiot you won't break the fingers on the puller attachments. Heat the cases, then use the puller. 200-300 degrees is fine.
Smells great, works great. Used it in place of yamabond and other proprietary materials with never a problem. Doesn't come with an applicator tip. You'll have to pirate one. Don't store it with the tip on. Obvi.
Do NOT get the interchangeable tip snap ring pliers from harbor freight. Get the set of 4 or 5, whatever it is.
Can't believe i didnt own these sooner. Great for cleaning small bits, taking off o-rings, etc.
Use this prodigiously. As in on many bolts. Do NOT use a lot of it on one bolt. Too much is a bad thing.
Stick between the Crank/Countershaft gears to tighten down and loosen nuts.
Zip tie things together so you dont forget their order. E.G. washer, gear, washer, nut.
Stick parts in baggies (shifter mech. comes to mind)
Very useful. But no substitute for parts diagrams and internet knowledge.
How it started...
I found it the same as I did with the Yamahas- randomly searching for legendary deals.
It’s a hobby and past time. I search forums and craigslist for people offloading cheap projects. I have this mind set that anything is fixable. Maybe not so much a mind set, but theory…anything mechanical is fixable.
Yet to find that false…though some things are far more challenging than others. But the challenge is the fun.
So I was perusing Two wheeled Texans (twtex.com) and saw a thread where someone was offloading a bike (the model of which I’d never heard of) they said the crank bearing was bad, it had a title, ran, etc, etc.
A decent deal was struck. It was all there, it had a title, and most important, it was close by. So pickup was arranged and work began.
It lived a long 12 years as mostly an off-road bike. No mirrors, no blinkers, no speedo, no tach. A key switch and a petcock. My vision for it is a bare minimum dual sport, with the primary sport being dirt. The secondary barley qualifying sport- on road travel.
Not even an hour after loading it in to the truck the knobby tires hit the grass and I fired it up and drove it maybe1/10th of a mile. It rode well, but it did have a hearty knock. A sound that is akin to the sound of a bad rod bearing in a car (motorcycle rod bearings are different in construction) so I took that to be the diagnosis.
And there on the front lawn I started taking the machine apart. The engine was ripped out and taken to Houston. The frame and other parts left in Central Texas.