Boring
After getting word from Harold that the cylinder would need to be bored .50mm over (or the 2nd over) I started sourcing a piston and a ring/rings.
Yamaha switched to a reed valve induction system in 72 which made more power and was more efficient presumably (they've been using reeds ever since). Pistons for those engines are easy to find…like order-them-in-a-catalog easy.
DT1 pistons…not hard to find, but they’re the order-them--on-ebay kind of not hard.
Found a decent deal after little to no searching; a DT1MX Piston. When I bought it, I knew there is a different piston ring configuration than the DT1E (what I have)
I learned after getting the piston and looking at it that the skirt is also much shorter (this will affect port timing) and that the piston is a good few ounces heavier than the old DT1 piston.
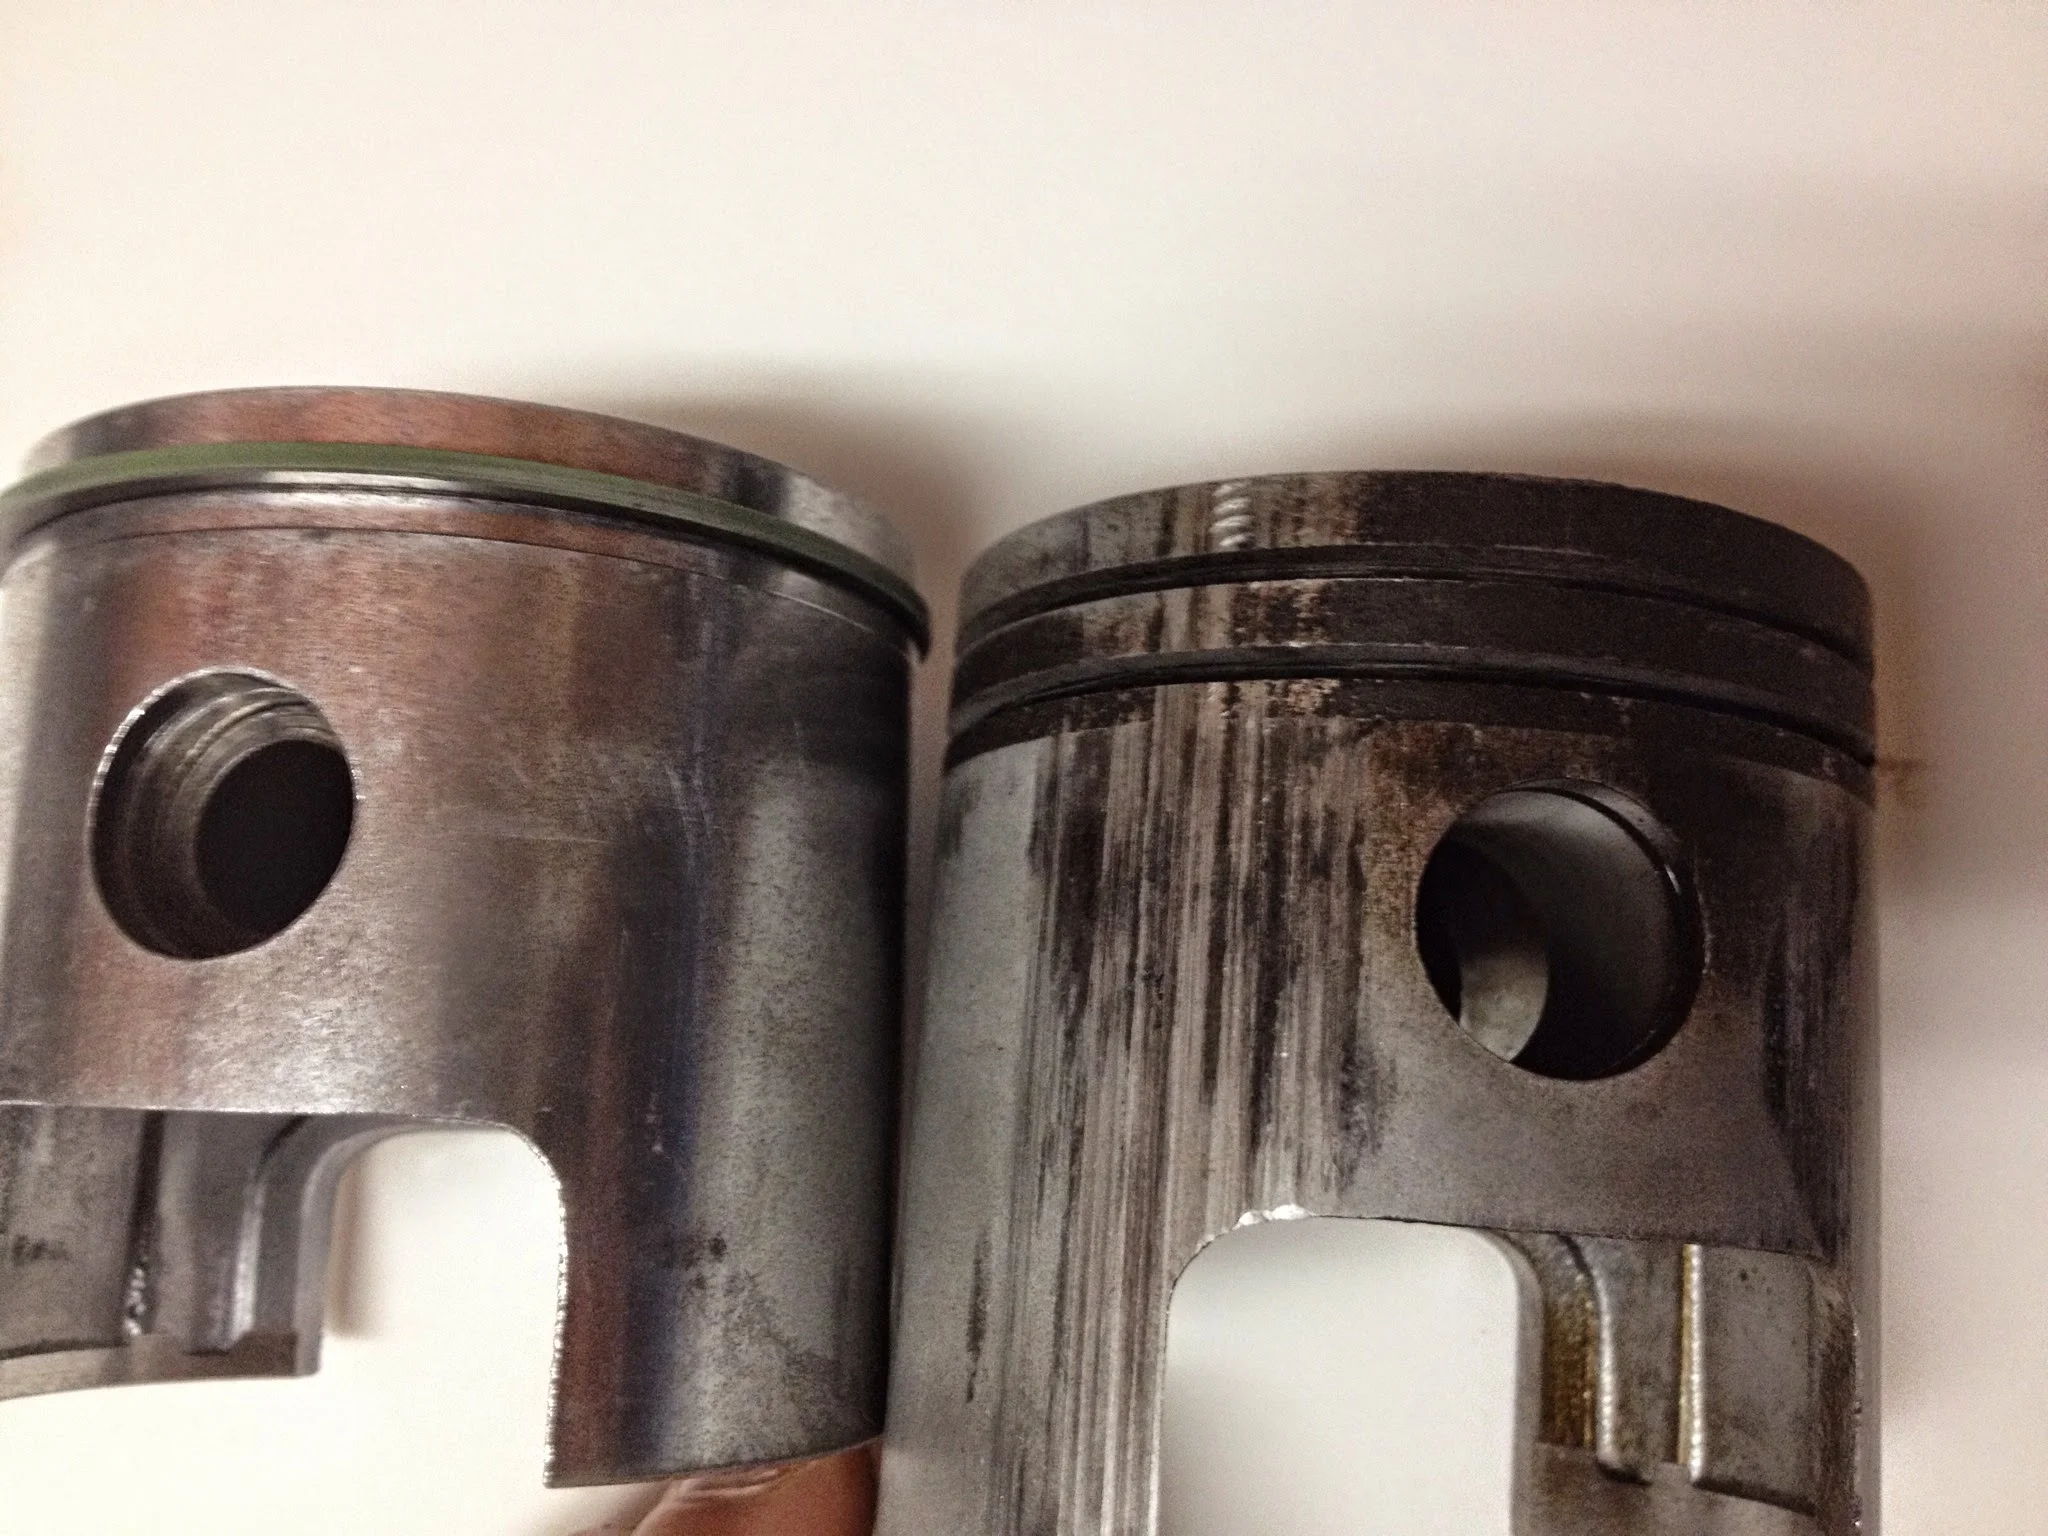
Though thinking on it now, the old piston was gouged, had another ring grove, and lived a hard life in its latter years. It’ll find its way to a book shelf or a desk to lead a less stressful life…
There’s something really reassuring about going to a place of business that’s named after a man and actually talking to that man. This was the case at Harold’s Machine Shop. It was a 2 man operation in Richmond, Tx as best I could tell. I think is comrade was named Donnie. I gave him the piston and ring so he could do the finish work and I picked up the cylinder the next day.
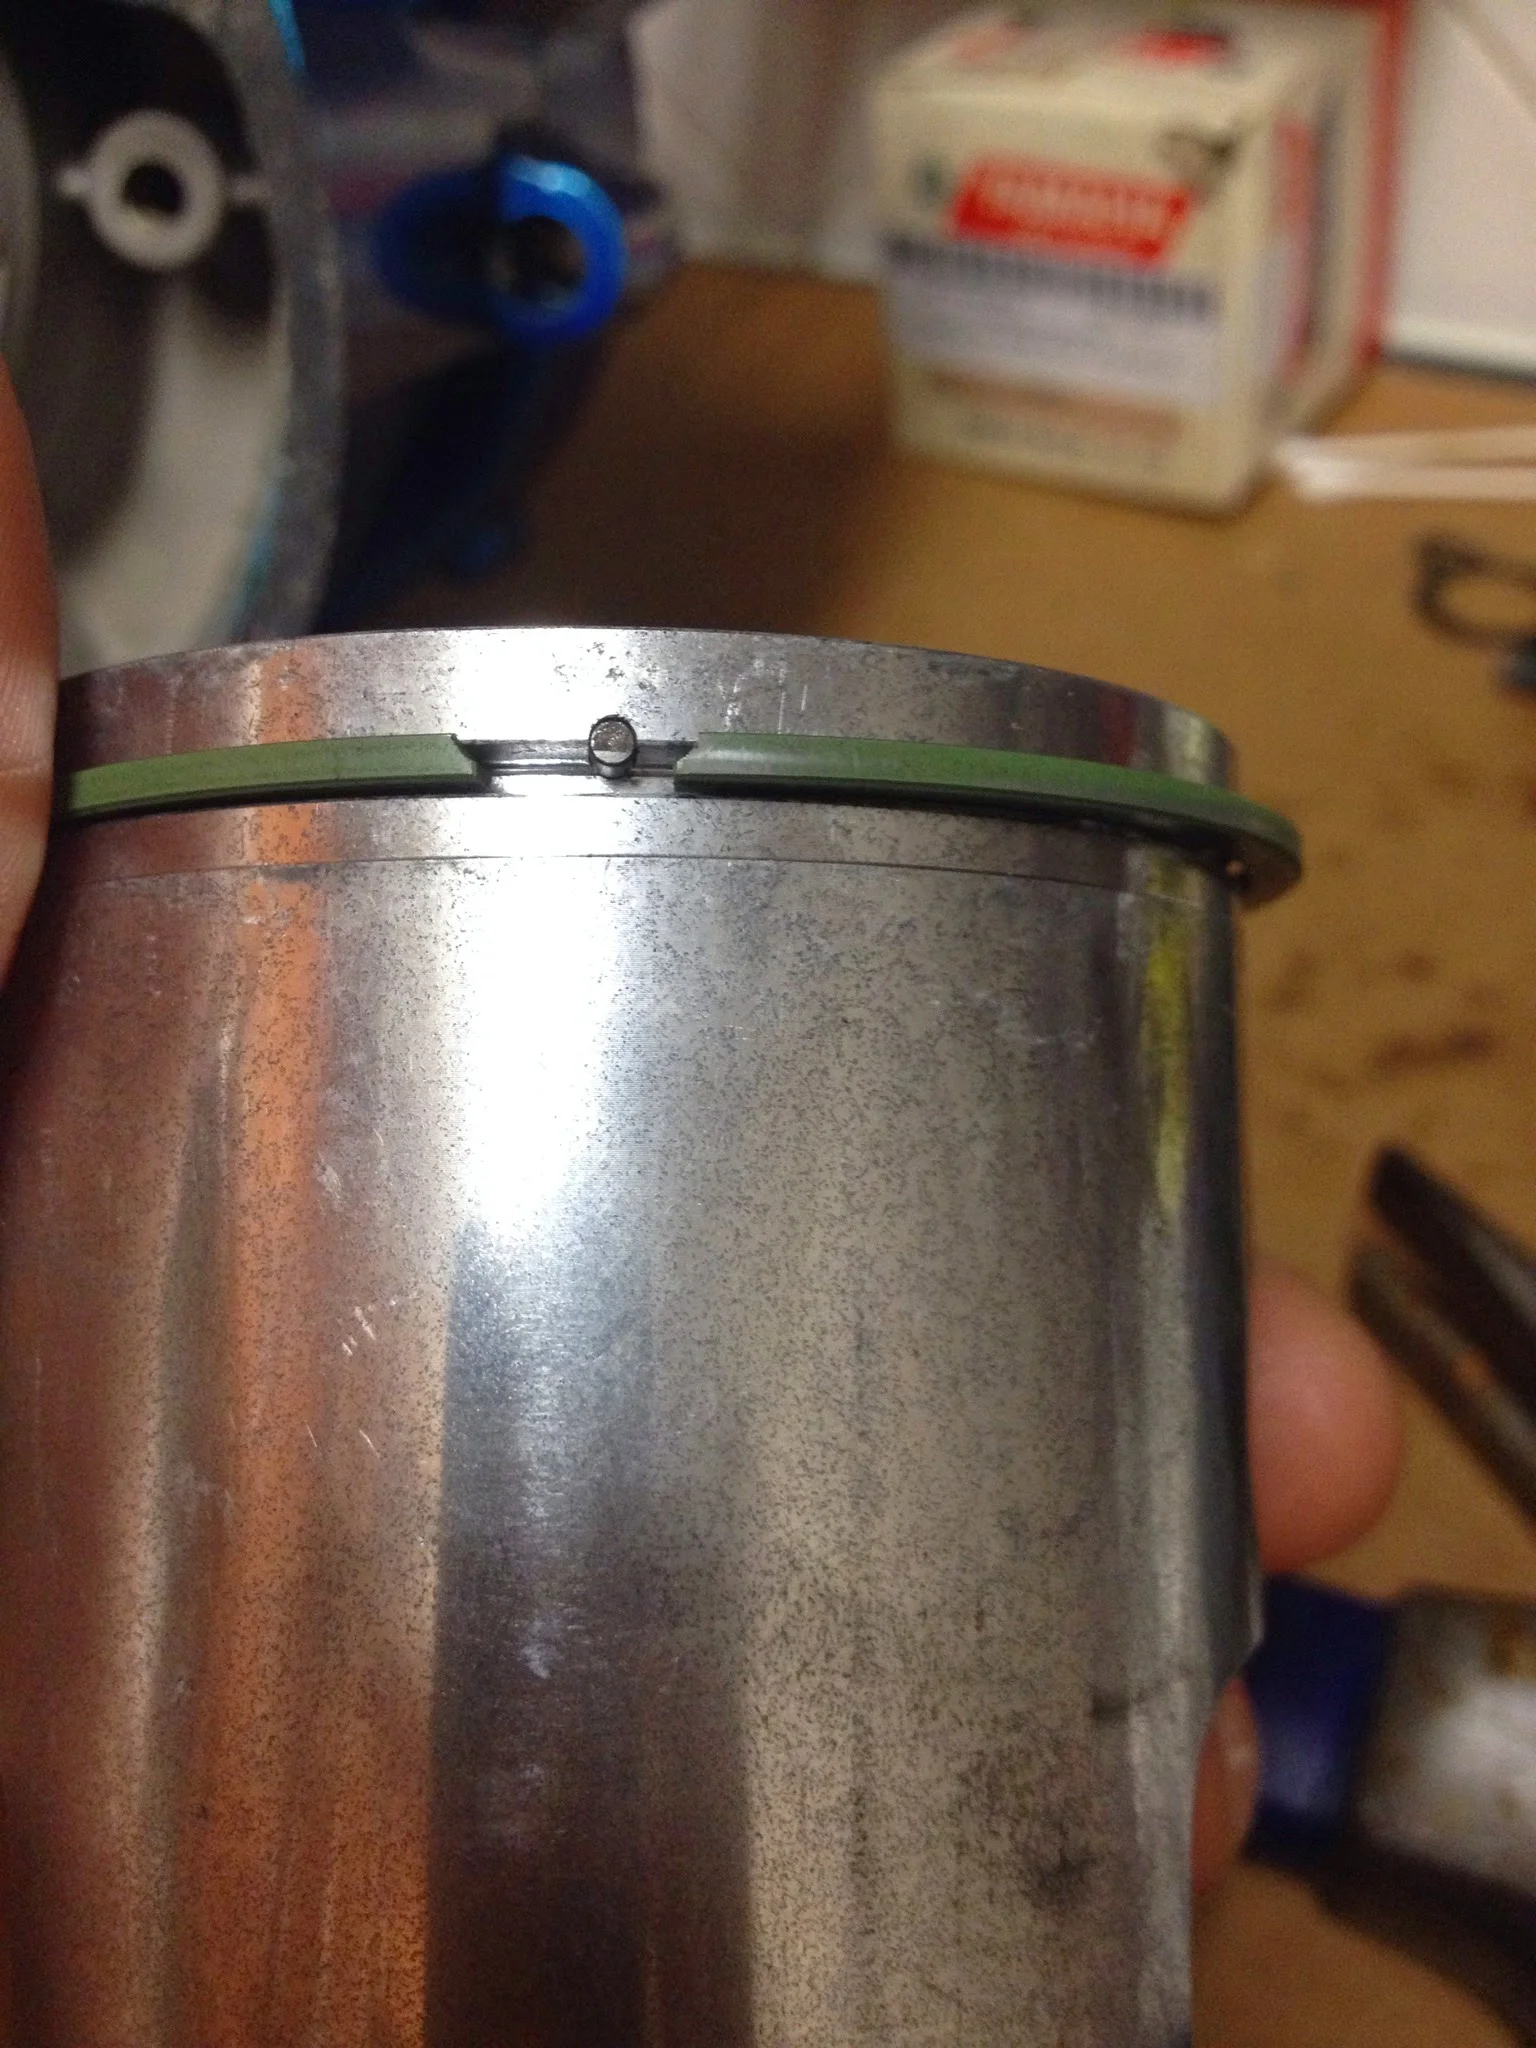
Steel liner needs to be filed to smooth the transition between ports/cylinder wall.
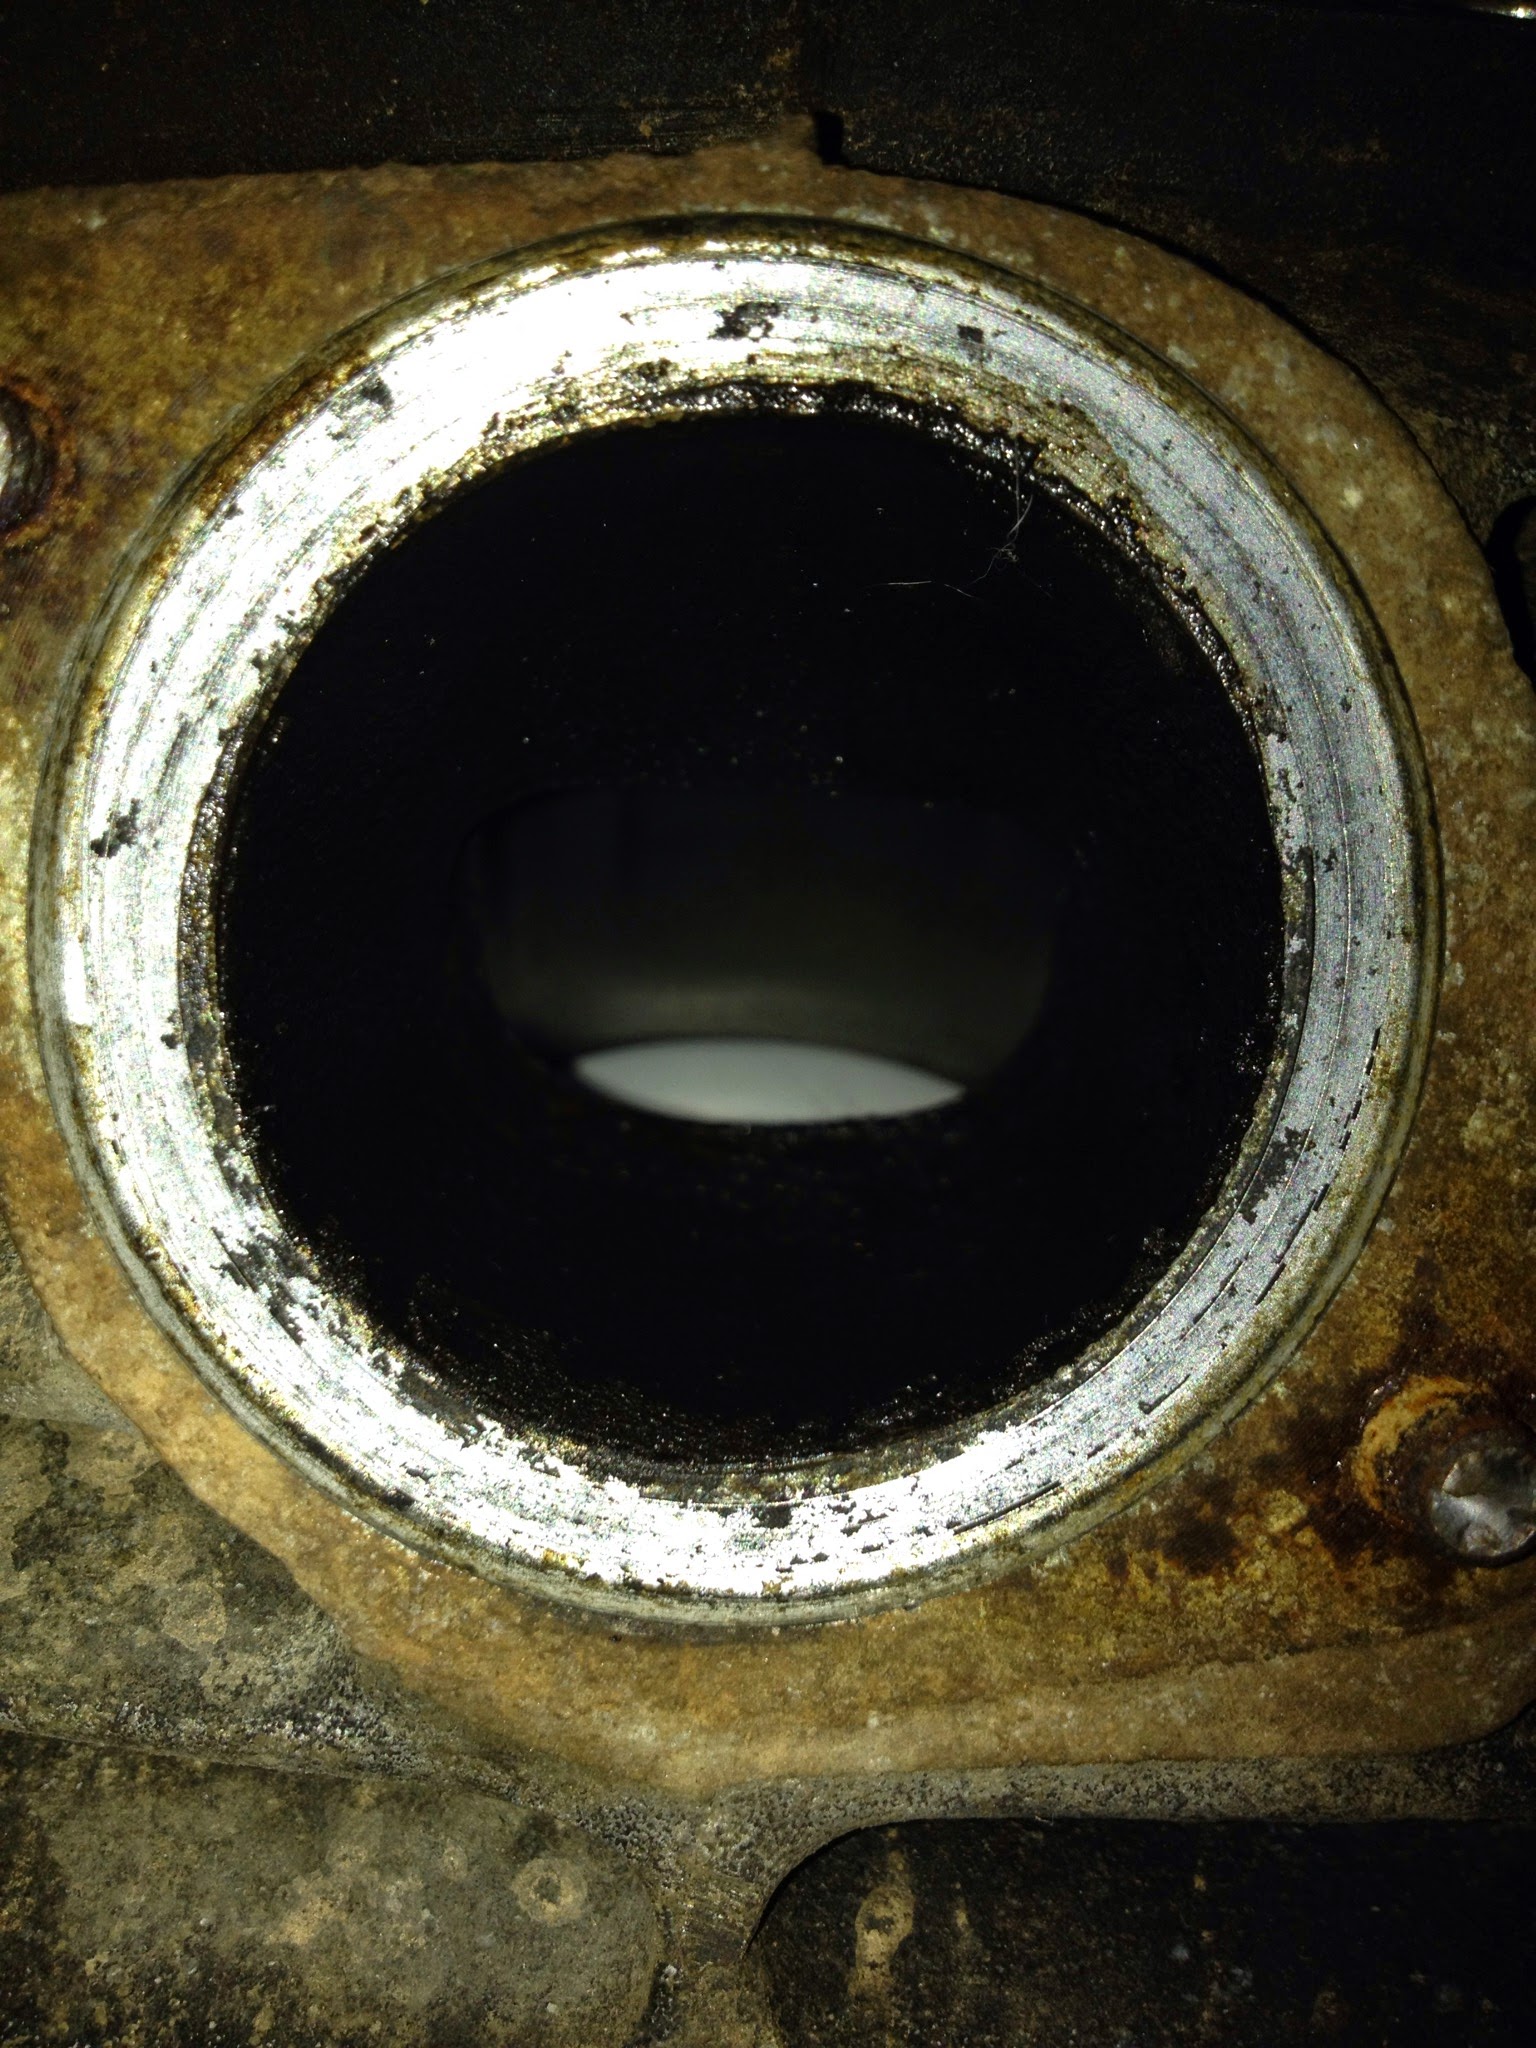
I’m a little sad that it didn’t come back hot tanked or cleaned, but for $64 I have no room for complaint.
I was unable to find what the proper ring gap should be. I feel like the gap might be large, but can’t say for certain without the data. We’ll see how it runs…
Somewhere in the time before, after, or while the cylinder was in the shop, I slowly collected my pieces from USPS. A tachometer drive gear, a shift shaft washer, a tiny oil pressure spring and a 5/64ths diameter ball bearing. A rubber “oil pipe holder” and a grommet for stator wires.
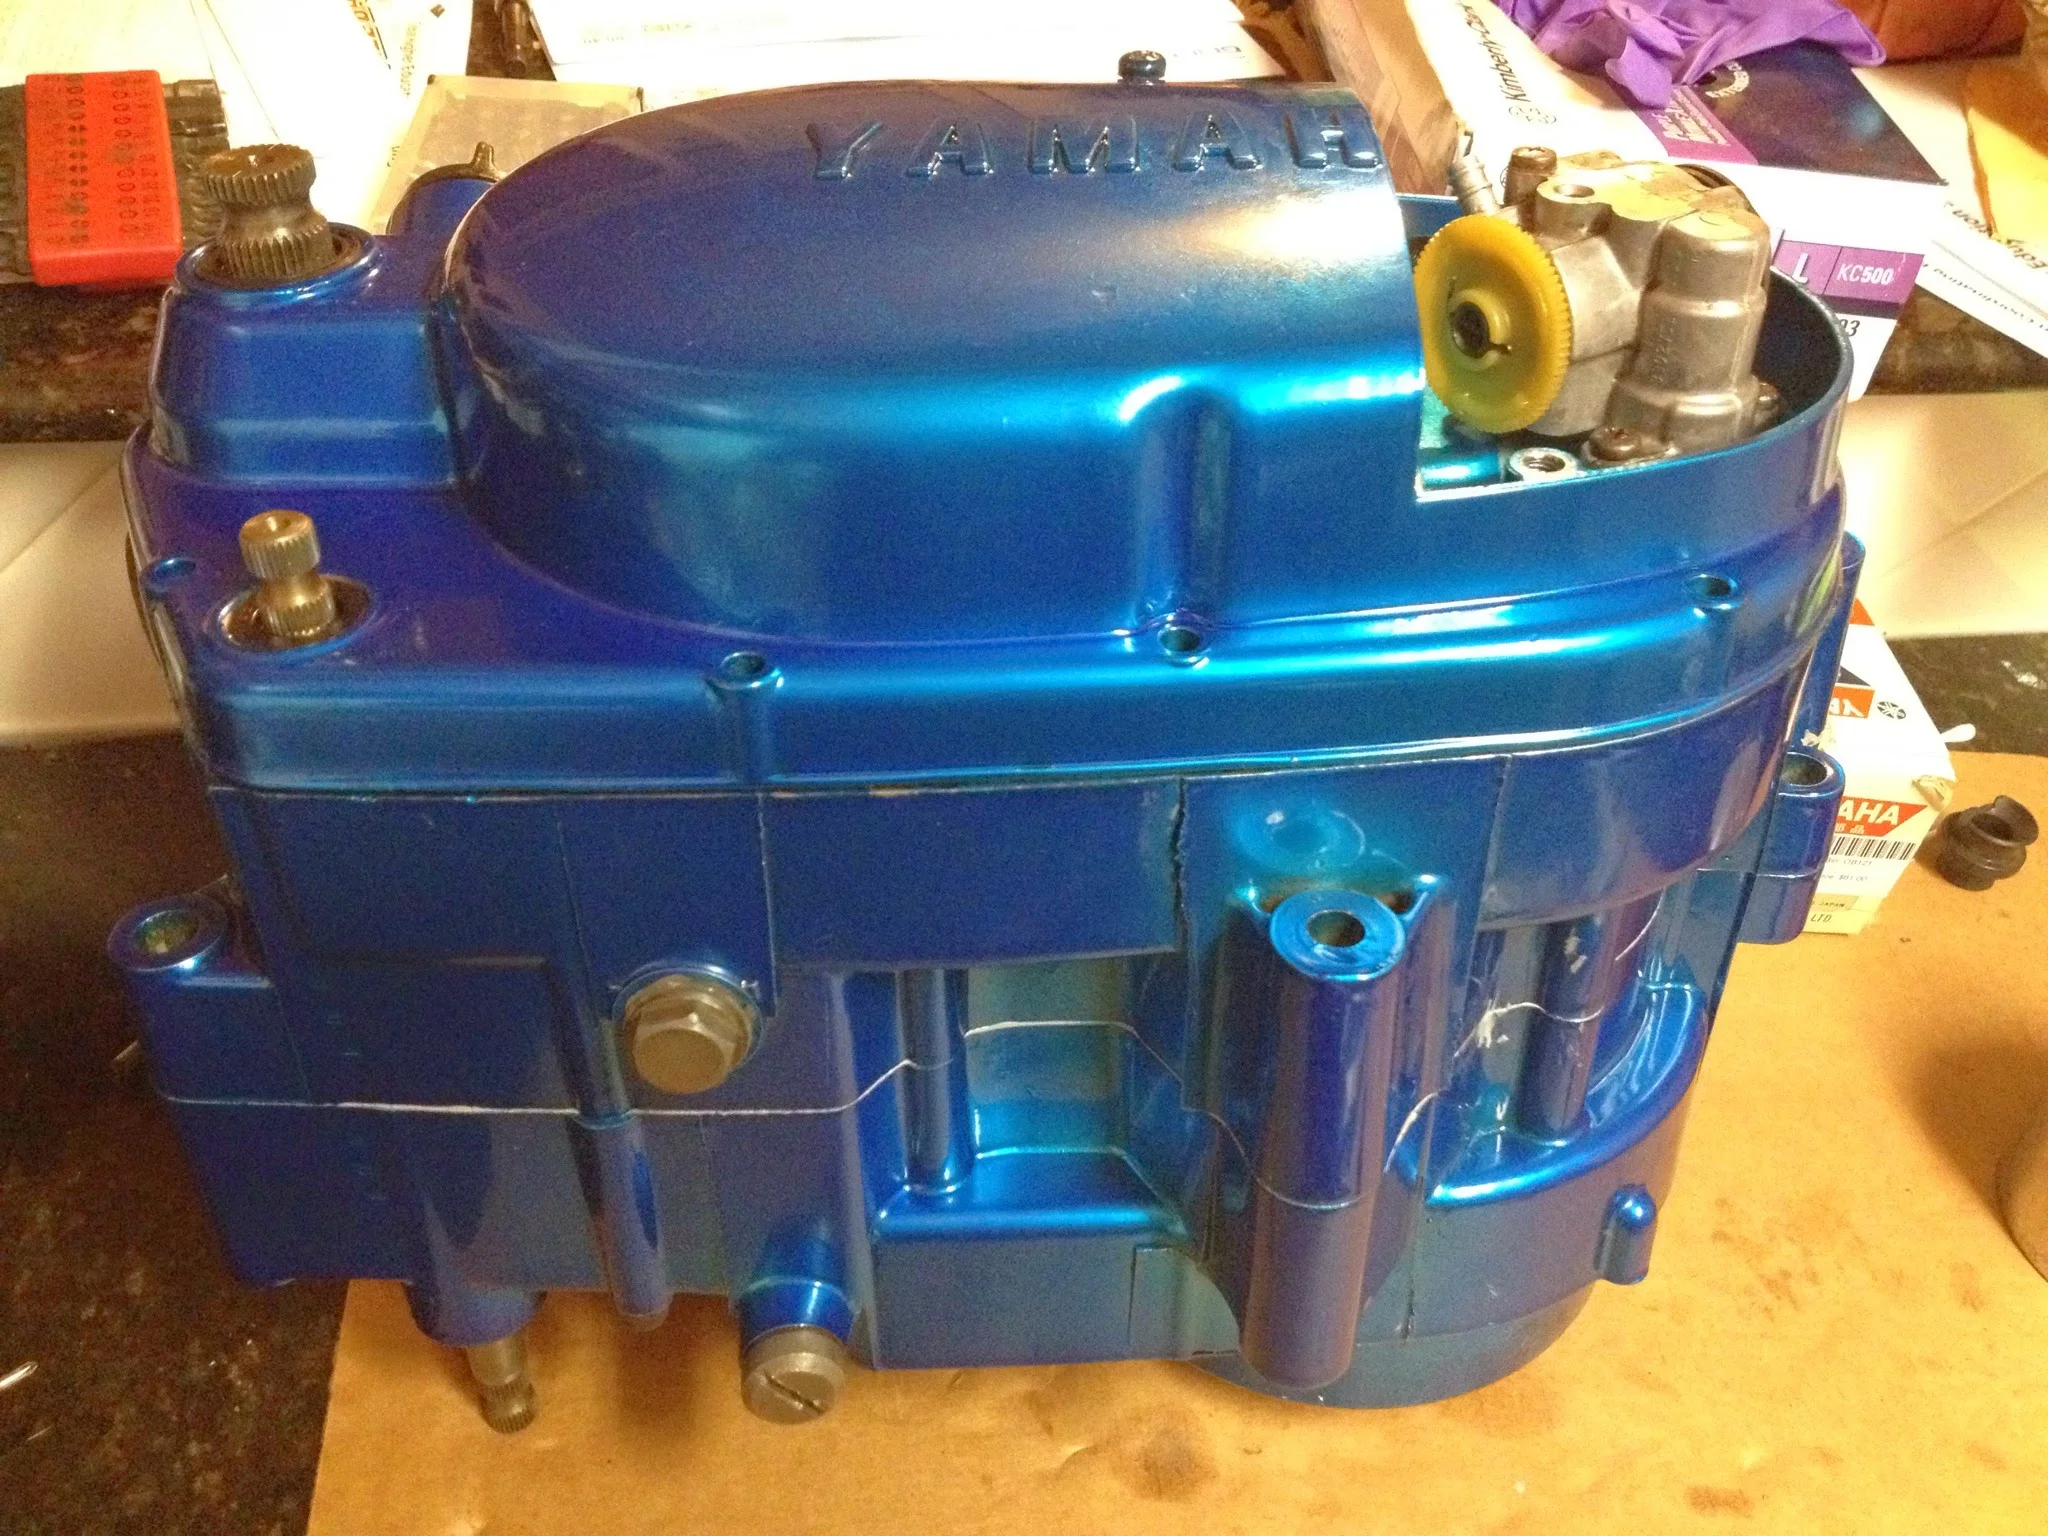
I’m happy to say that it was a day ago when I put the clutch side engine cover on with black oxide allen screws and plan to never open it again. (But I’m a realist. I know it’ll be open again…)
Gear on bottom left is Kickstarter. Didn't look right. Should have known...
How we fix torn gaskets.
The gasket kits for these engines, or maybe just the ones I’ve gotten (because this happened with the DT2) are some odd sort of deformed. Not enough to matter from a functional standpoint, but just enough to put weird stress on the gasket at certain bends.
I put the kickstarter shaft in (thinking that it was all too easy) and buttoned the whole case up. After kicking it a few times, I noticed the kick starter shaft was installed wrong. Goody. So off the side over comes, I re-set the kick starter shaft (not rocket science, but a return spring has to catch on a certain knob) and upon trying to put the cover back on…tore the gasket. I’m thinking it’s nothing Motoseal can’t fix.
I was going to just stick the autolube system on (oil pump) and let it ride….but it kept me awake at night not knowing if it was full of sludge or solidified castor oil or what. So I took it apart….
Last time I took one apart (DT2) I ruined it.
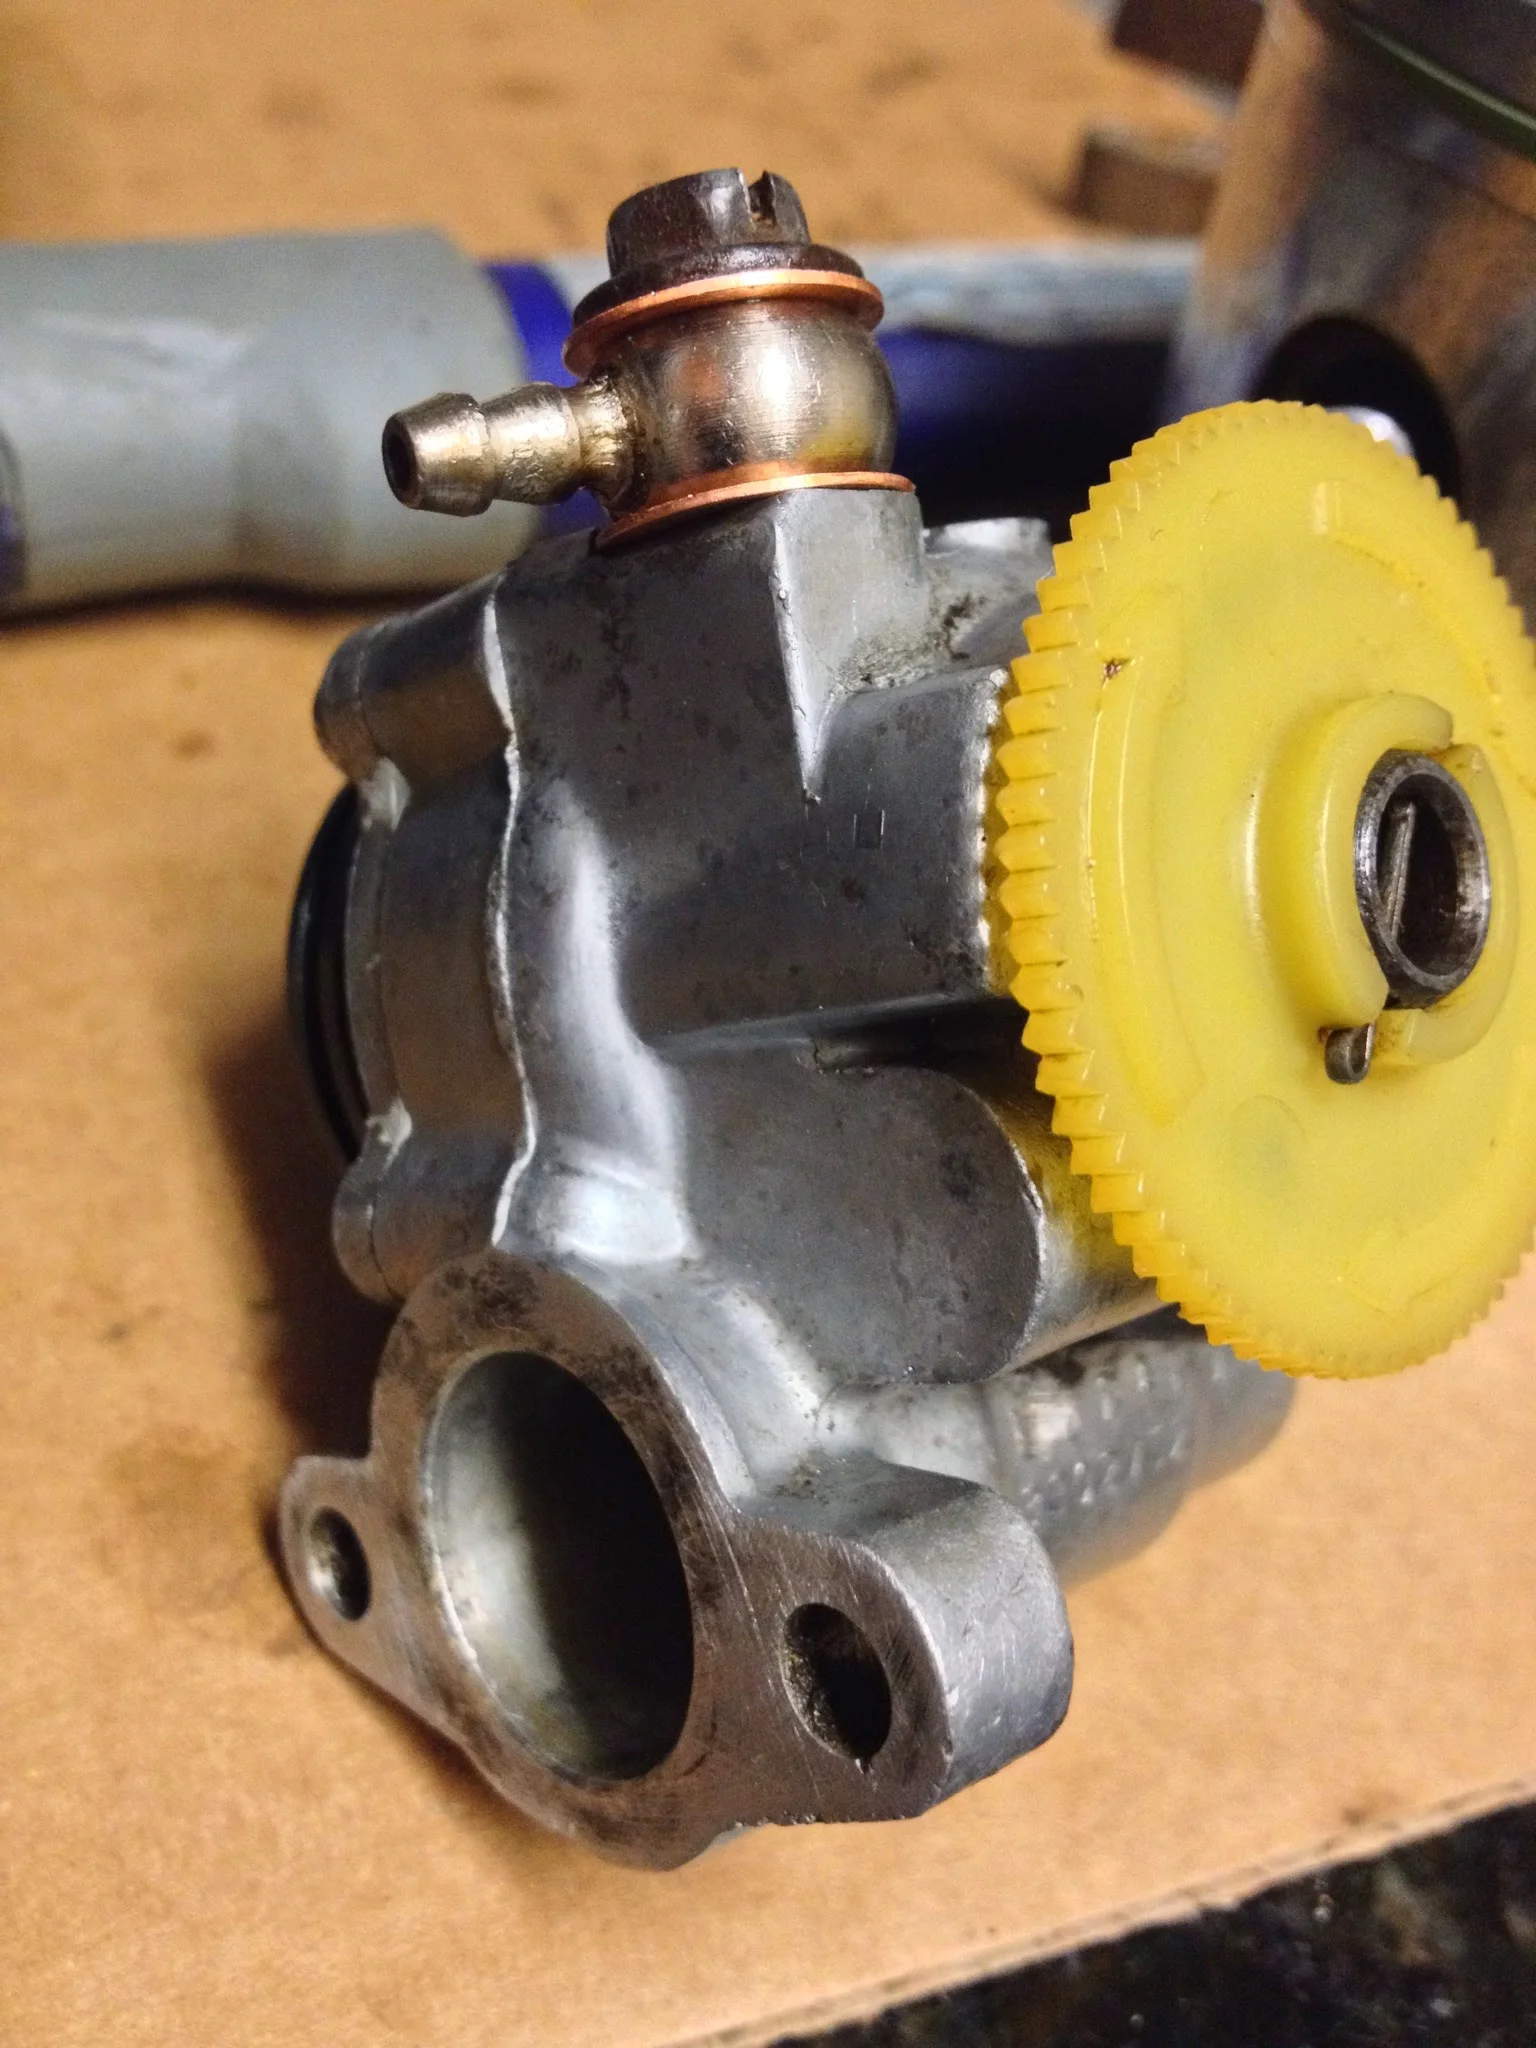
2 Stroke oil pump. No need to premix as long as you have faith...
These bikes (all bike, really) have road maps..exploded part diagrams for every little system showing what part goes where, what part number it is and how it interacts with other things around it. It’s like a mechanical, 3d paint-by-number.

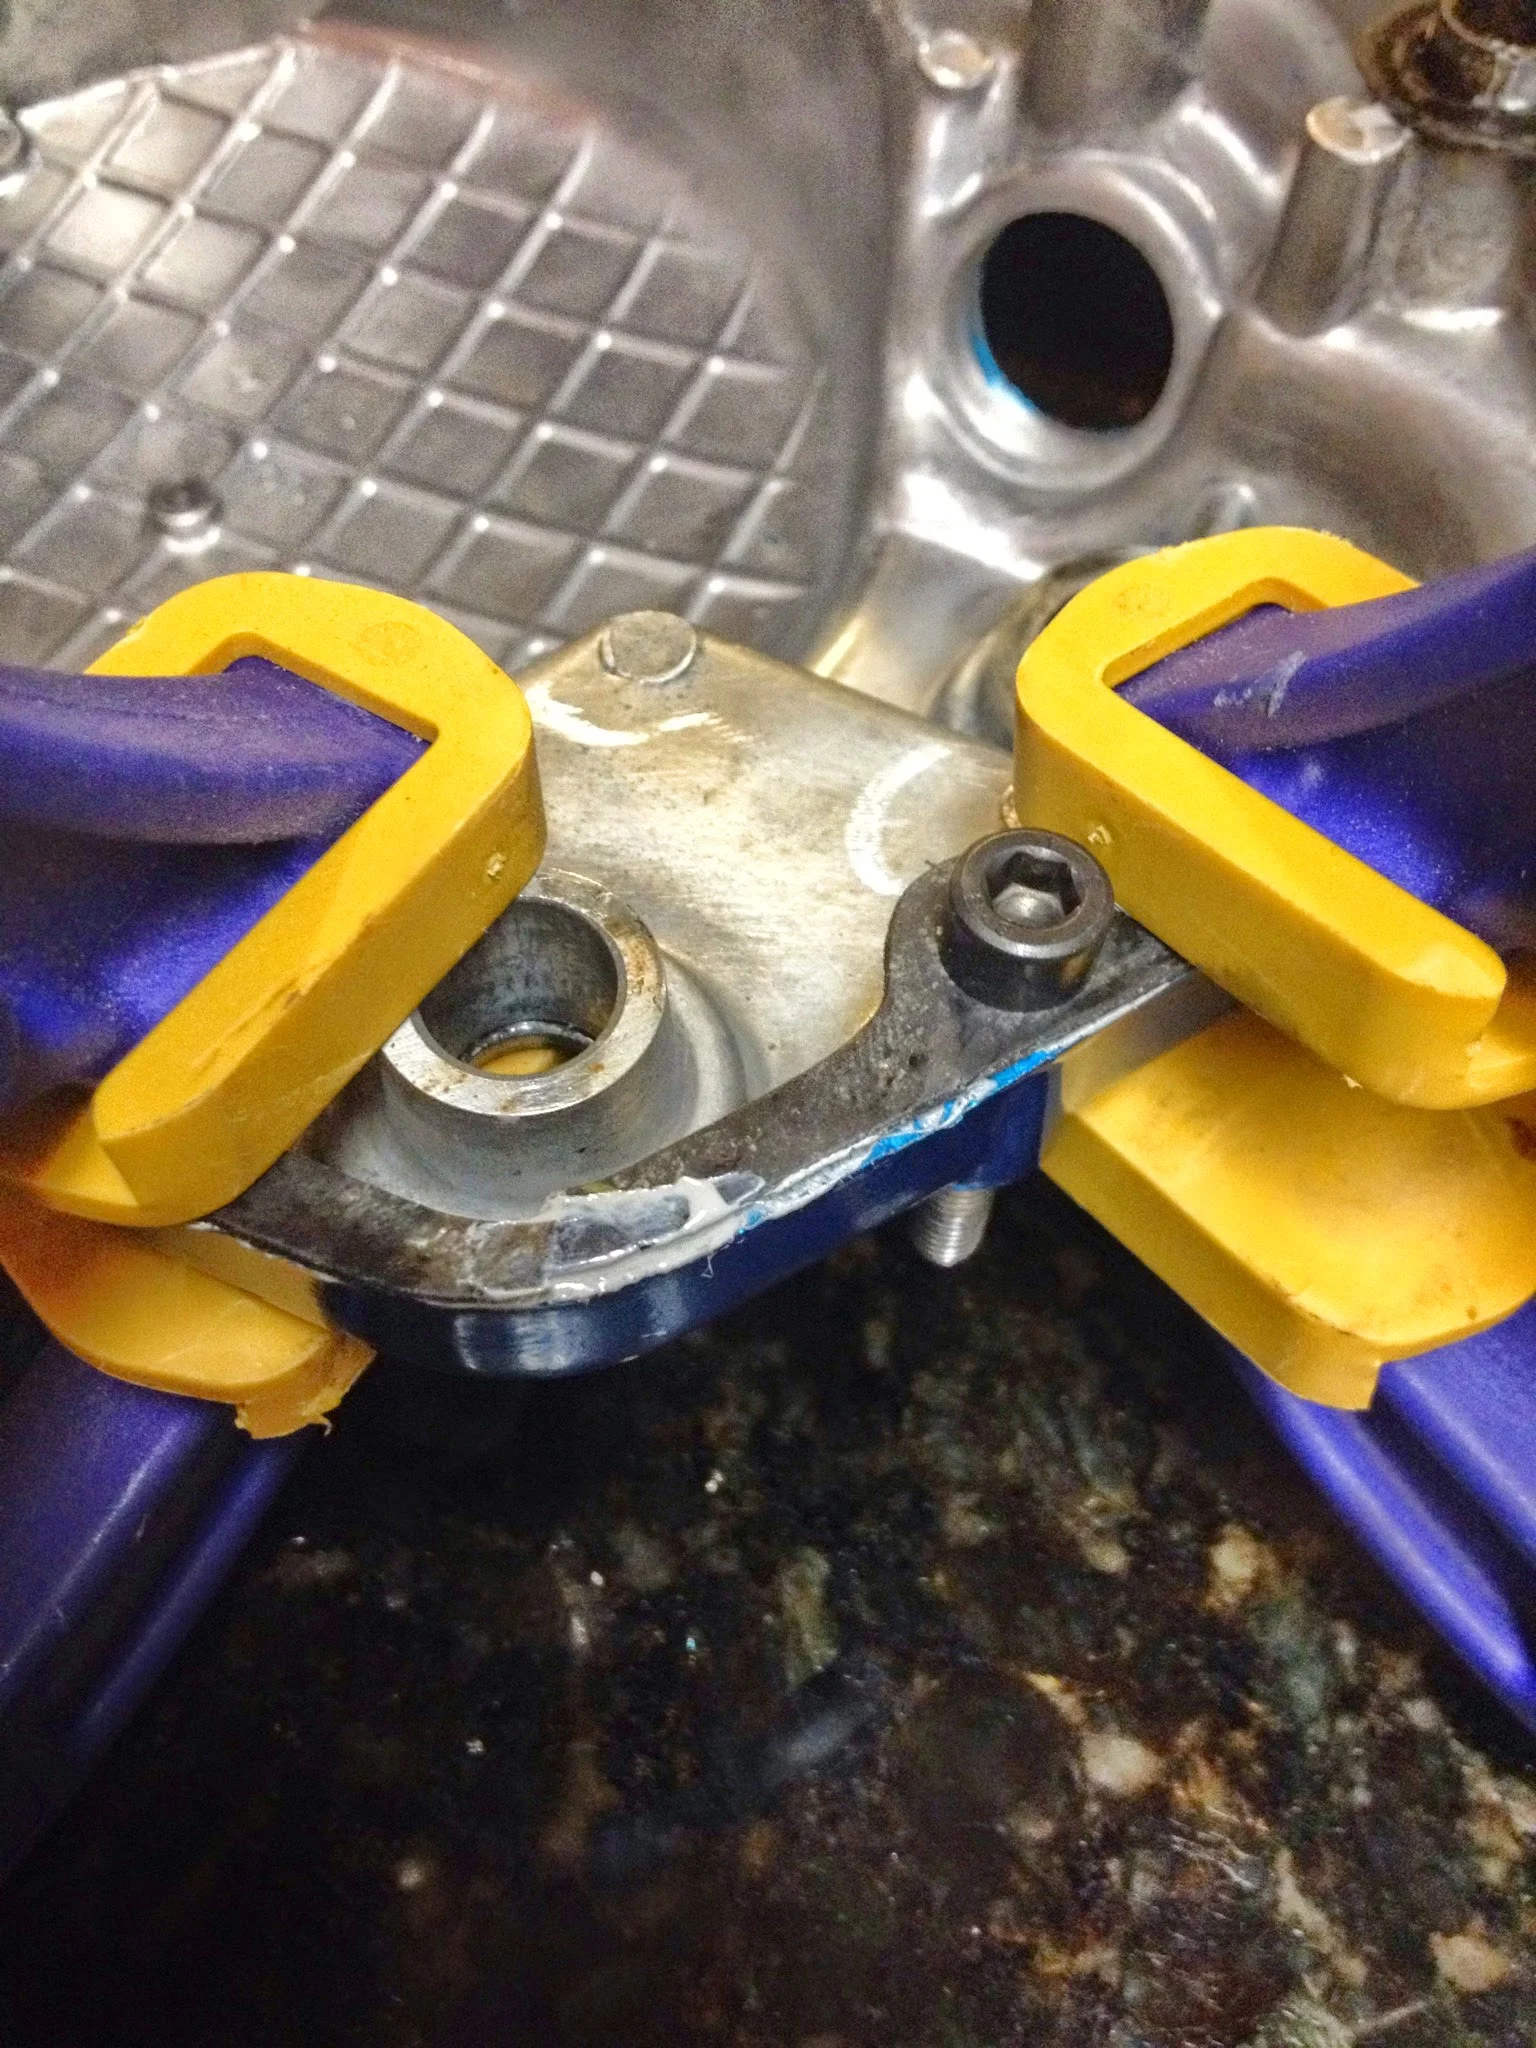
Part 23 does not exist on earth. Also note #12- a screw. Behind those 4 screws is the insanity.
The oil pump is an exception. There’s no diagram showing what’s in the pump. It’s some gears, microscopic (honestly, damn near…) springs, some seals, and a crazy array of different sized washers of different thickness that are of critical importance.
I ended up being glad I took it apart because there was some crap in there…but it was a very painstaking time. SO much so that I took 0 pictures. As a plus, though…I lost the little spring and the directional gear that ratchets on them. BUT I found the springs. And managed to get the gear back on. Doesn’t sound hard…but it was an amazing feat. I’d read from a few people “If the gear comes off (off the spring loaded pins) throw the pump away and find another one.”
Feel pretty good it’ll pump oil…I modified the lower banjo bolt since they don’t make and it’s impossible to find a spring that goes in it. Drilled the hollow bolt out a tiny bit and was able to get a later model spring (from a 76 DT250 oil pump) to fit. No idea if it’ll operate correctly so careful testing will be done before firing.
Next steps- Black letter the “YAMAHA” on both sides
Port and polish the cylinder, polish the head. (tools are in the mail. Doing it by hand got old fast.)
Powder coat the cylinder and head
Bolt it together.
The end? Don’t know what to do after that…
Sealing it up.
I do feel pretty good about this engine though. As far as tolerances, parts, function, and the fact that literally no stone (or bearing) has gone unturned.
And in the end, it’ll amount to a loss of money because no one will buy it, I don’t have anywhere to ride it, the “bill of sale” is some scribbles in red ink from a 14 year old, and I don’t really know what to do with it…
But it sure is a lot of fun building it.
Should probably take up fly fishing instead.
Portal 2
Some weeks ago I started porting the cylinder on the DT1. The last time I ported a motorcycle cylinder (head) I was maybe 16 and the bike was a Honda Z50. (it was an overhead cam engine, so the intake and exhaust ports were on the actual cylinder head. On two strokes, the ports are built in to the cylinder itself. The 2 stroke cylinder head is nothing more than an aluminum chunk with a combustion chamber, nothing else) I also had plans to supercharge that bike with a Coleman battery powered air pump and PVC pipe adapters.
Porting is the enlarging, smoothing, and streamlining of intake and exhaust ports. Sometimes it’s called porting and polishing (polishing is what it sounds like) the idea is that smoother, hand shaped ports allow air flow to move in greater volumes with less restrictions. The result- more power. Or, if you’re from East Texas, more “pahhrR.”
I’ve learned most of everything mechanical through reading, studying, looking at pictures and most of all by actually doing it and messing up. But my philosophy on life has changed, and that’s transferred over in my approach to this porting project. My philosophy now is take baby steps forward instead of a huge leap. And as much as possible…don’t overdo things.
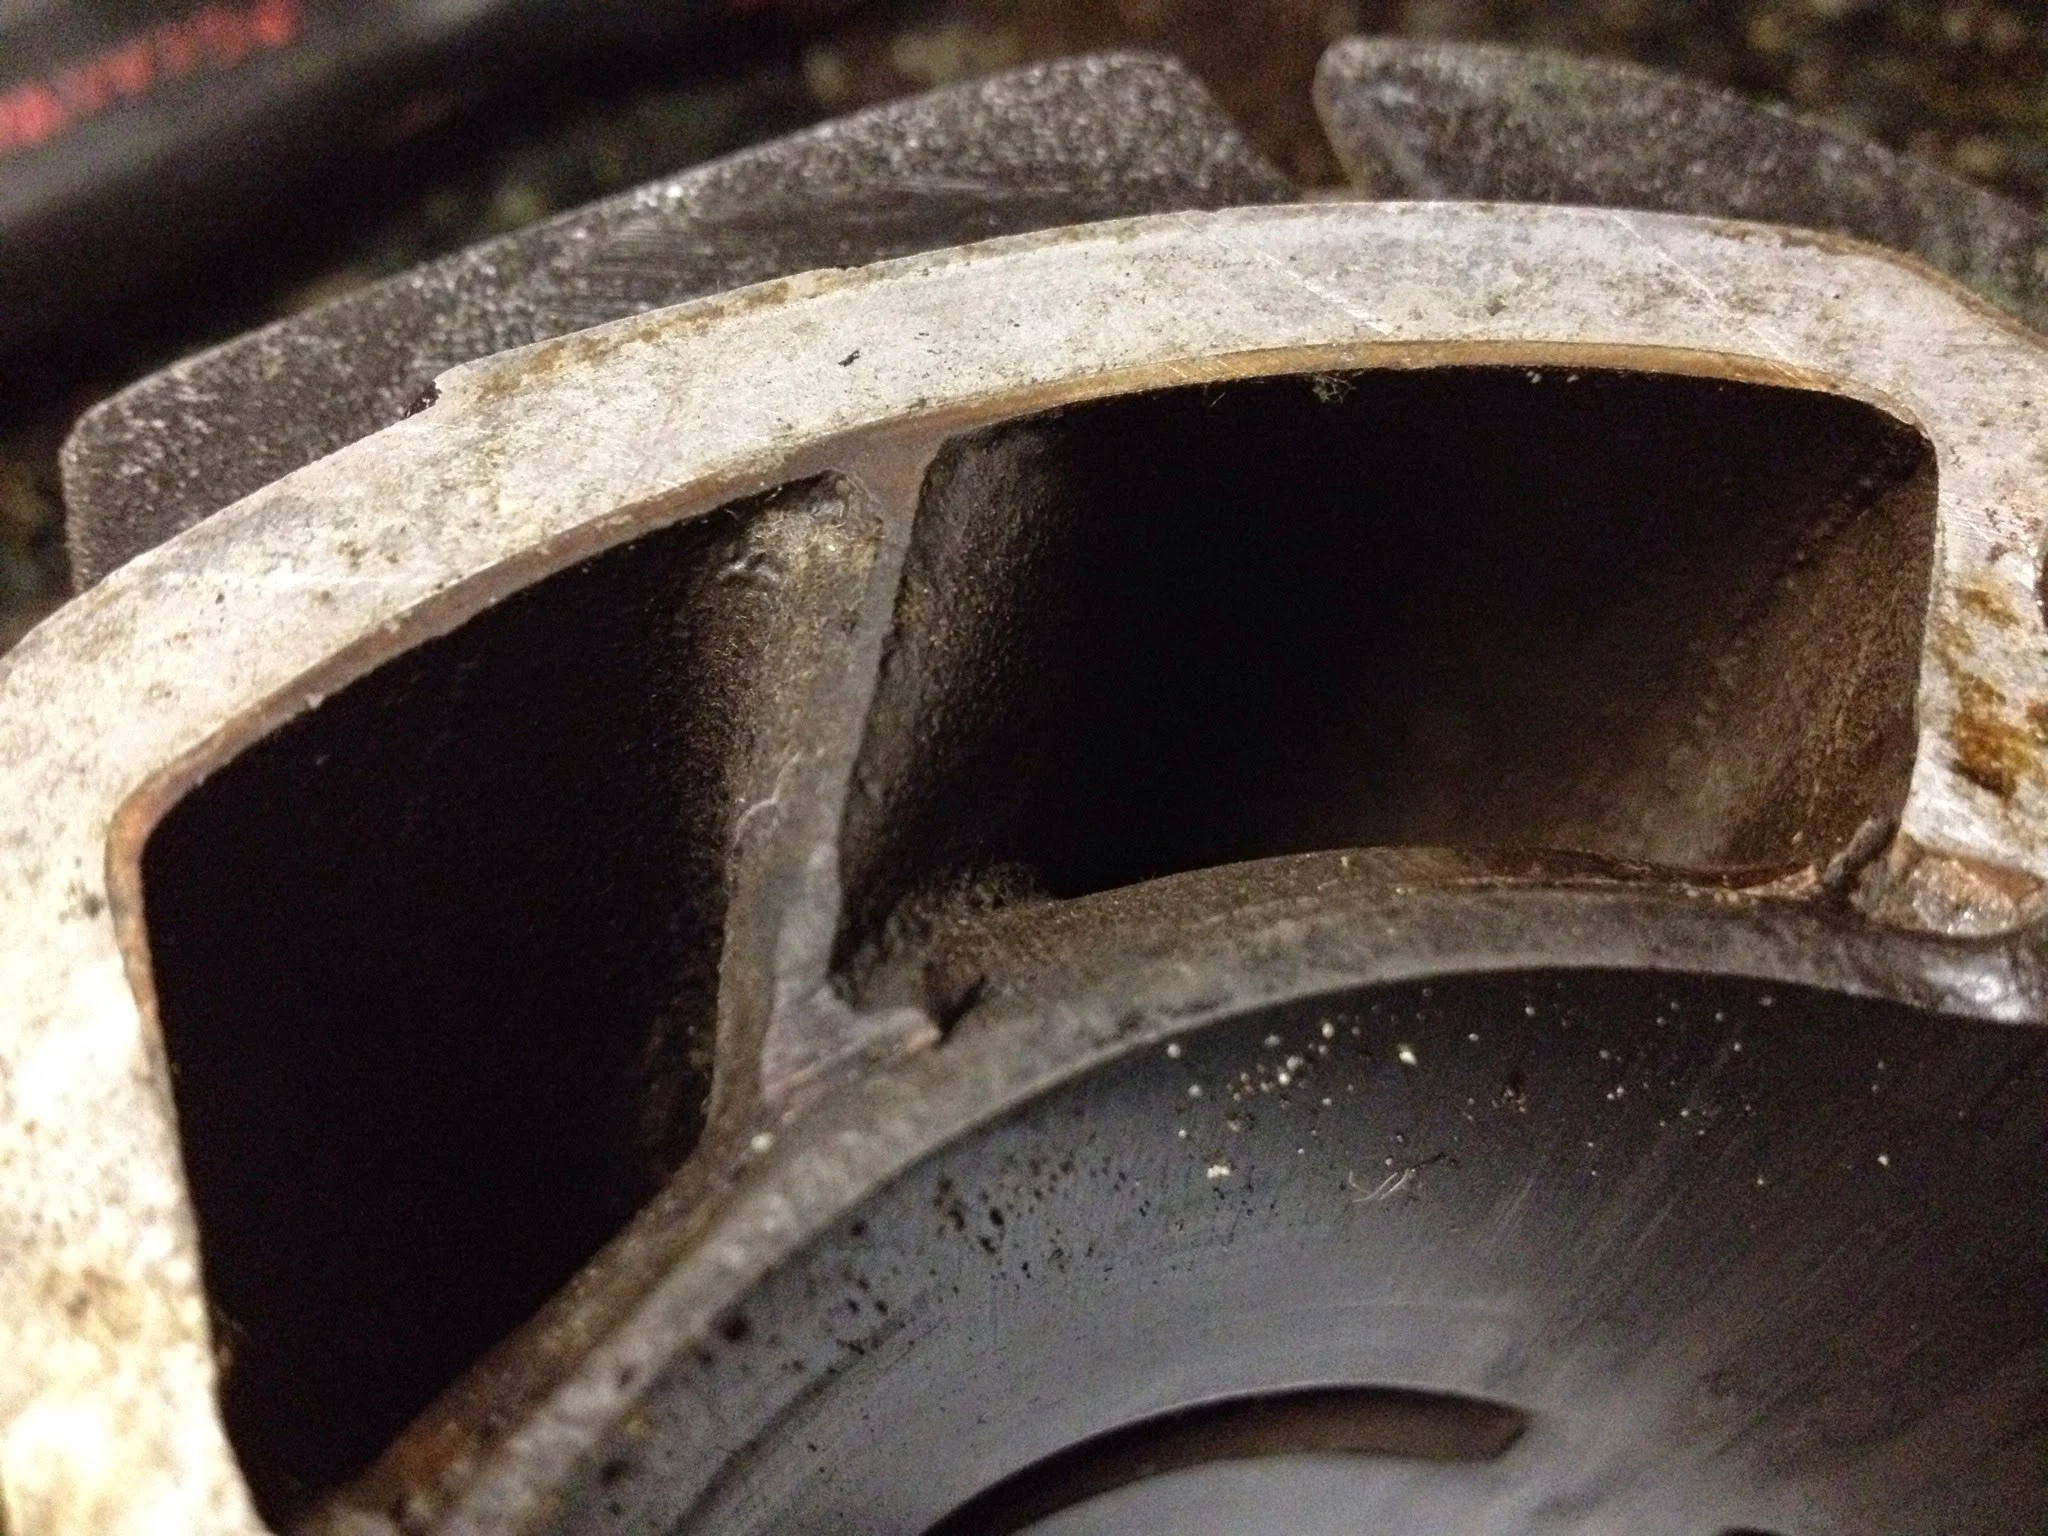
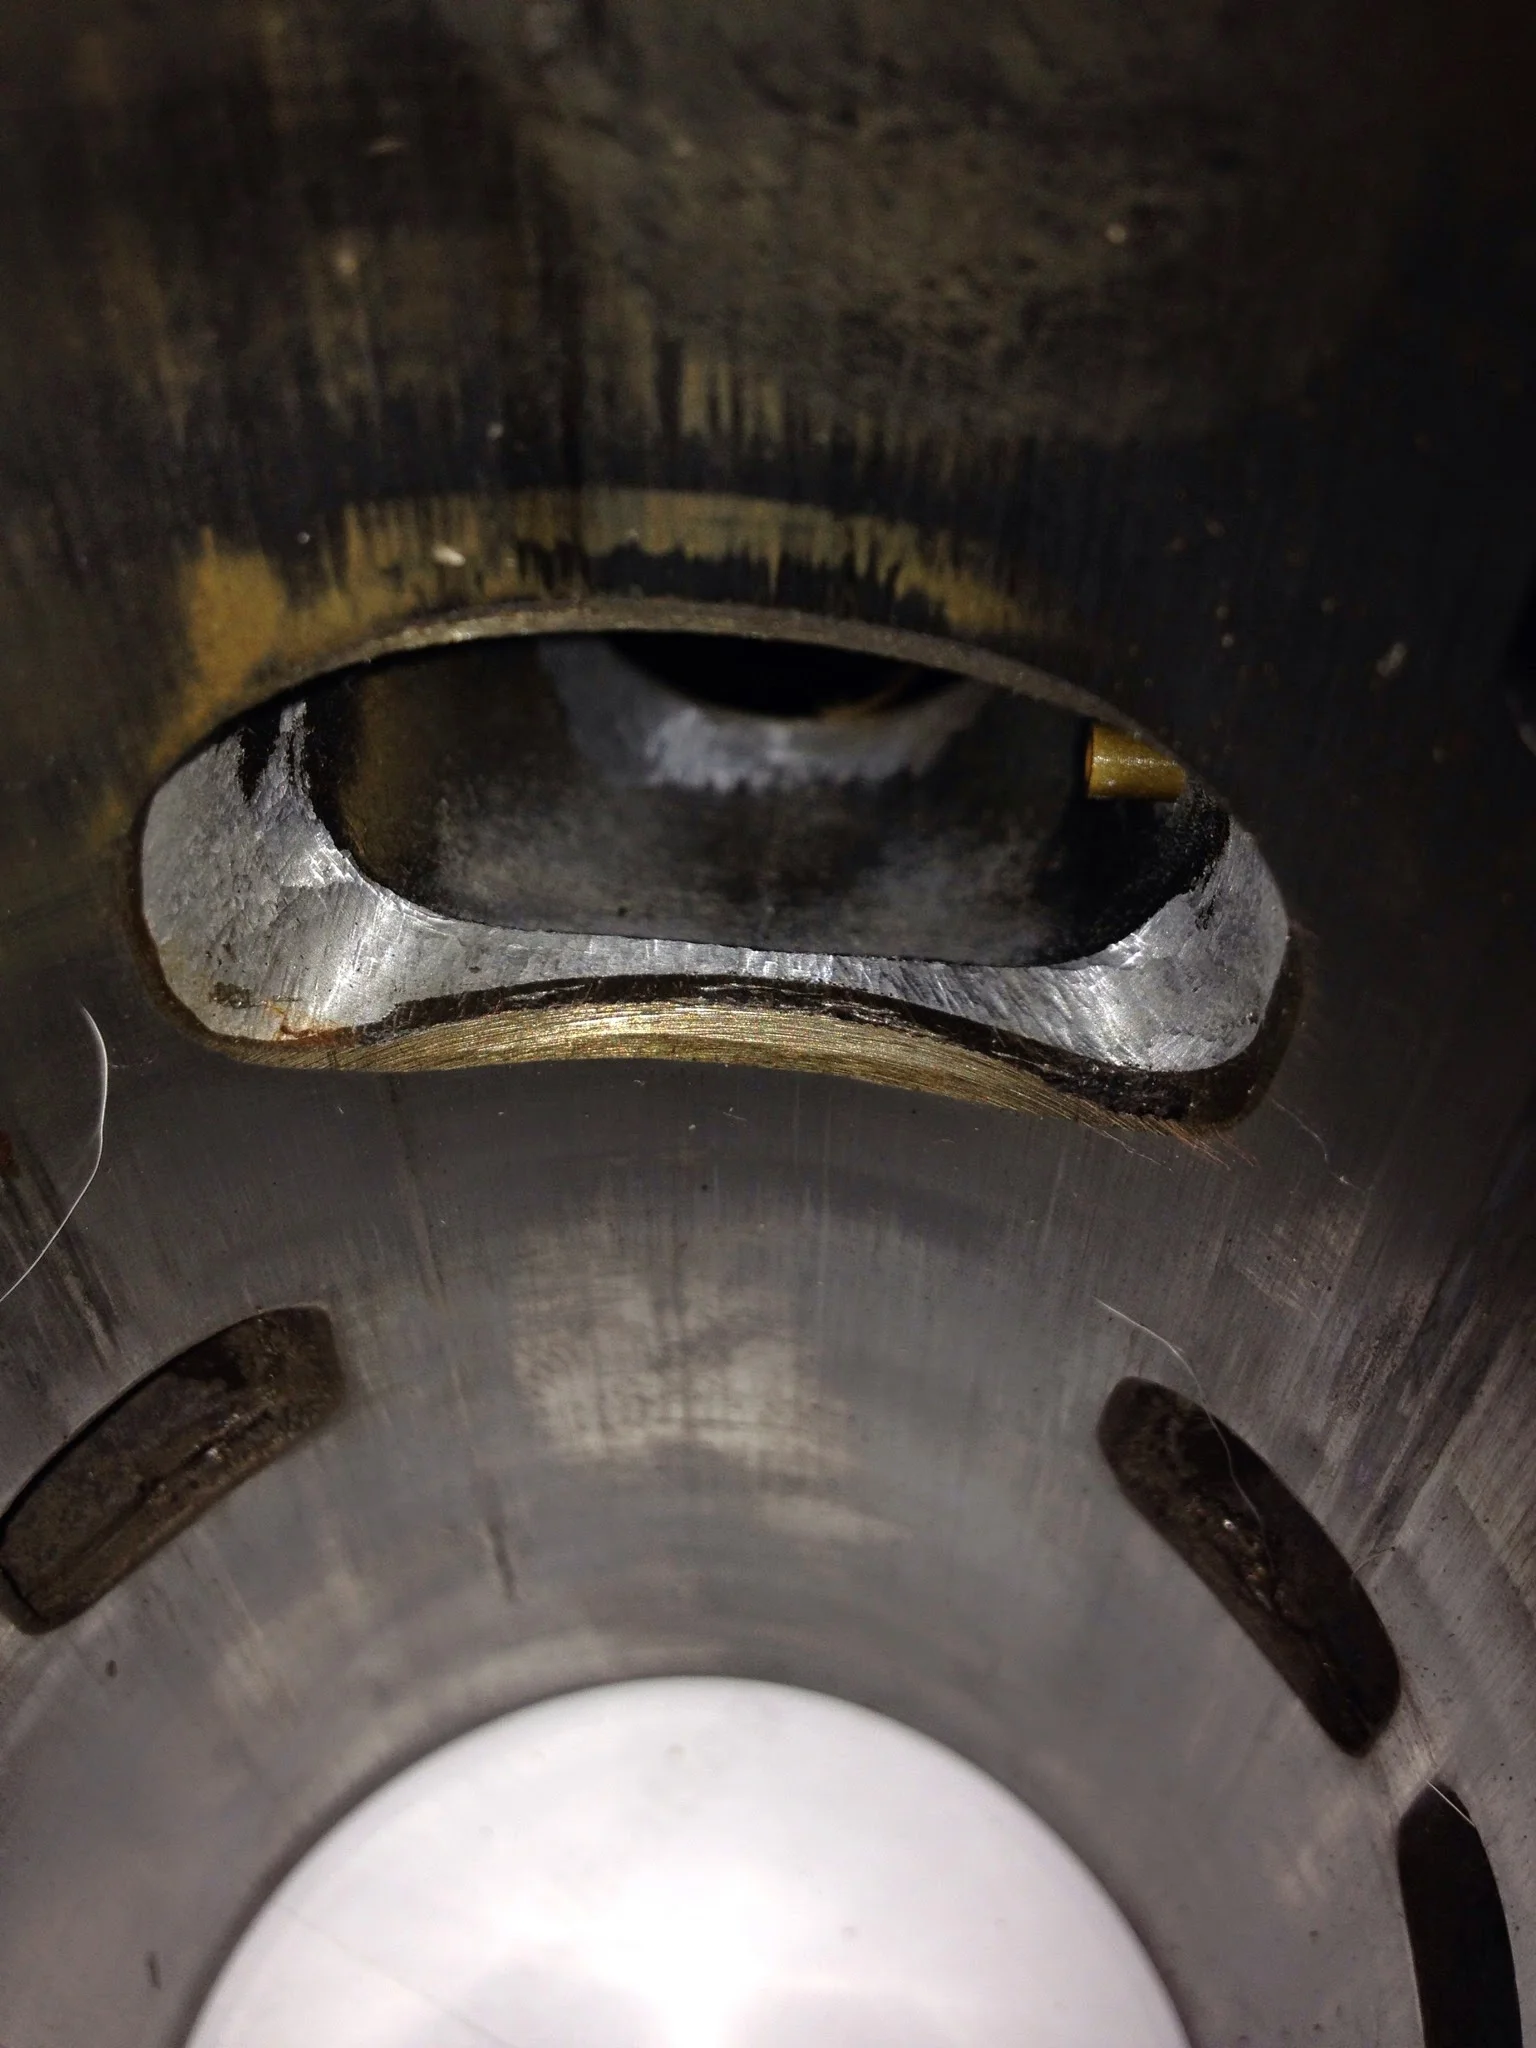
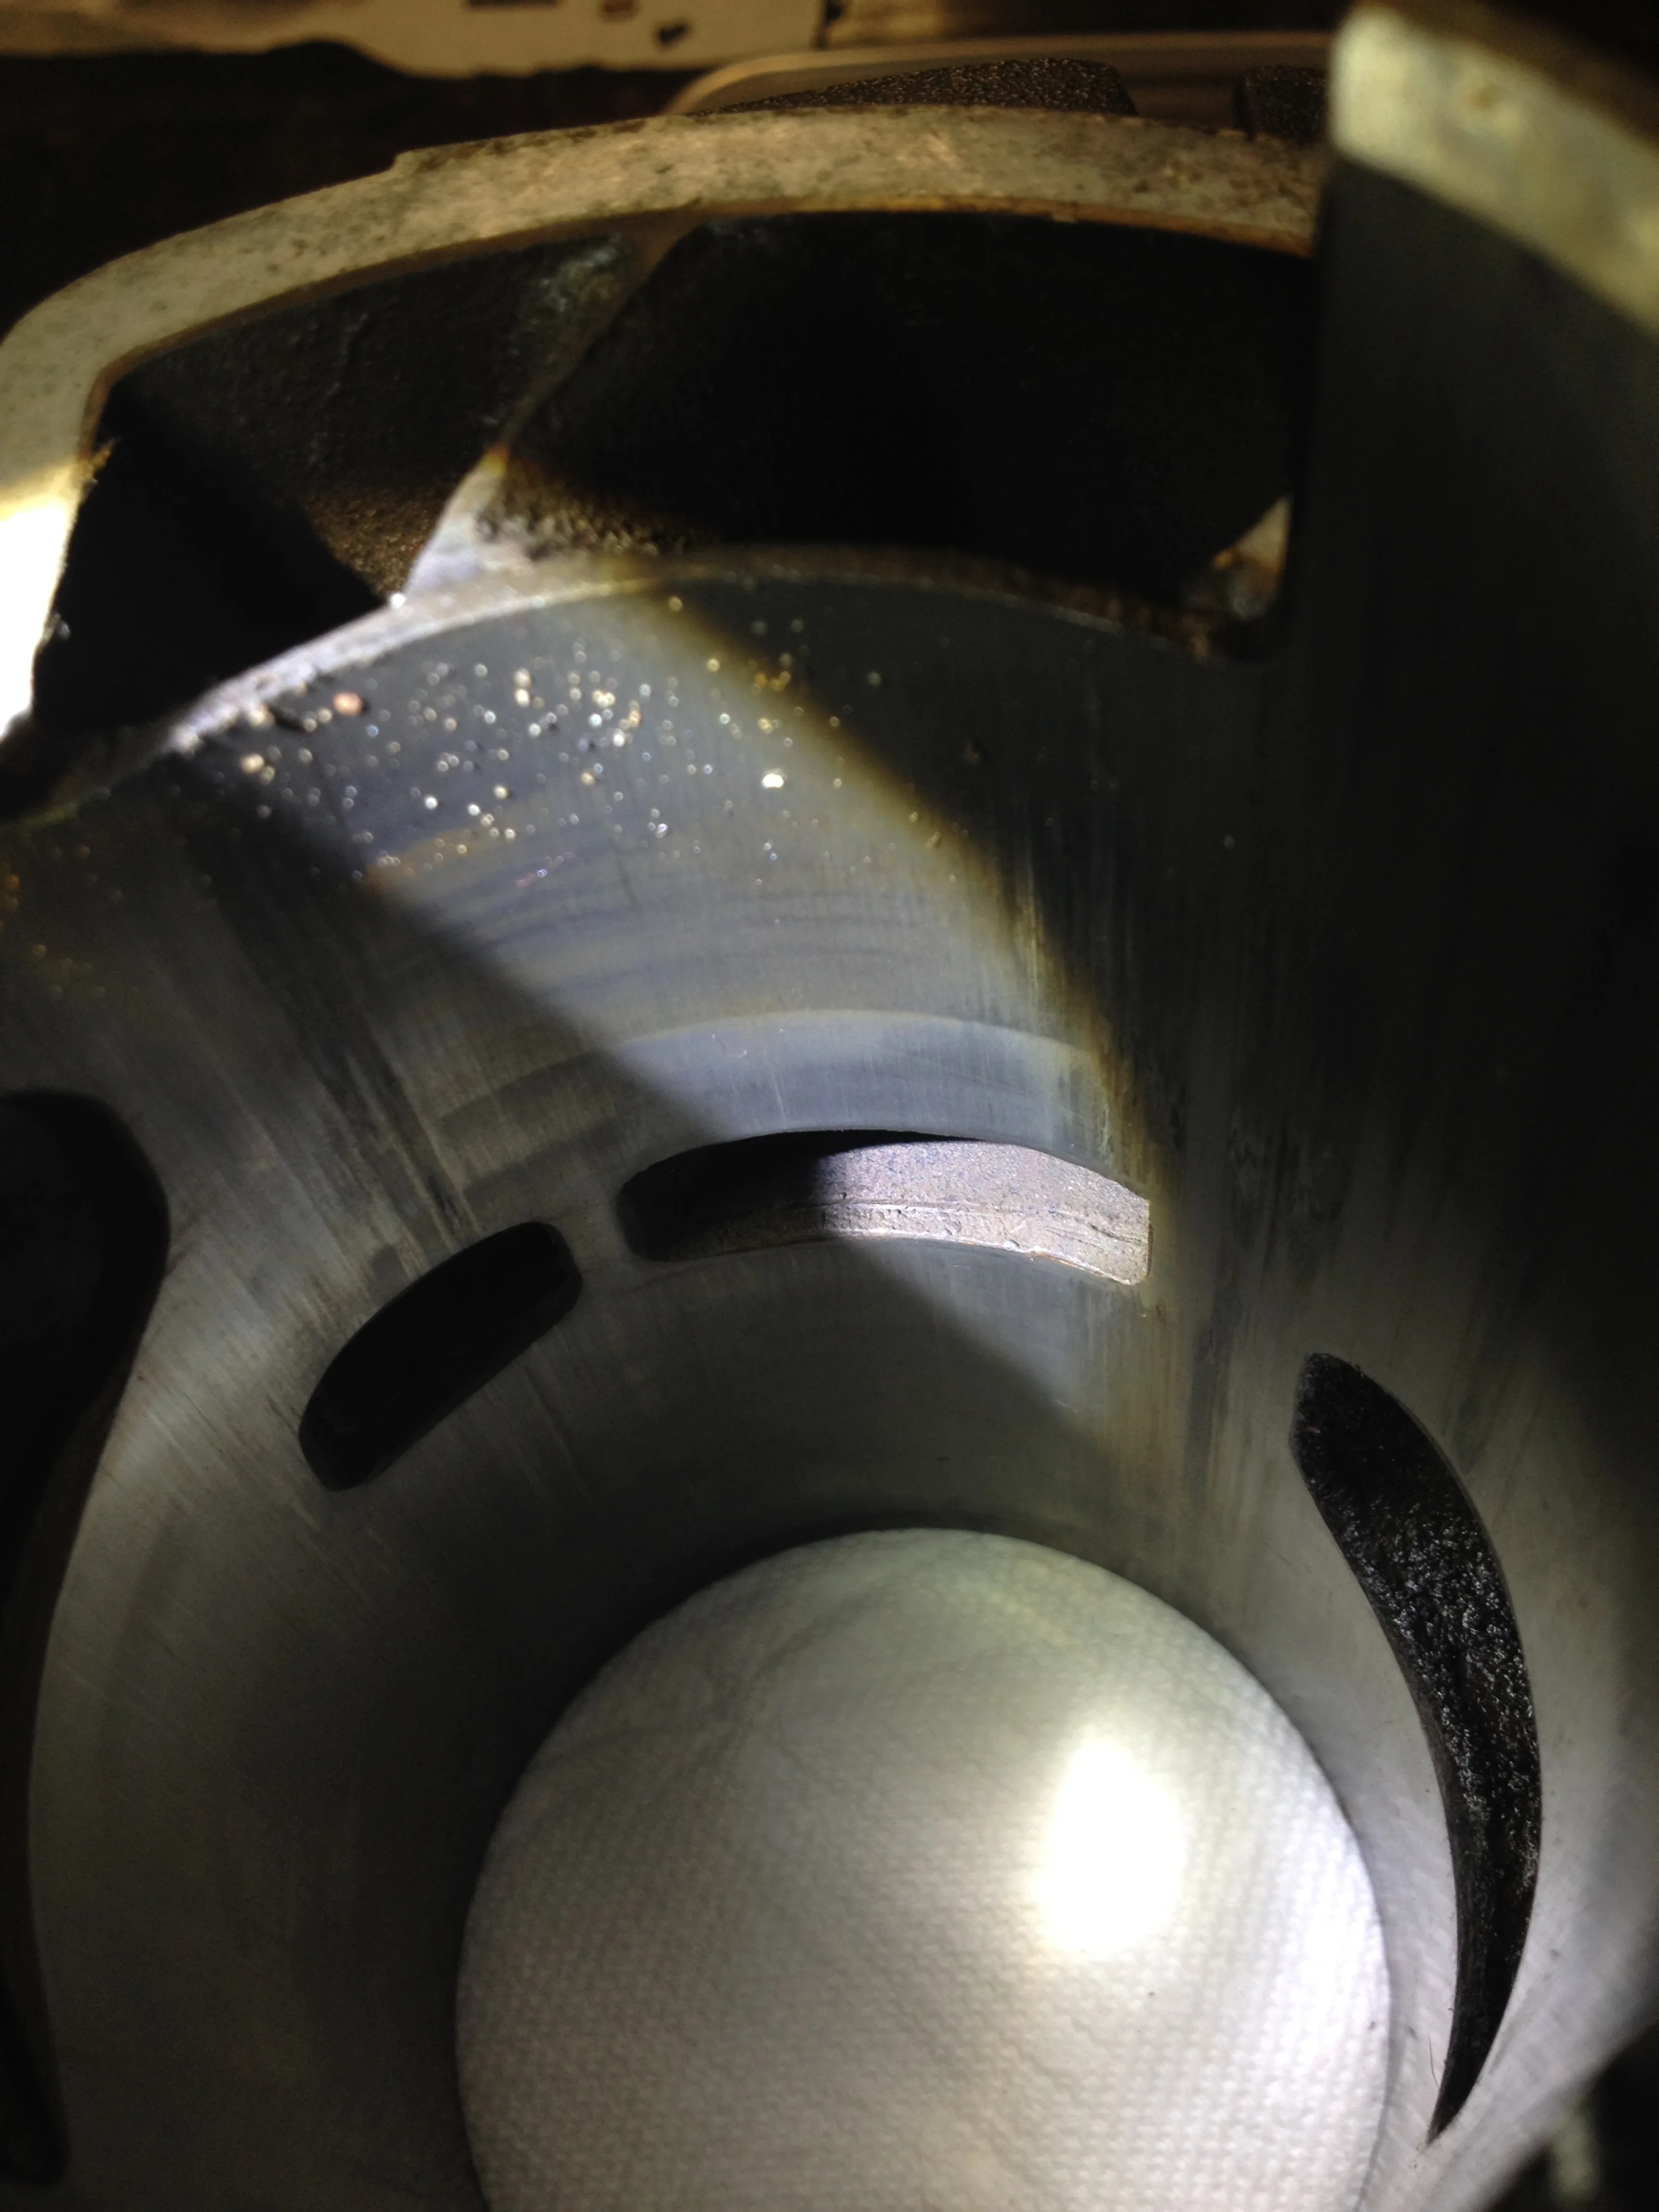
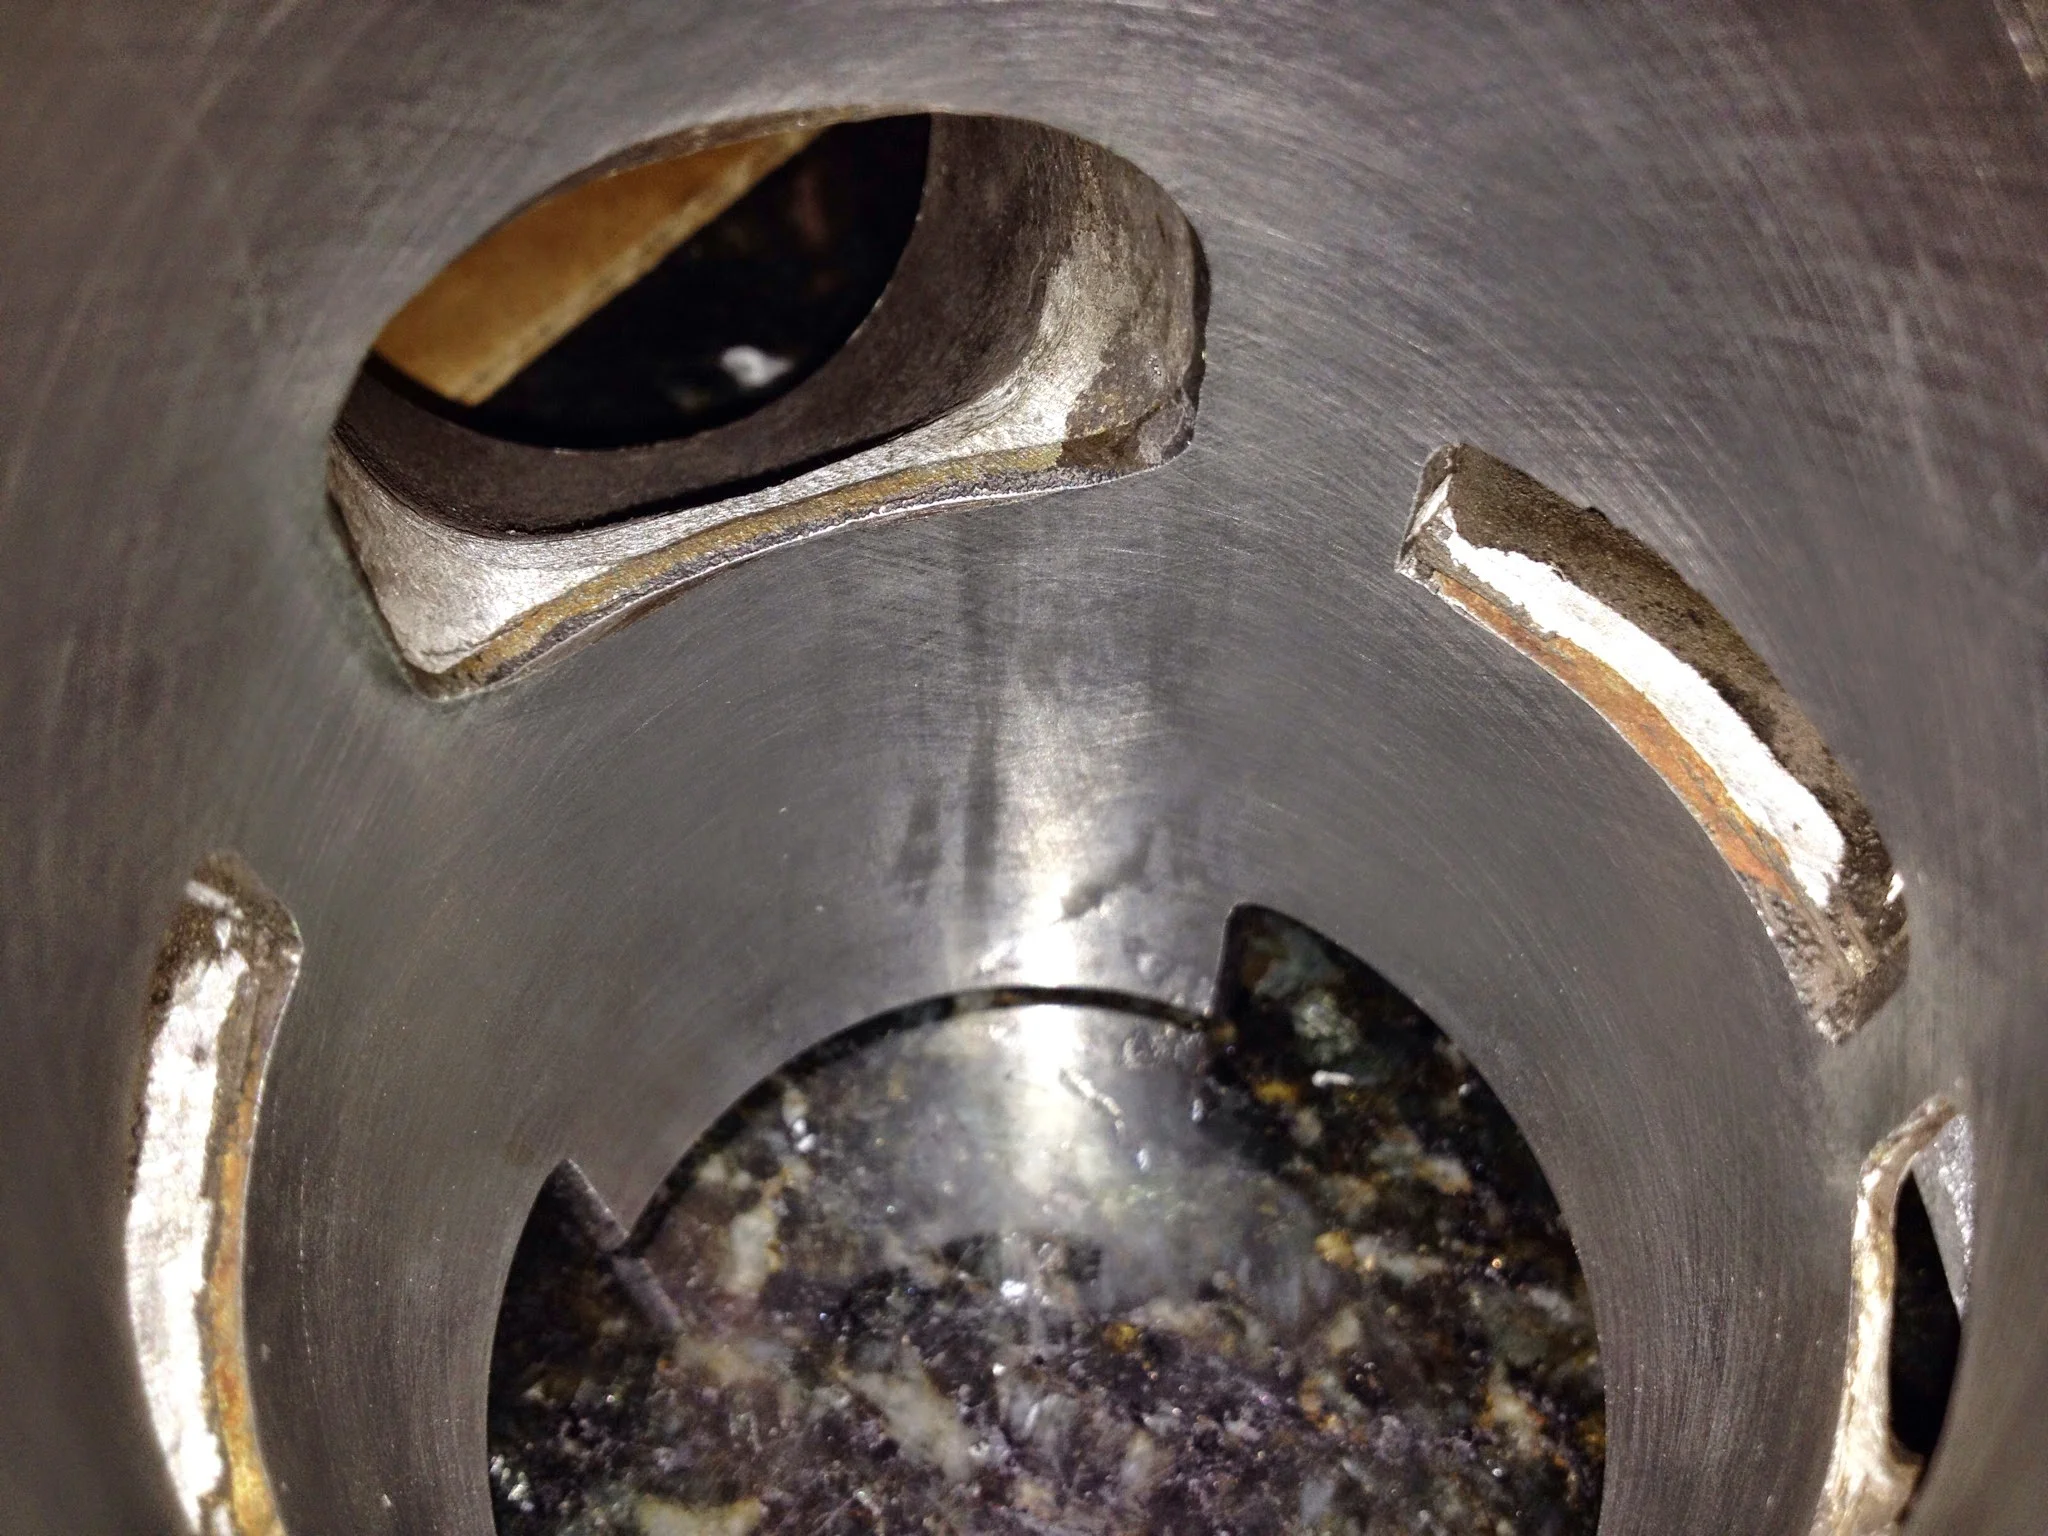
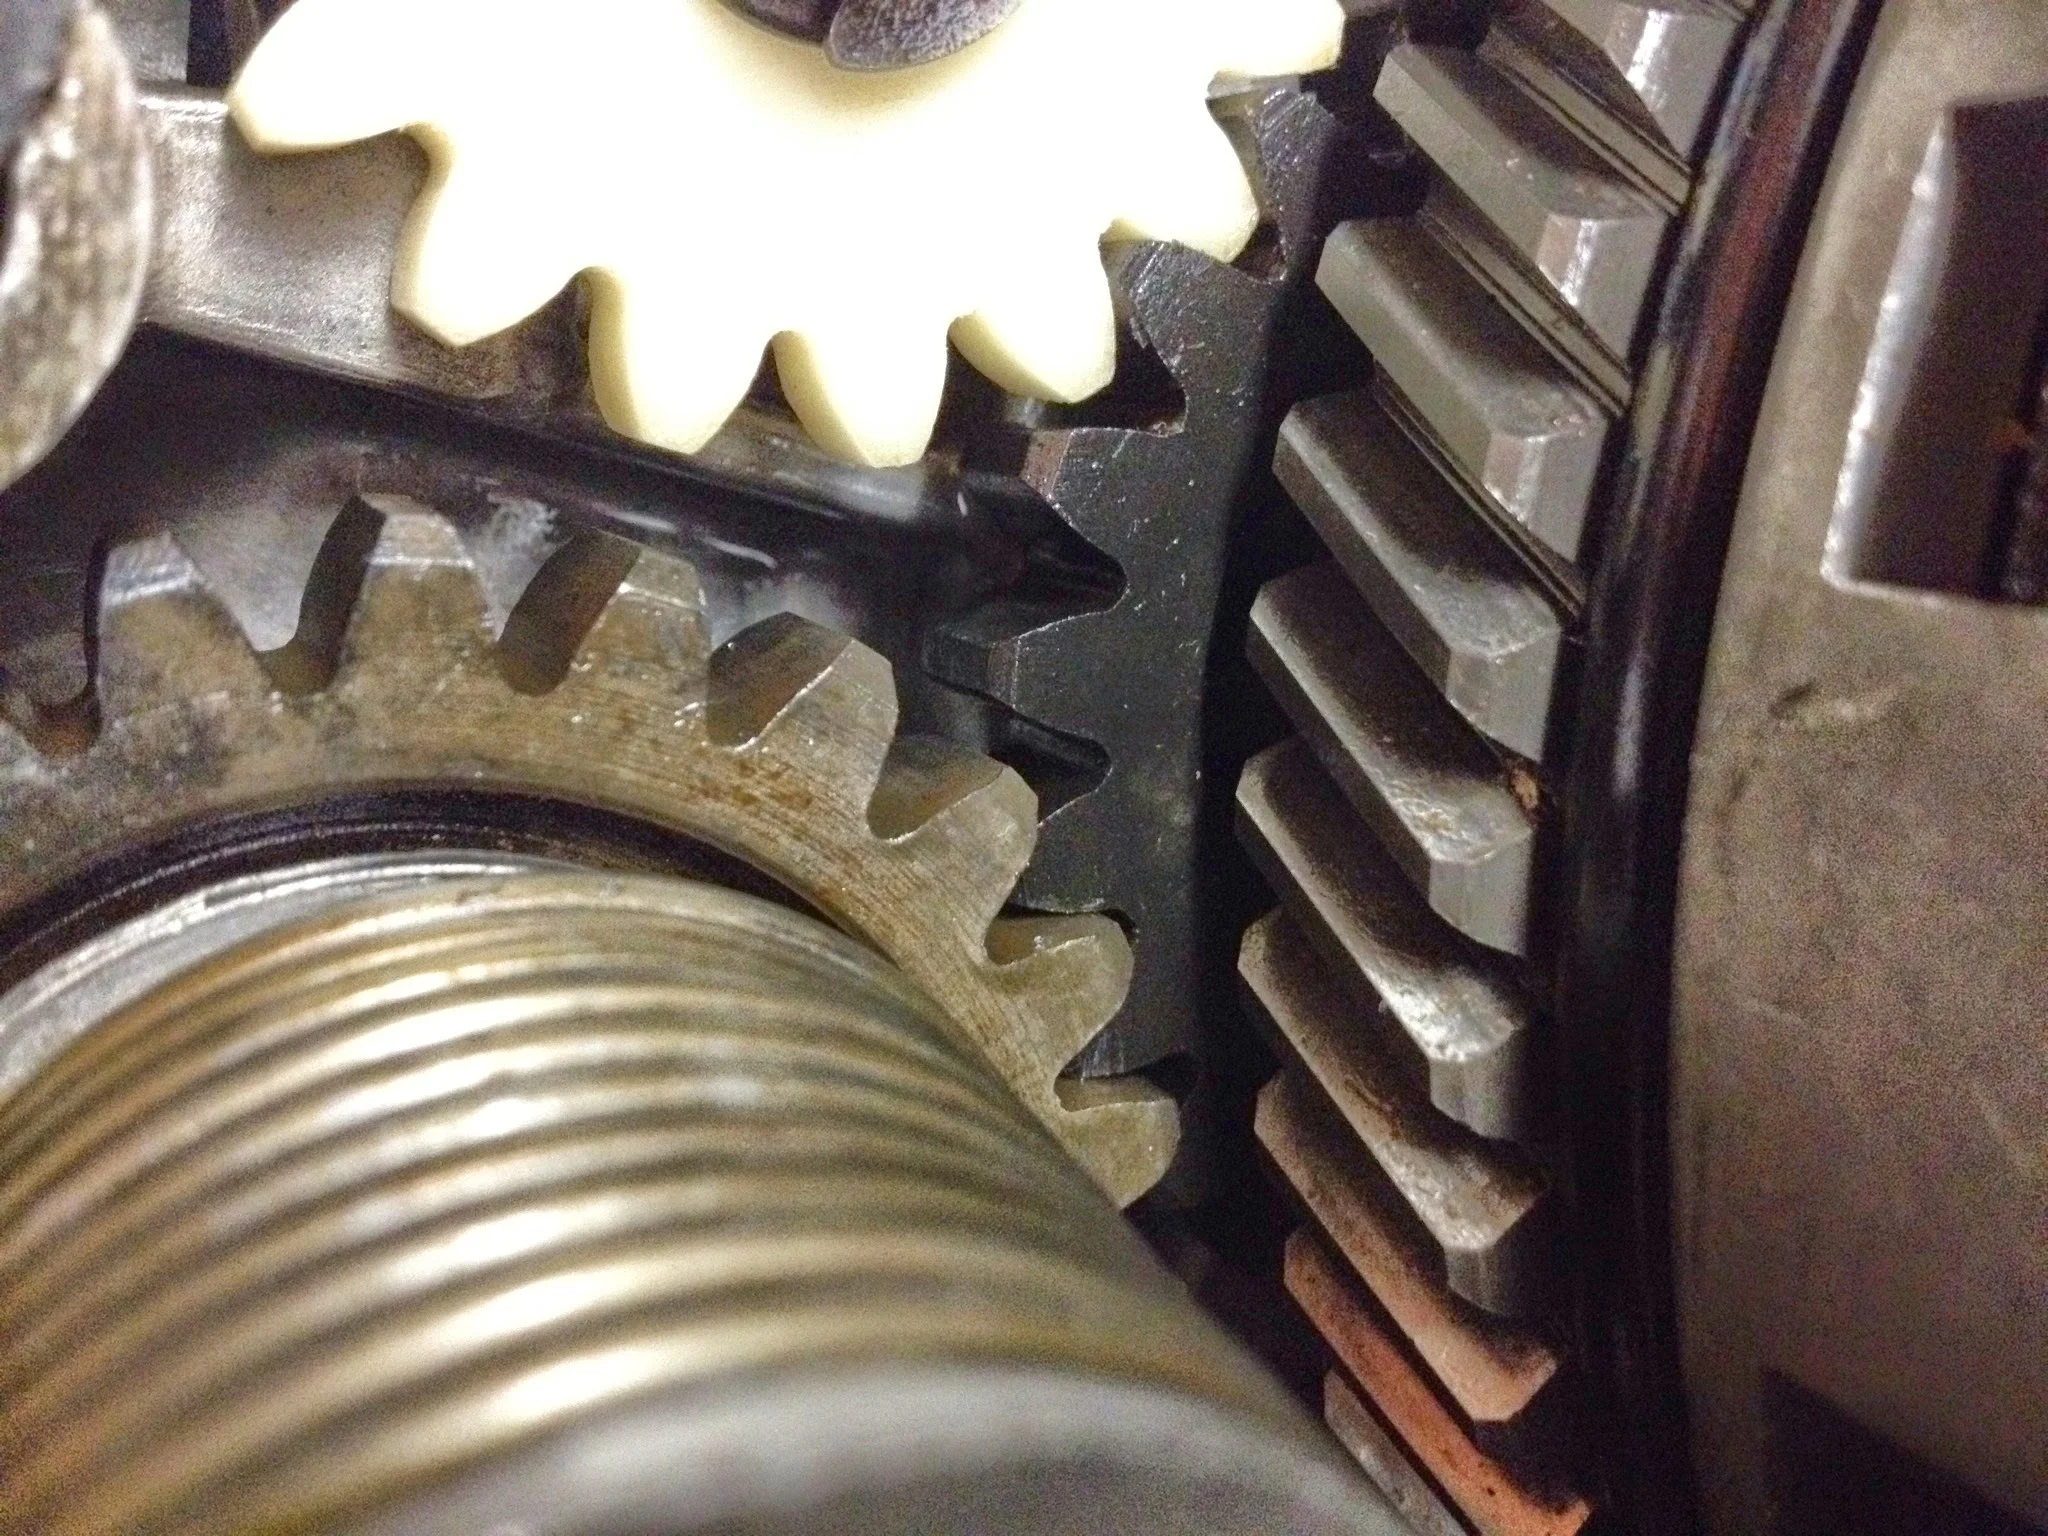
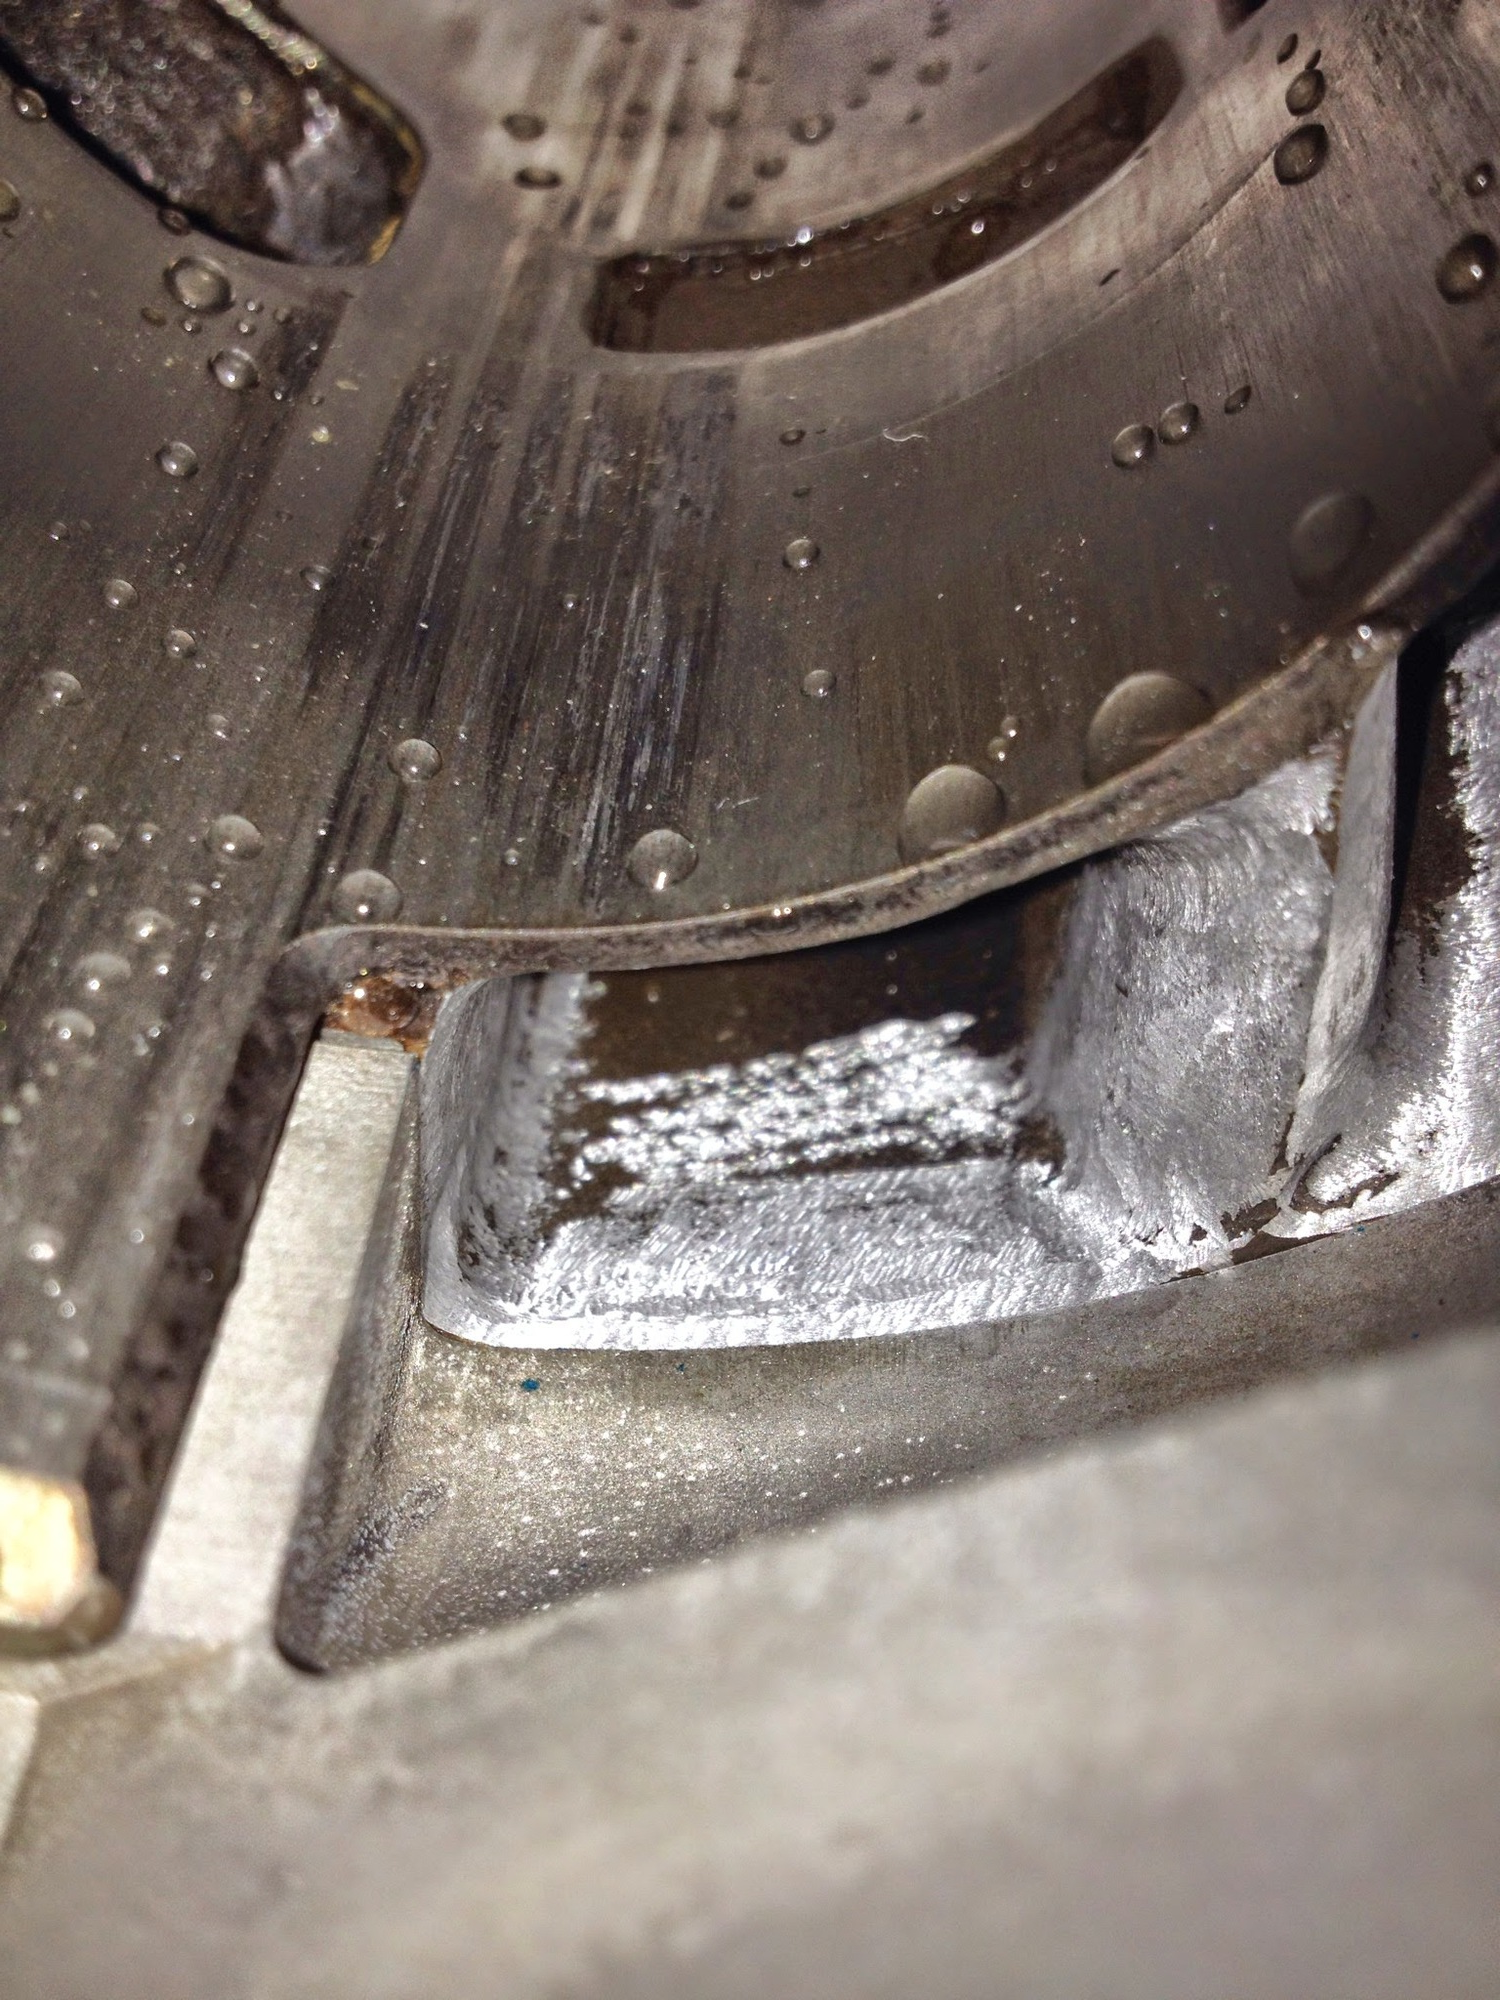
Some grinding done to the xfer ports before I got there
So I started with the transfer ports. Big chance to help smooth air flow, small(er) chance to really ruin things. When I got the cylinder, I could have sworn something had been done to the head. I had high hopes that it was a rare performance part from Yamaha, but having no way to substantiate that, I’m 98% sure it’s a factory, run of the mill cylinder. Most likely the 14 year old kid who had the bike before me, or the owner before that, did some work to the transfer ports. It's cool to think that some old guy back in the 70s did this to hop up his bike. You can see the color difference between the regular cast material and the material that was ground down years ago. Given the fact that the inside of the engine was so clean and the bike in general looks like it was never used, (wheel bearings perfect, hubs still showing clean grease, transmission gears showing almost 0 wear) I think this is old work, not done by the kid I bought it from.
2 strokes don’t use valves and camshafts to control air/fuel and exhaust. They use “ports” which are really just holes in the cylinder that allow gasses to flow through at certain times.
The 2 stroke relies on the crankcase to hold the air/fuel/oil mixture, relies on the transfer ports to get this mixture in to the cylinder, and relies on the exhaust port to get the spent gasses out of the cylinder.
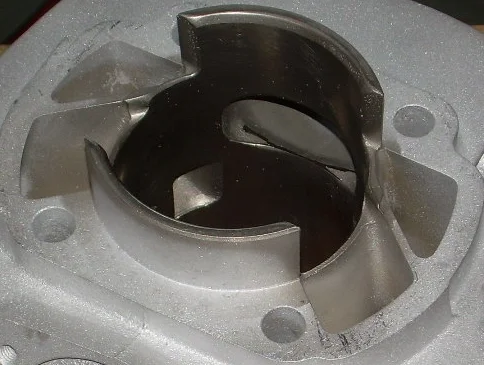
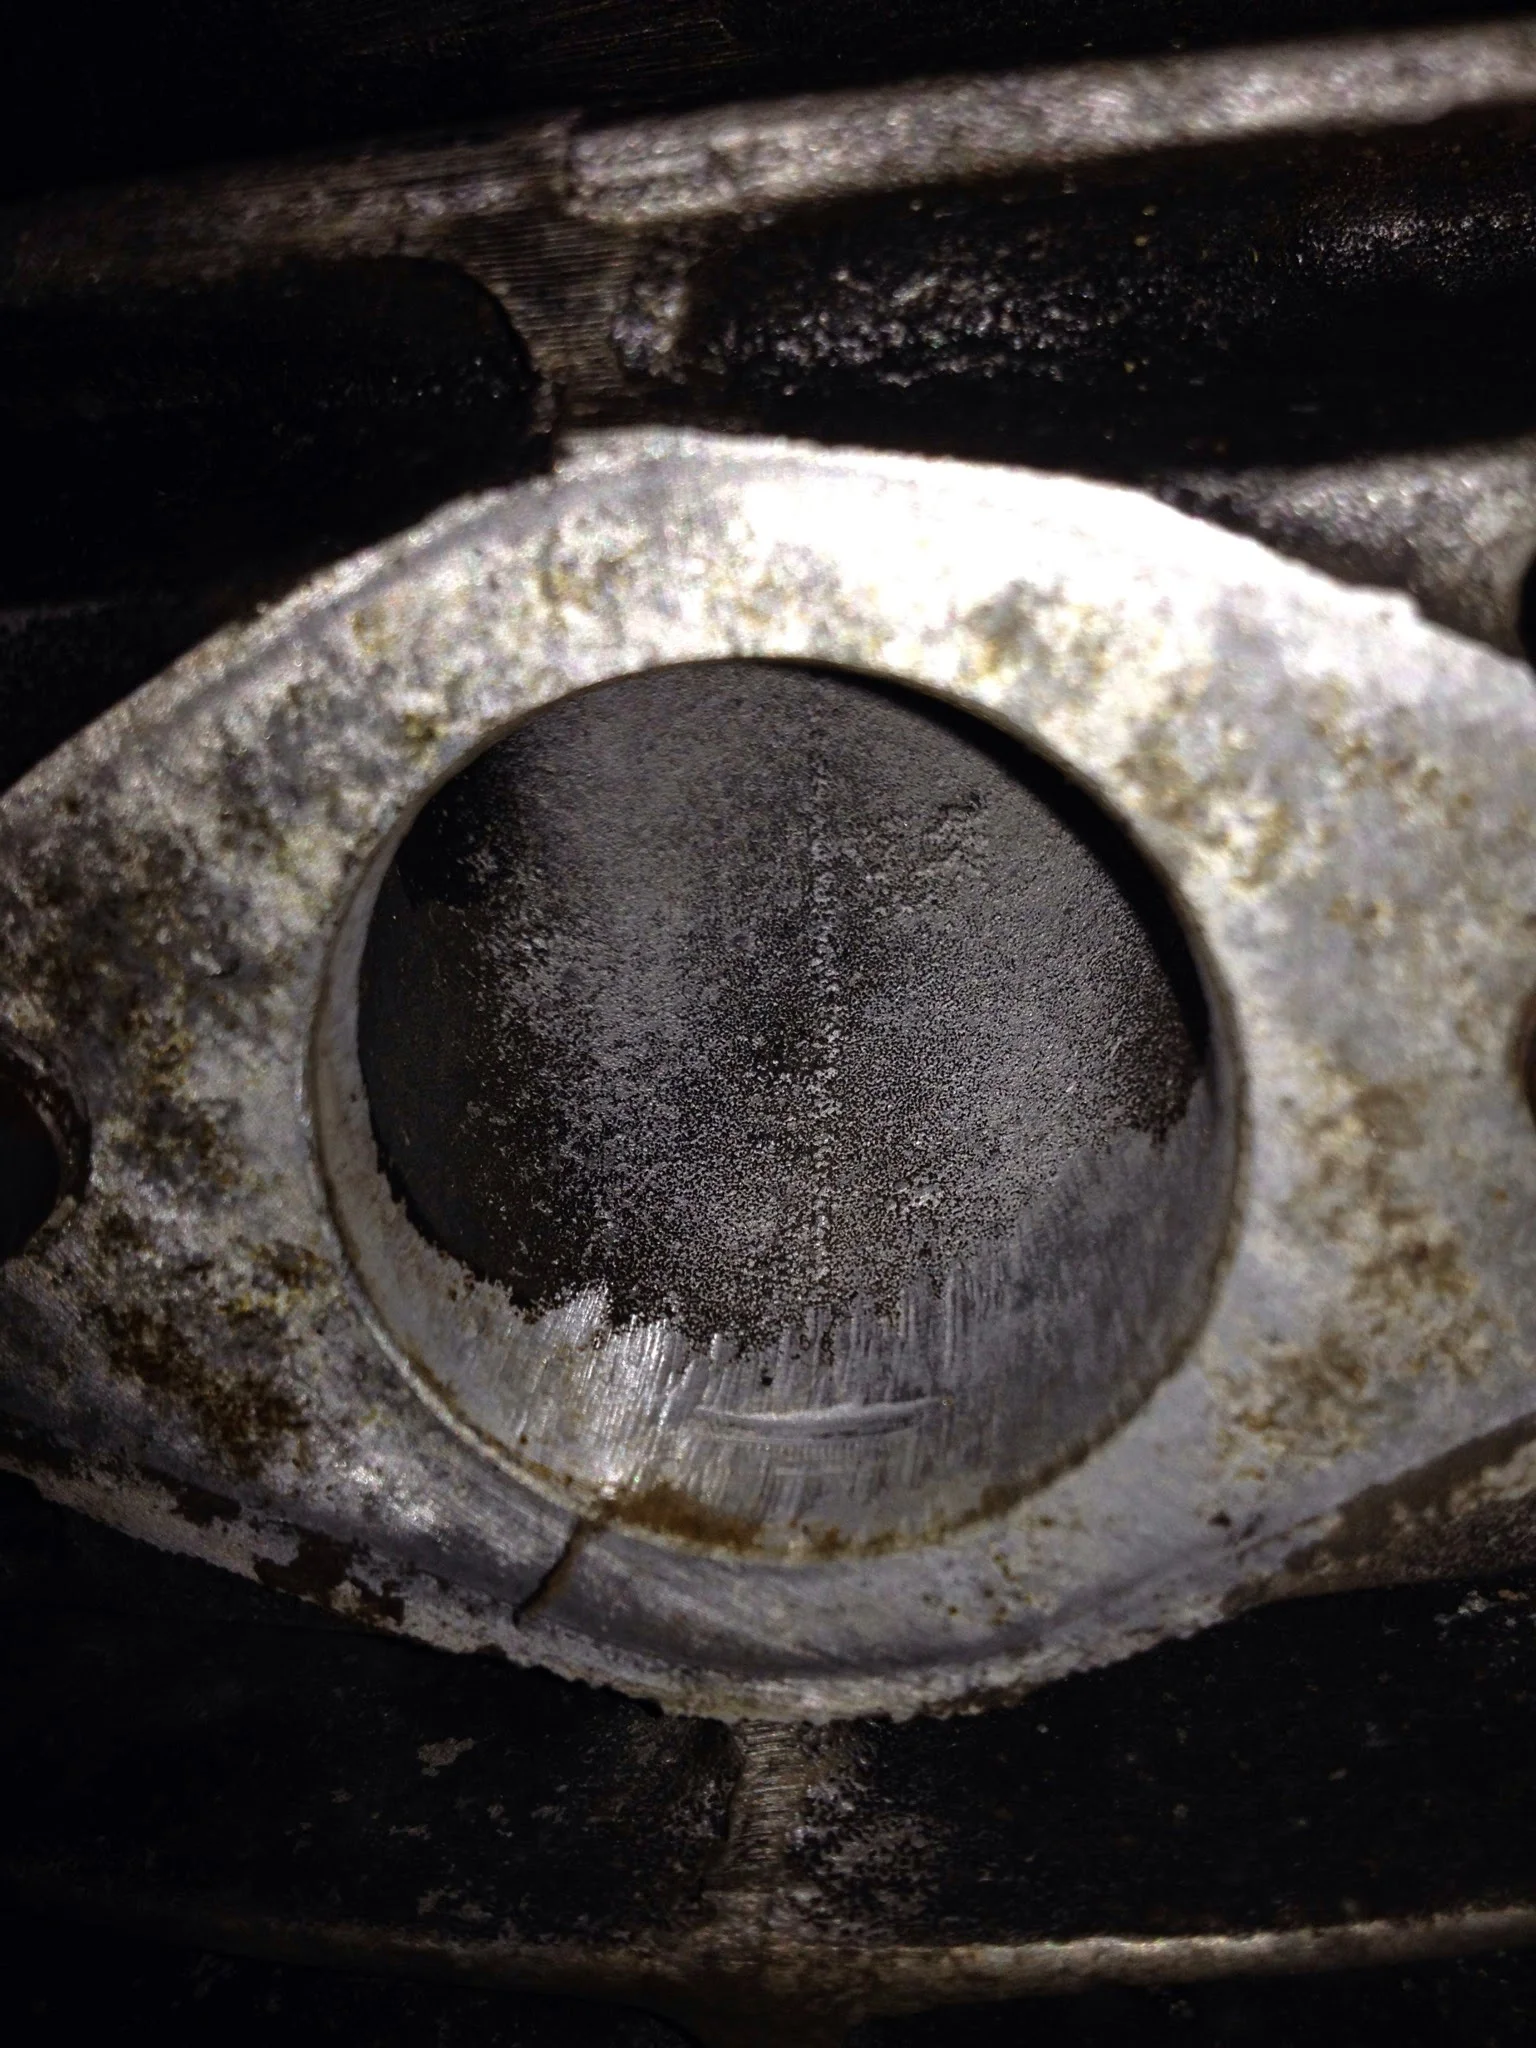
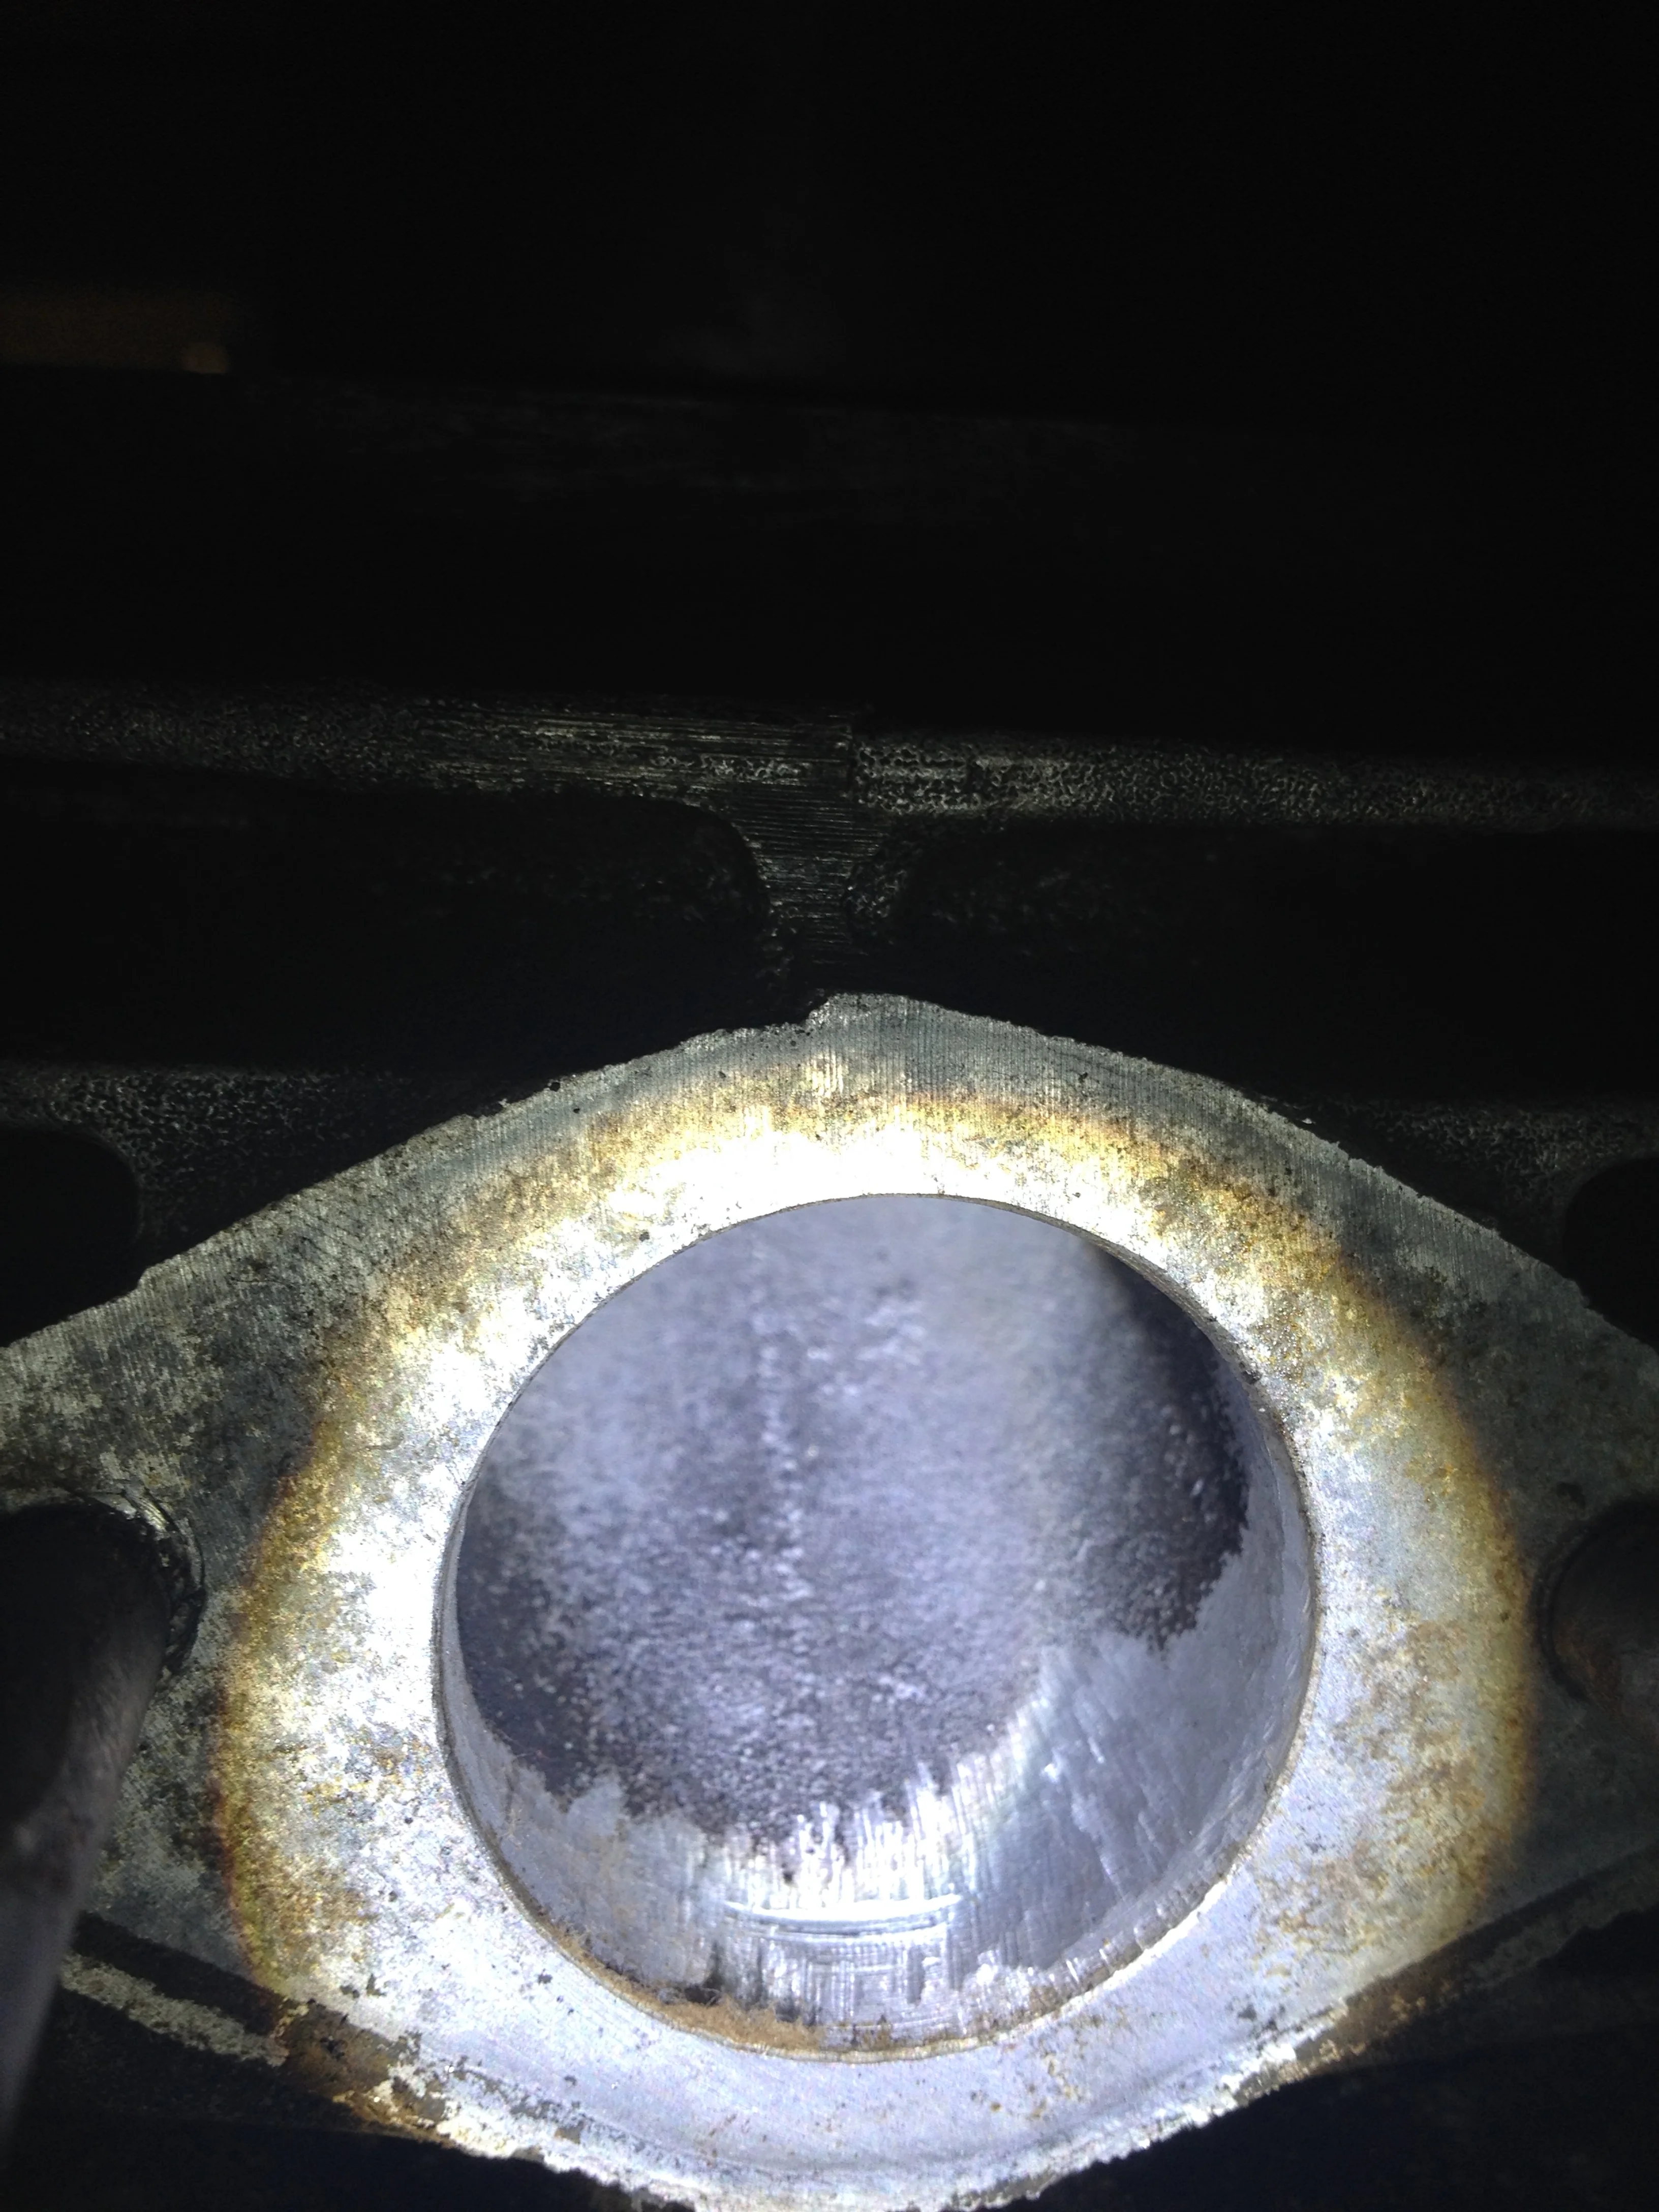
Stock transfer ports on a GYT Cylinder (stolen from Vallyrider and his rebuild thread, http://advrider.com/forums/showthread.php?t=557469
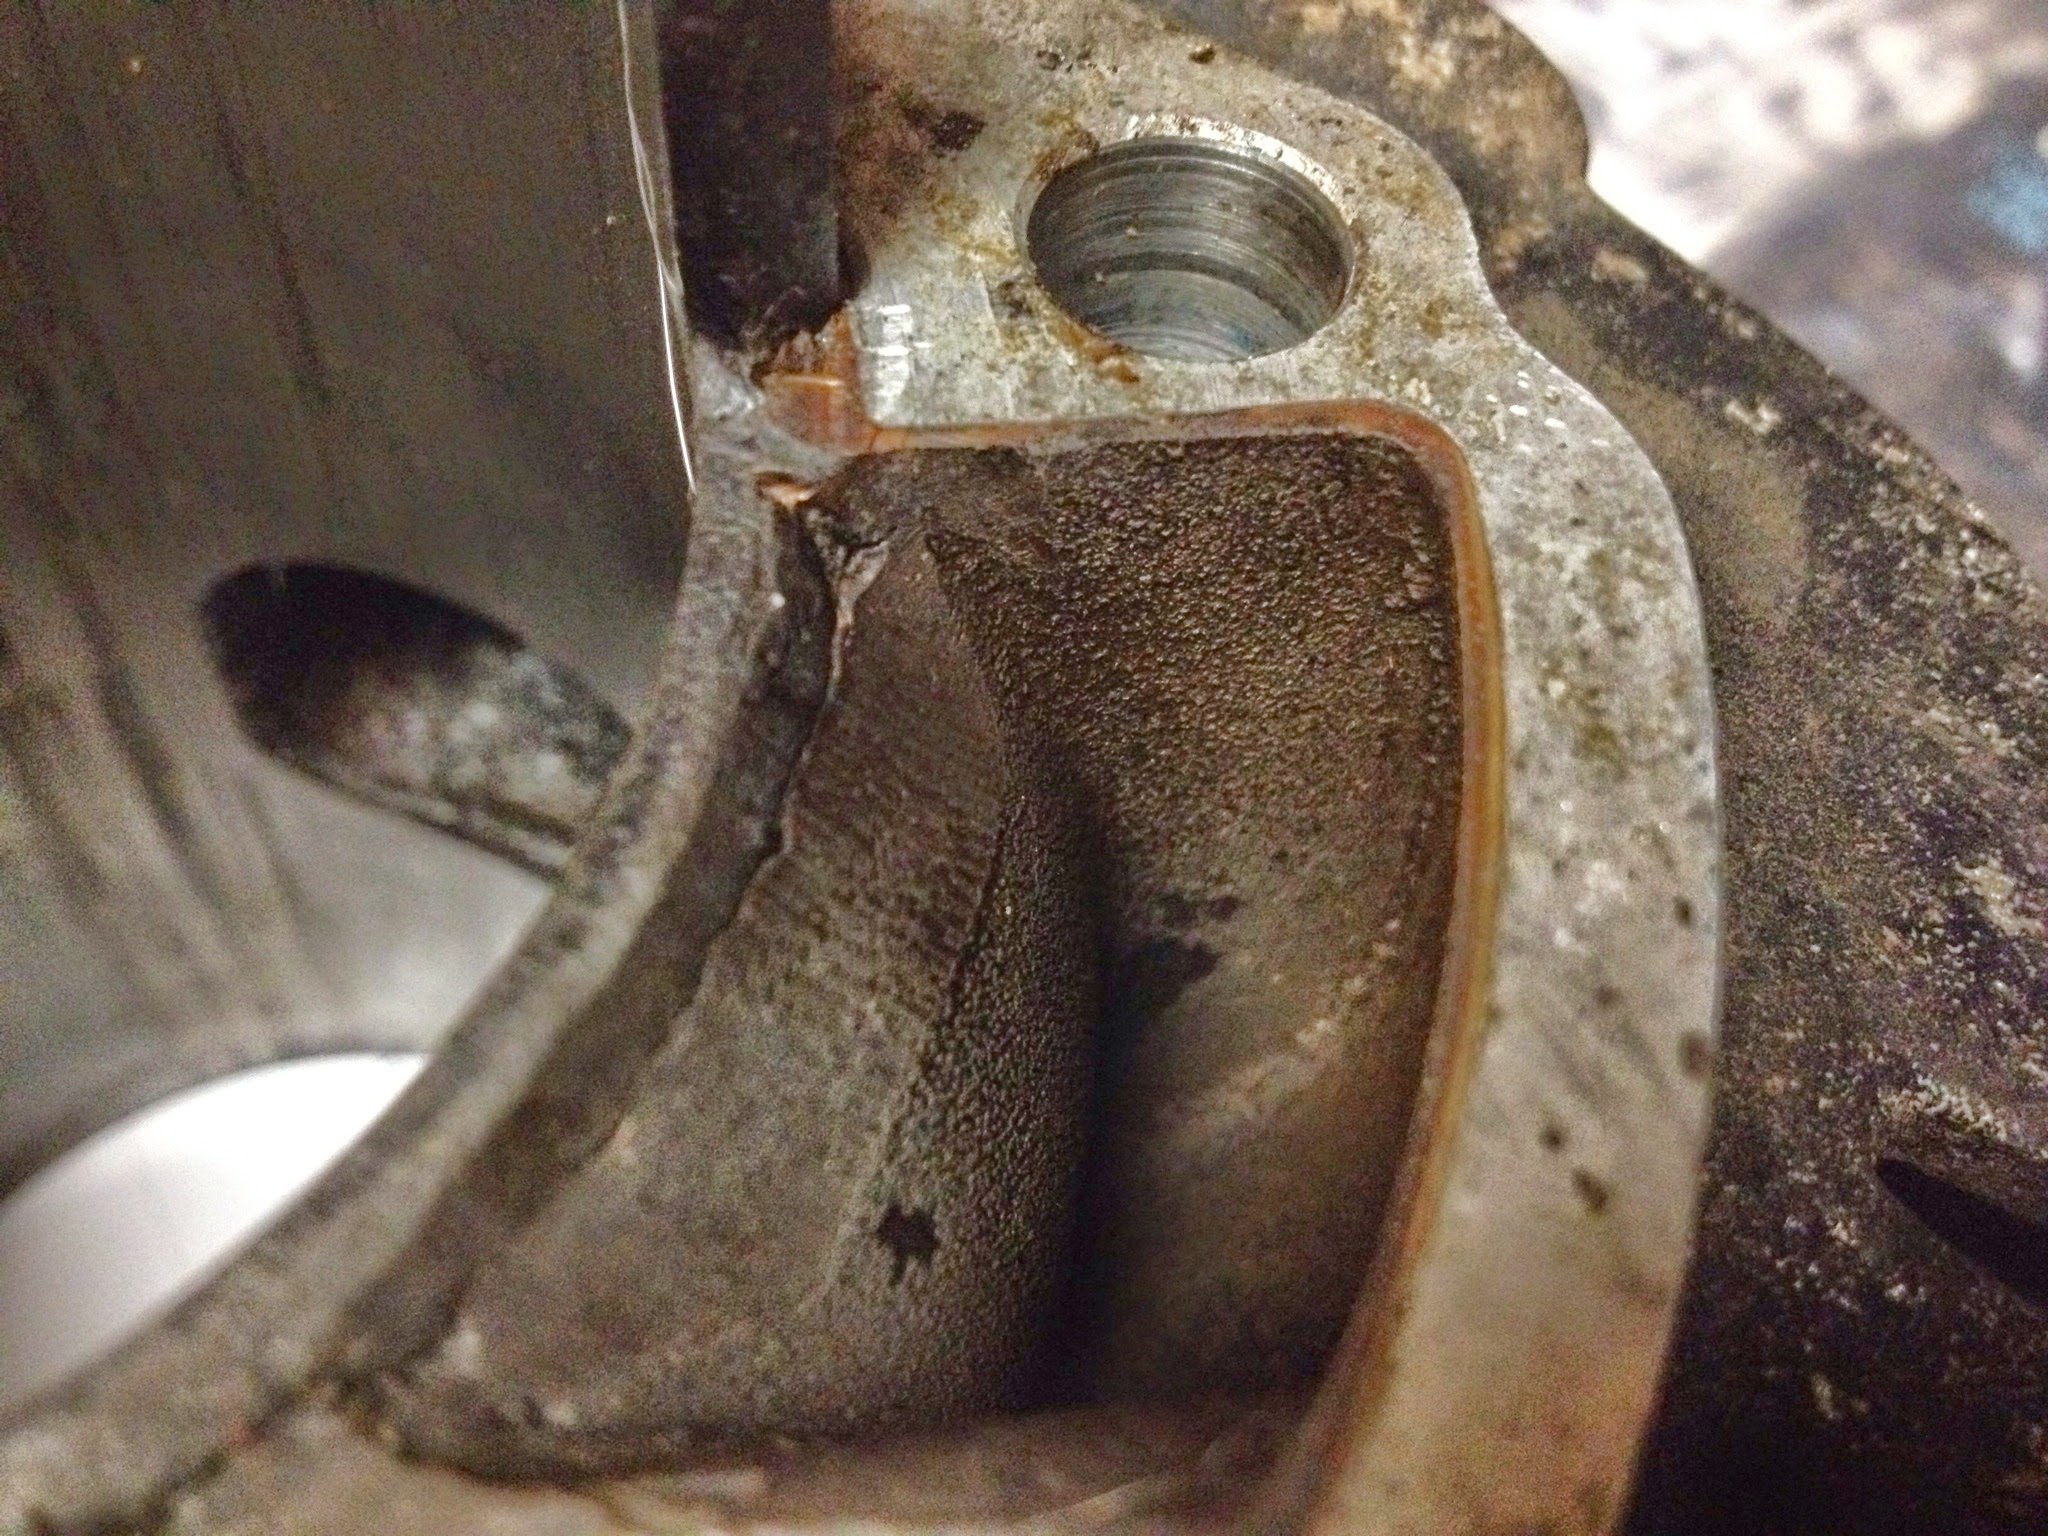
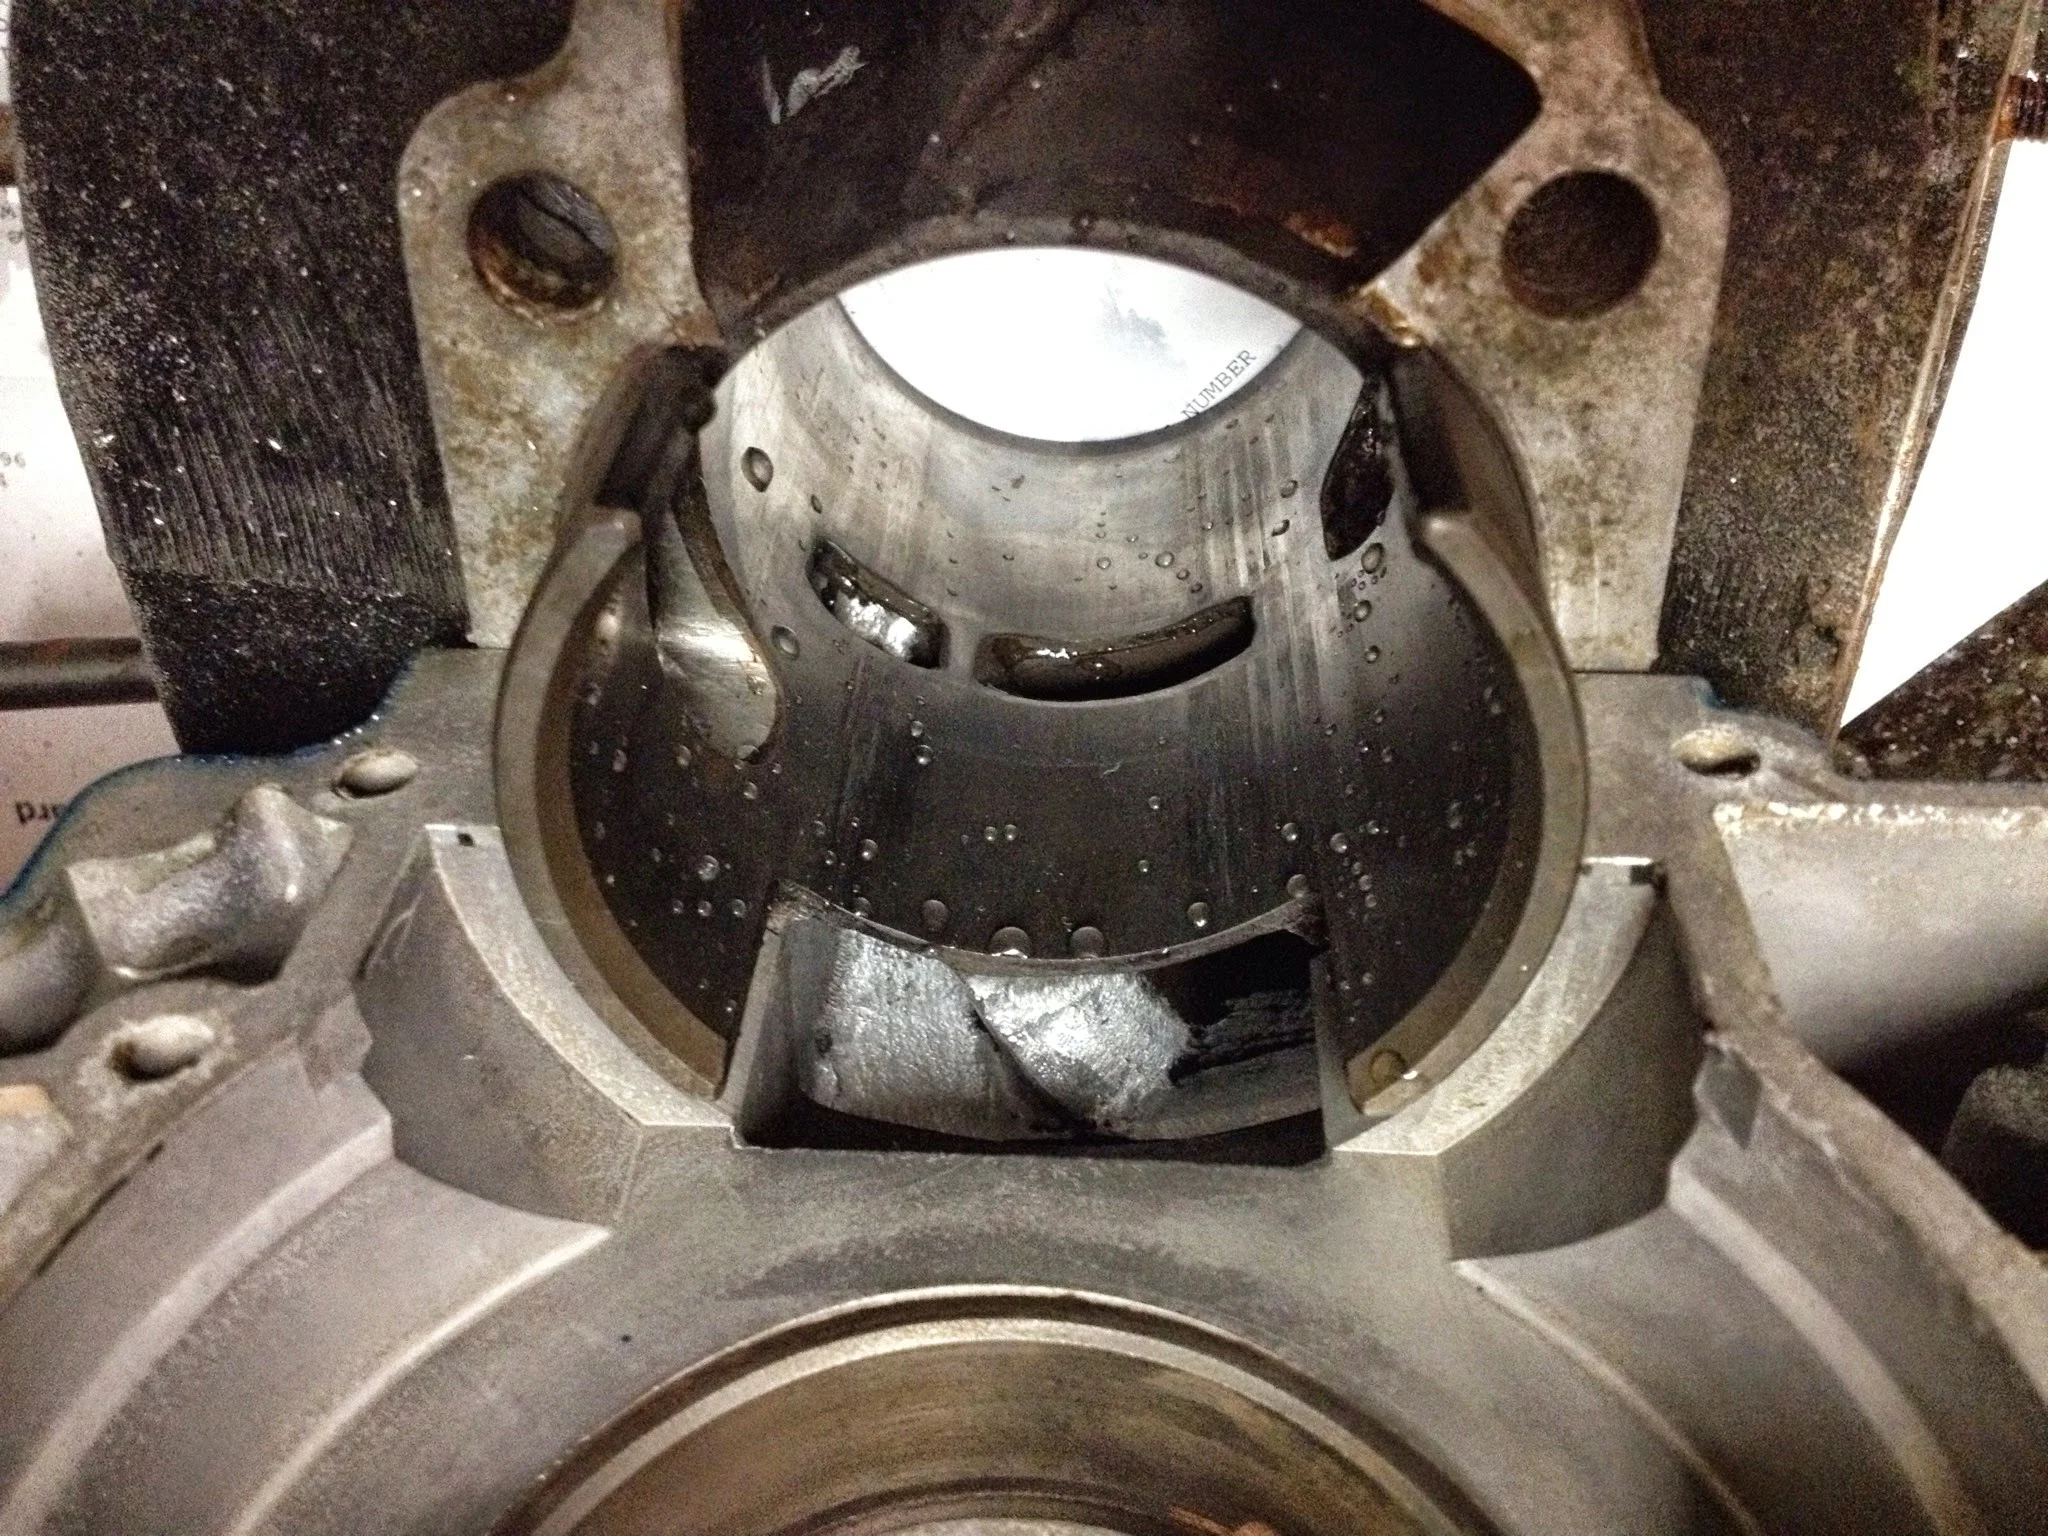
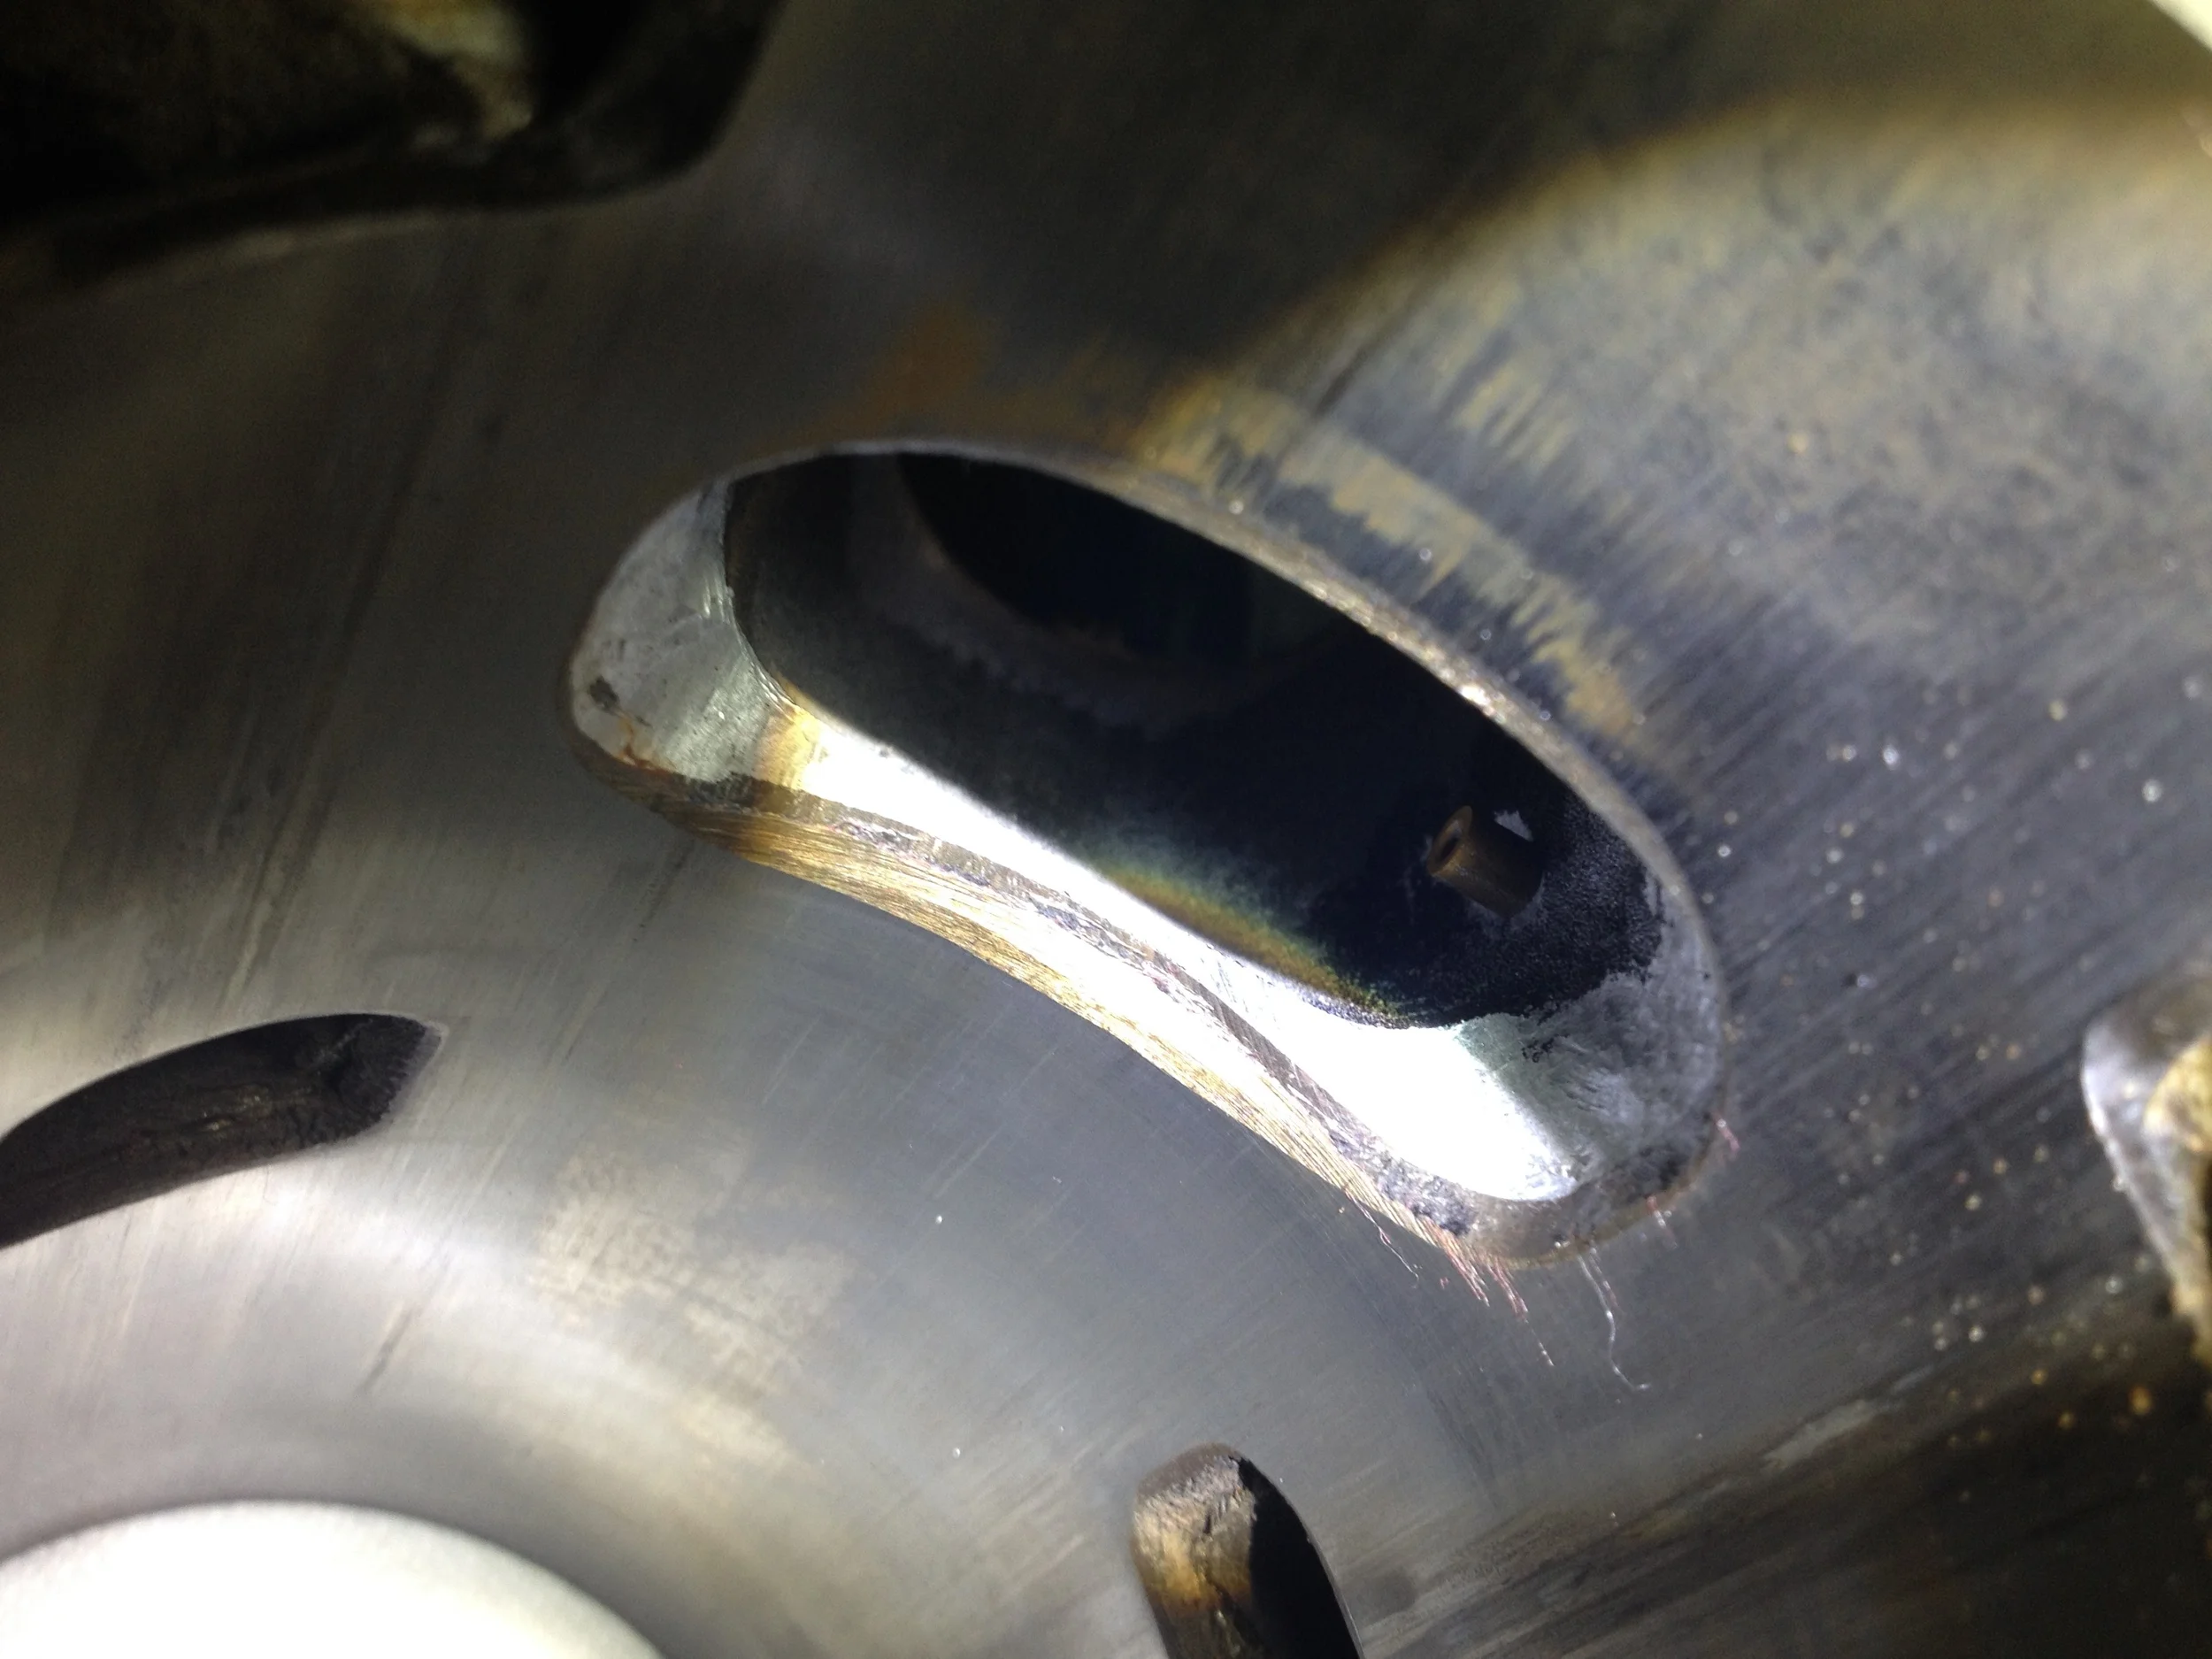
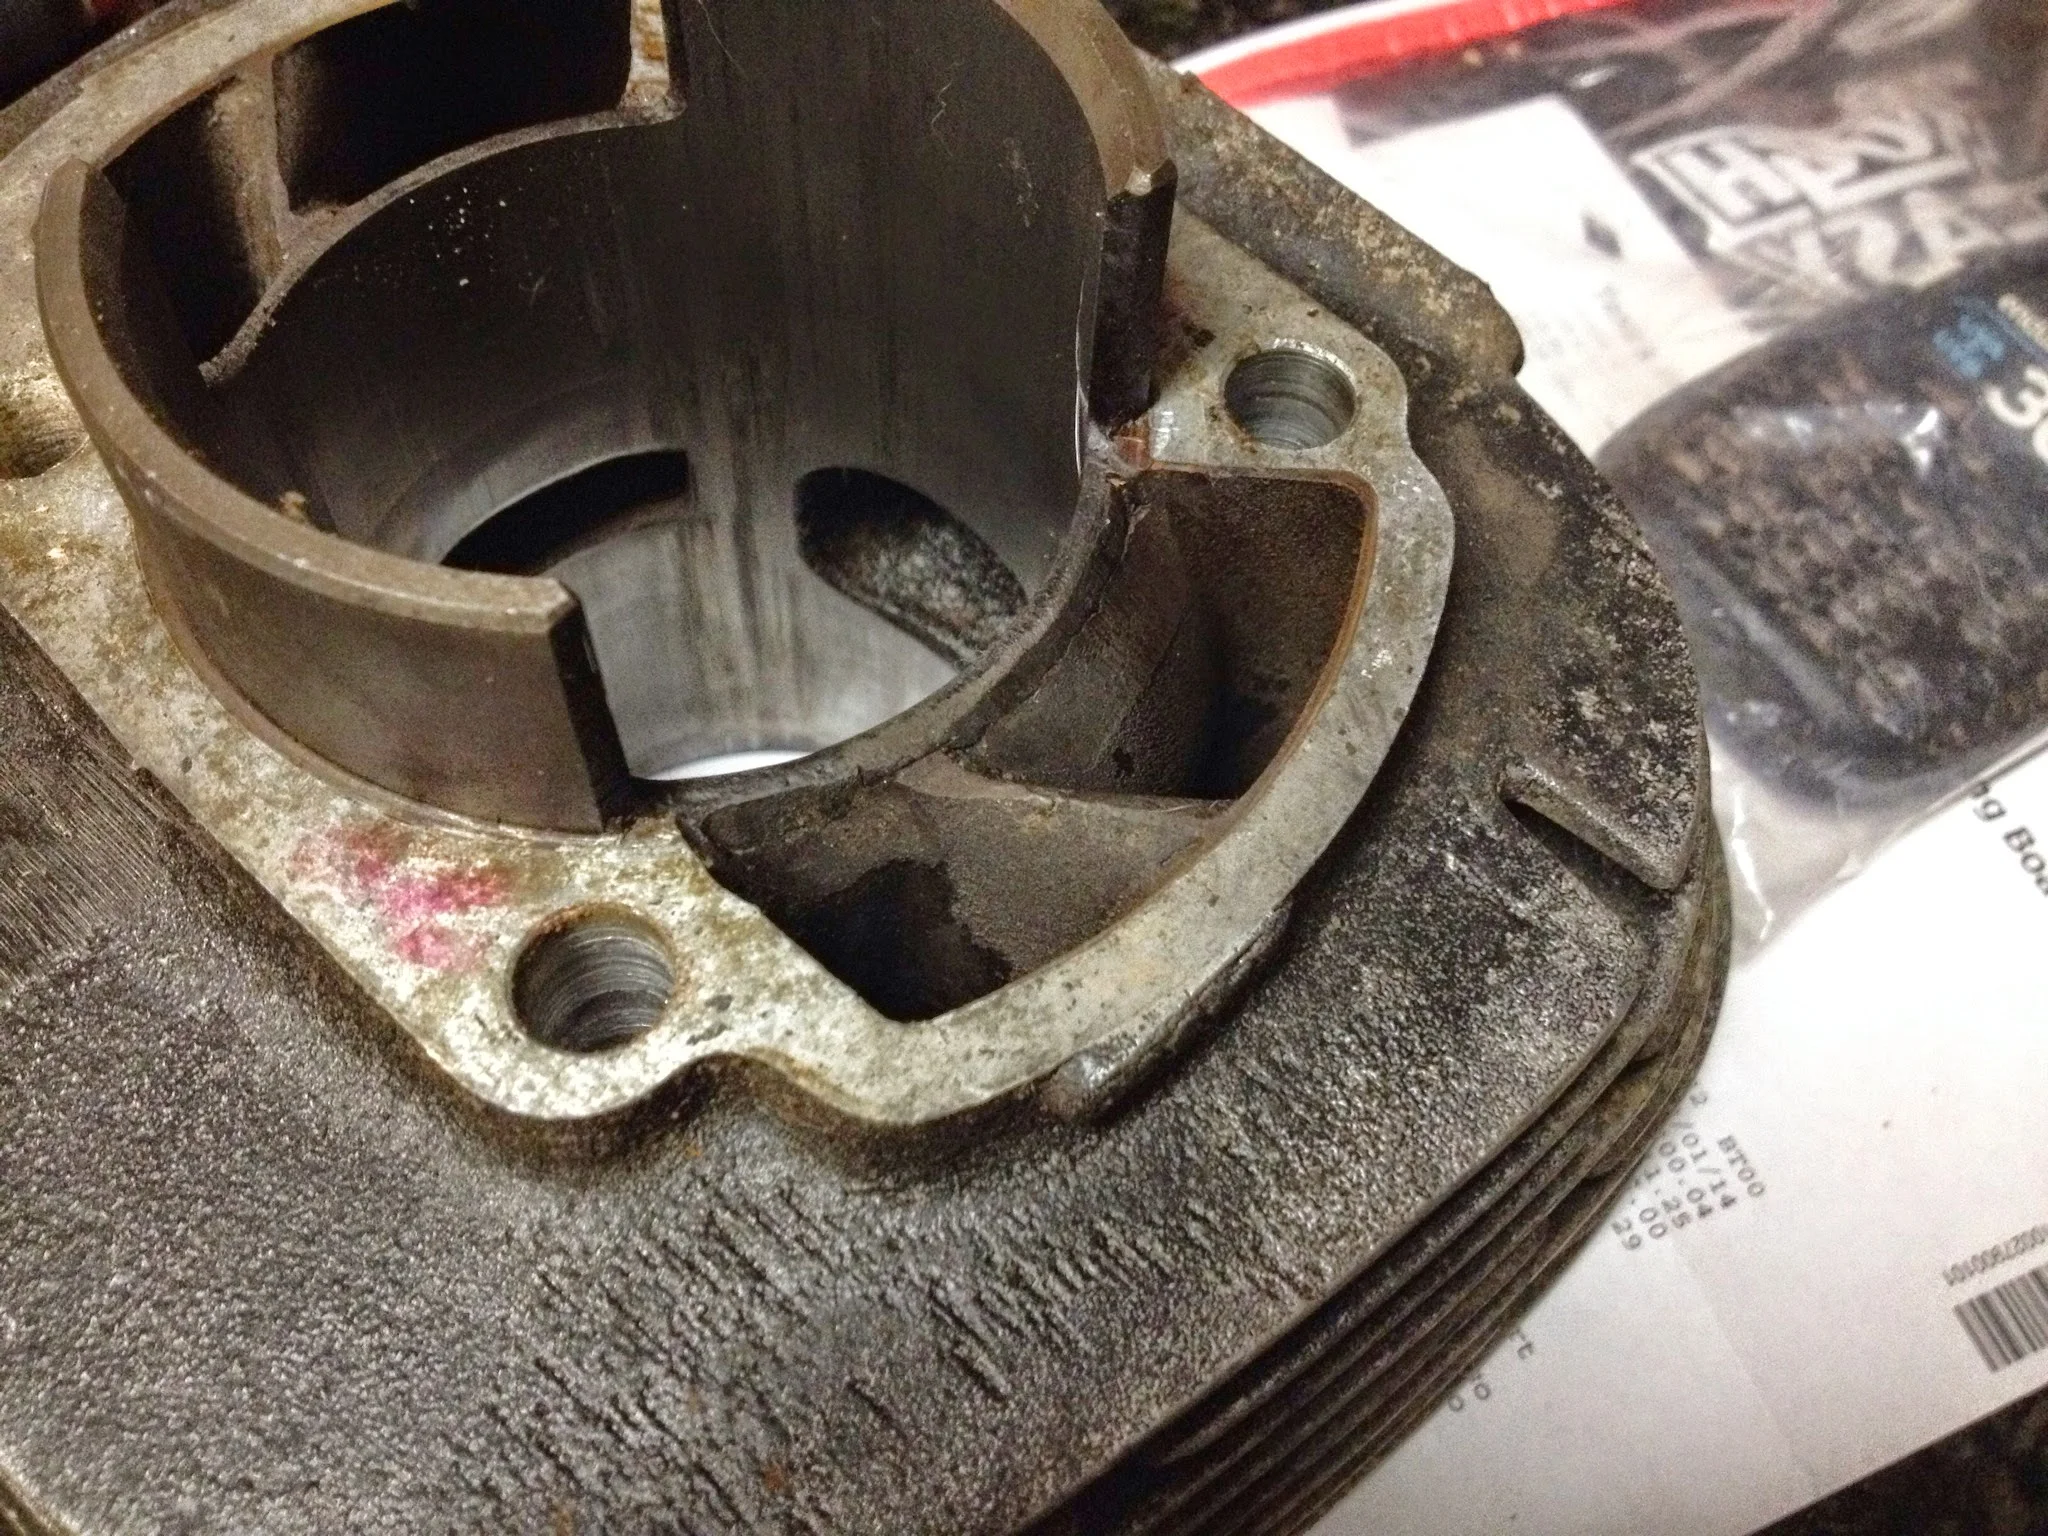
In the photo to the right you can see a thin dark "stained" area for lack of a better work on the flat cylinder surface. To contextualize, the cylinder is upside down in this pic. When installed on the motor, this surface is in contact with the crankcase. This dark stained area over hangs in to the crank case, disrupting and obstructing a portion of the flow. This part is easily ground away to port match the cylinder to the cases.

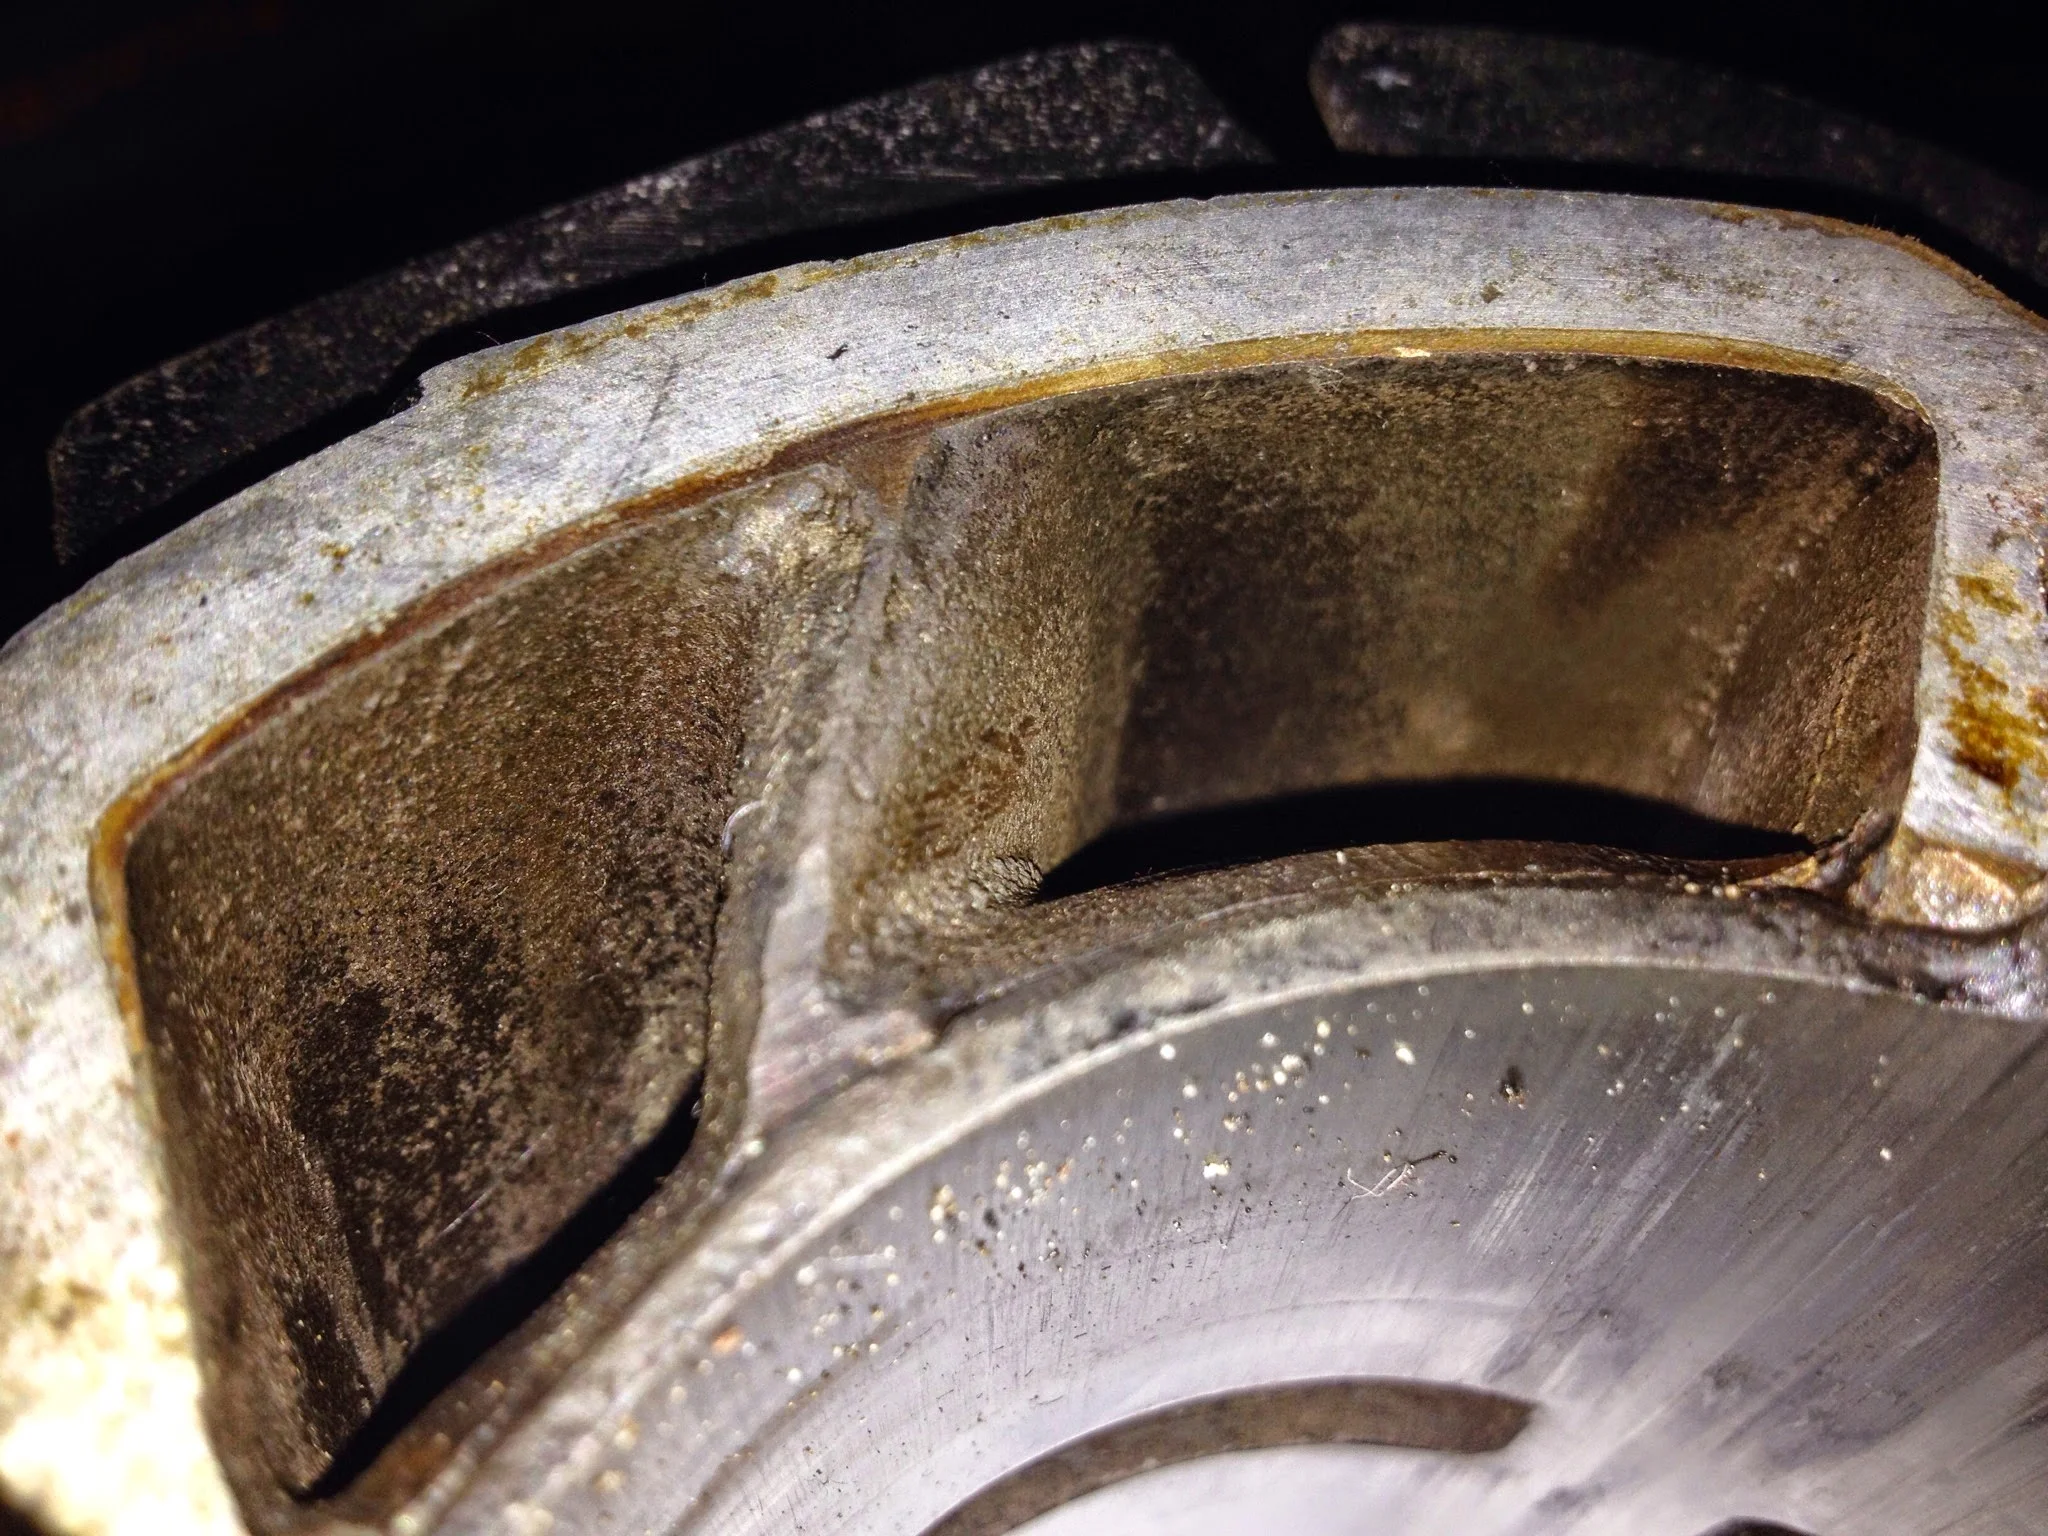
Why port/case matching helps. The person before me filed down the center divider to smooth air flow.

If you look closely in the center of the picture where the case (grey silver color) comes in contact with the port (the two black/brown open holes) you can see the difference in surfaces.
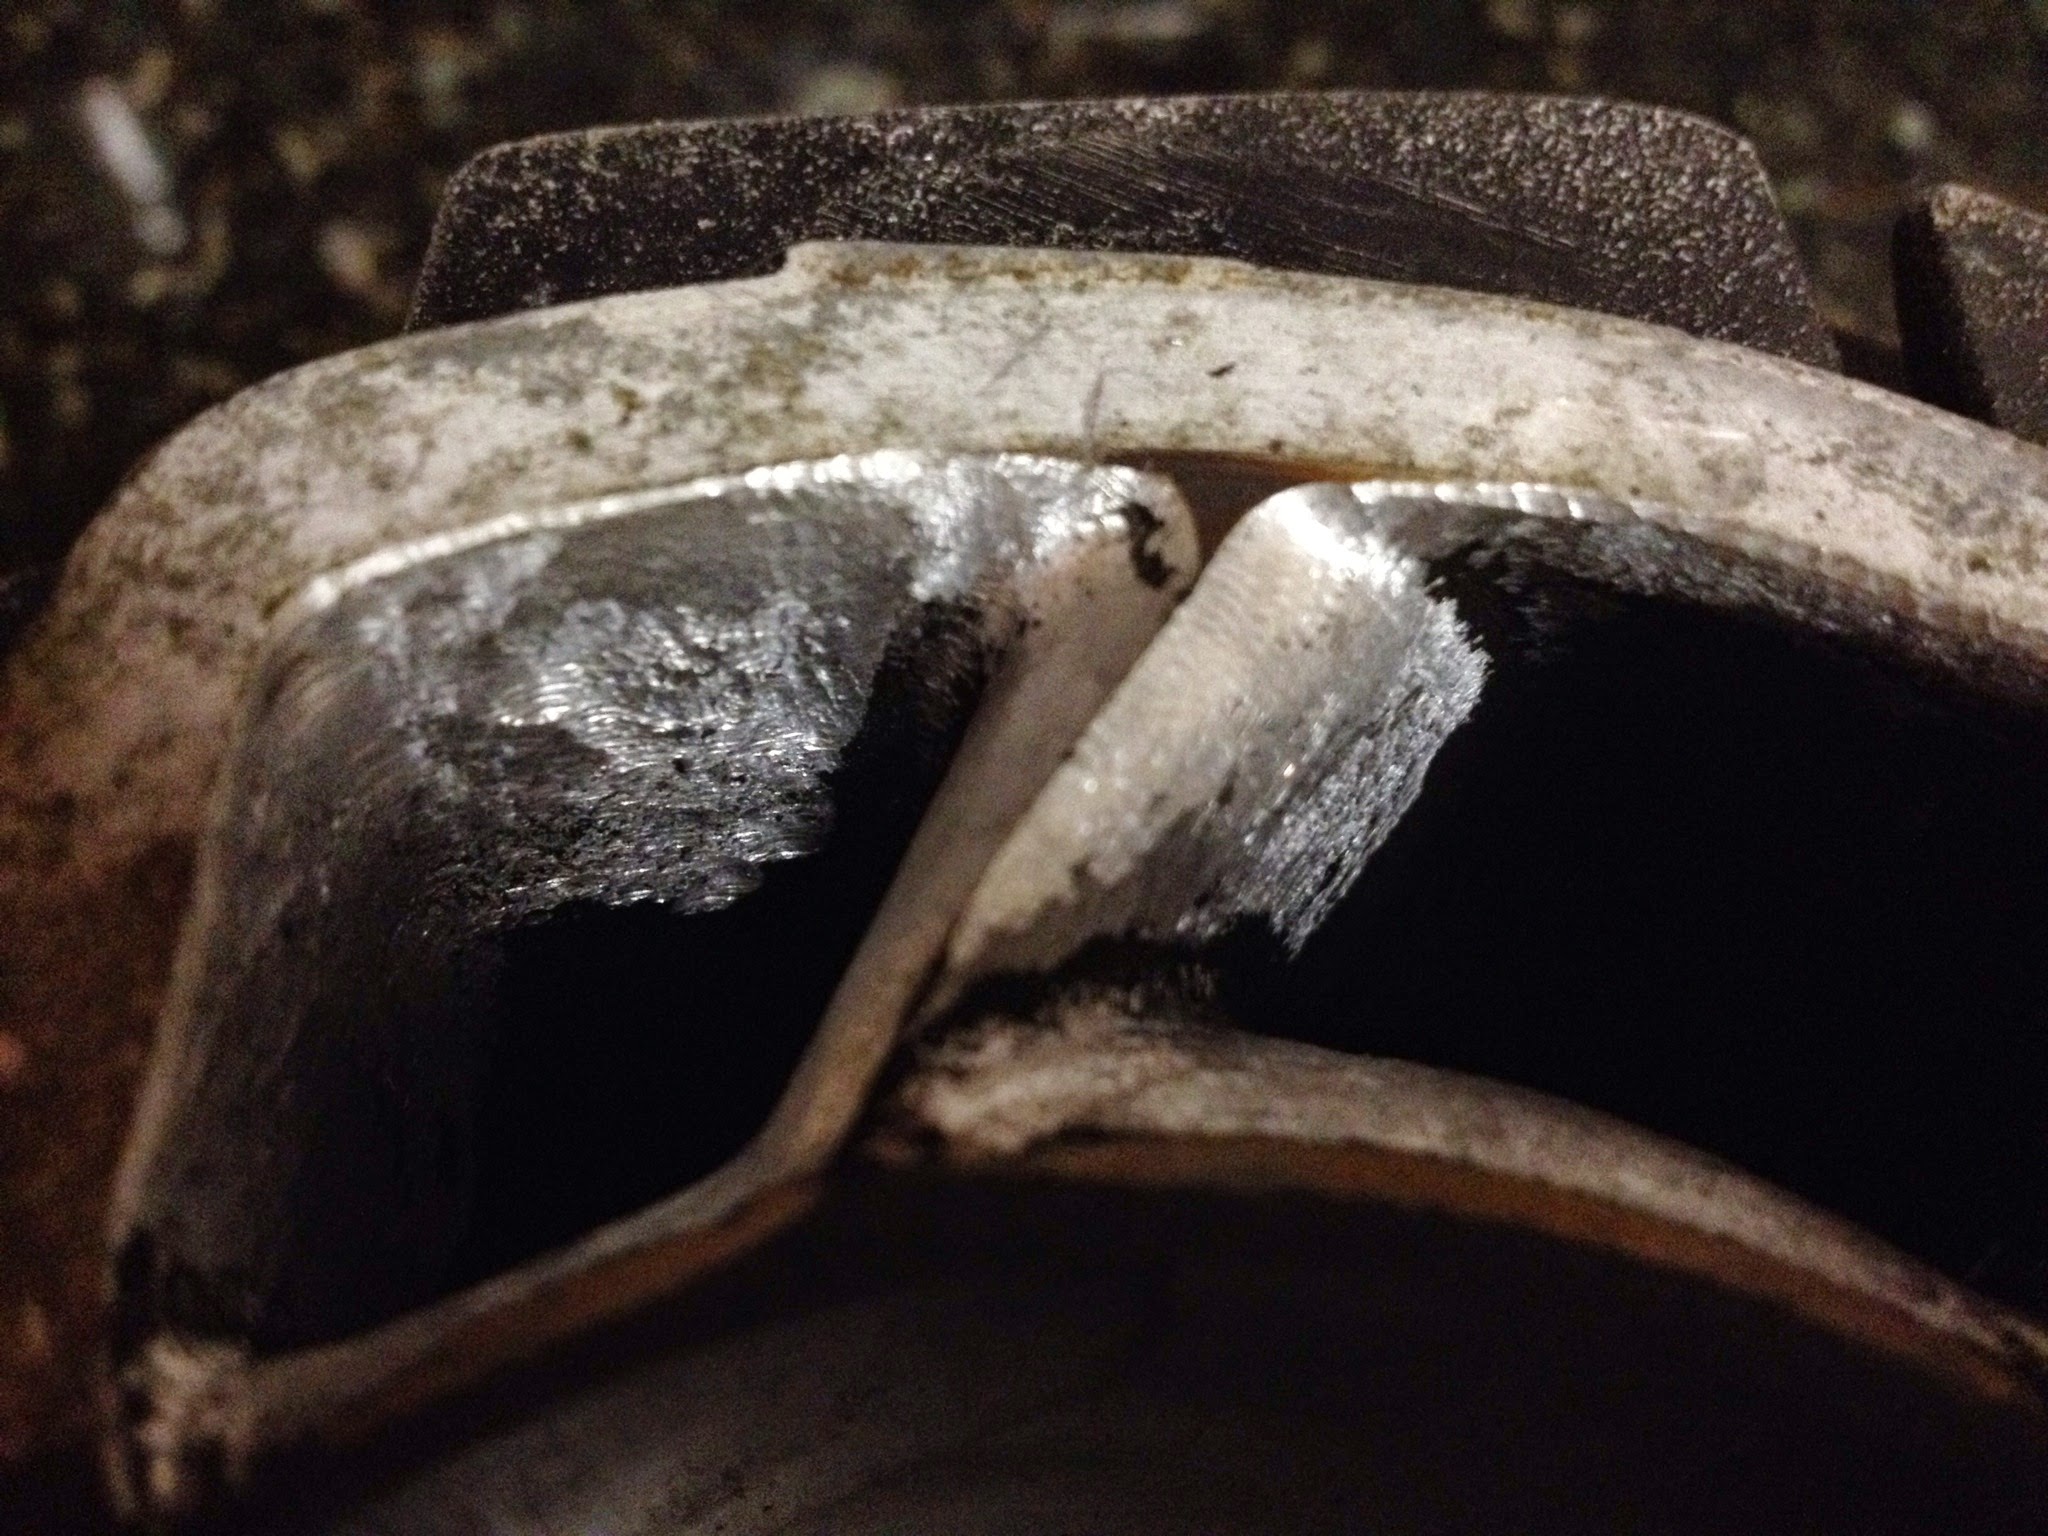
Close up of the surface and material removed with a carbide bit to match the transfer port to the case. This will be smoothed with sand paper and then be finished. You can also see the scoring in the cylinder wall, which is why it needs to be bored.
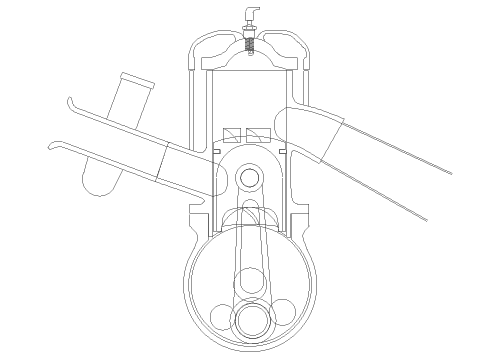
The engine manages to do all this with nothing but a piston, the changes the piston creates in air pressure, and it’s path of travel up and down the cylinder. Piston Port induction. The earliest, simplest, (most inefficient) form of 2 stroke awesomeness. There’s some good info online about how they work, but here’s a good animation from Hooniverse.com
So porting…why not make the port as big as possible, polish it mirror smooth, and profit?
That’s pretty much the plan on 4 stroke engines (pretty much everything today) with the caveat being that if you port too much, the port walls are too thin. Behind the port walls of almost every 4 stroke engine- water jackets that transport coolant. If the ported wall is too thin you can get a leak, and that’s all sorts of bad news.
For 2 strokes…since the efficiency of the engine relies solely on the volume of air the piston is able to move in 1 stroke, if you make the ports too large, the gasses will not move with adequate velocity. The whole deal with two stroke porting is balancing velocity and volume. The other mess that comes in to play is port “timing,” or when ports open in relation to one another and for how many degrees of the rotation of the crankshaft. There are some good DT1 port maps out there based on the DT1MX, which came with a higher performance cylinder. Doing that level of porting requires a lot of time, skill, and faith. All of which I have…but I have it in baby steps.
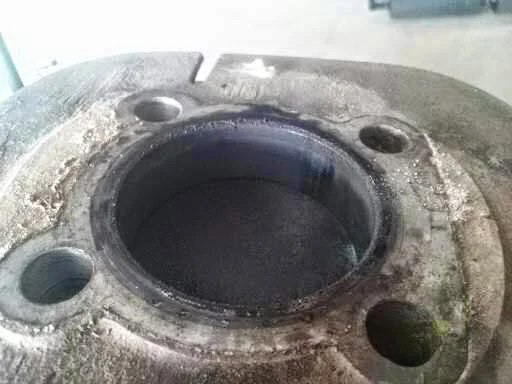
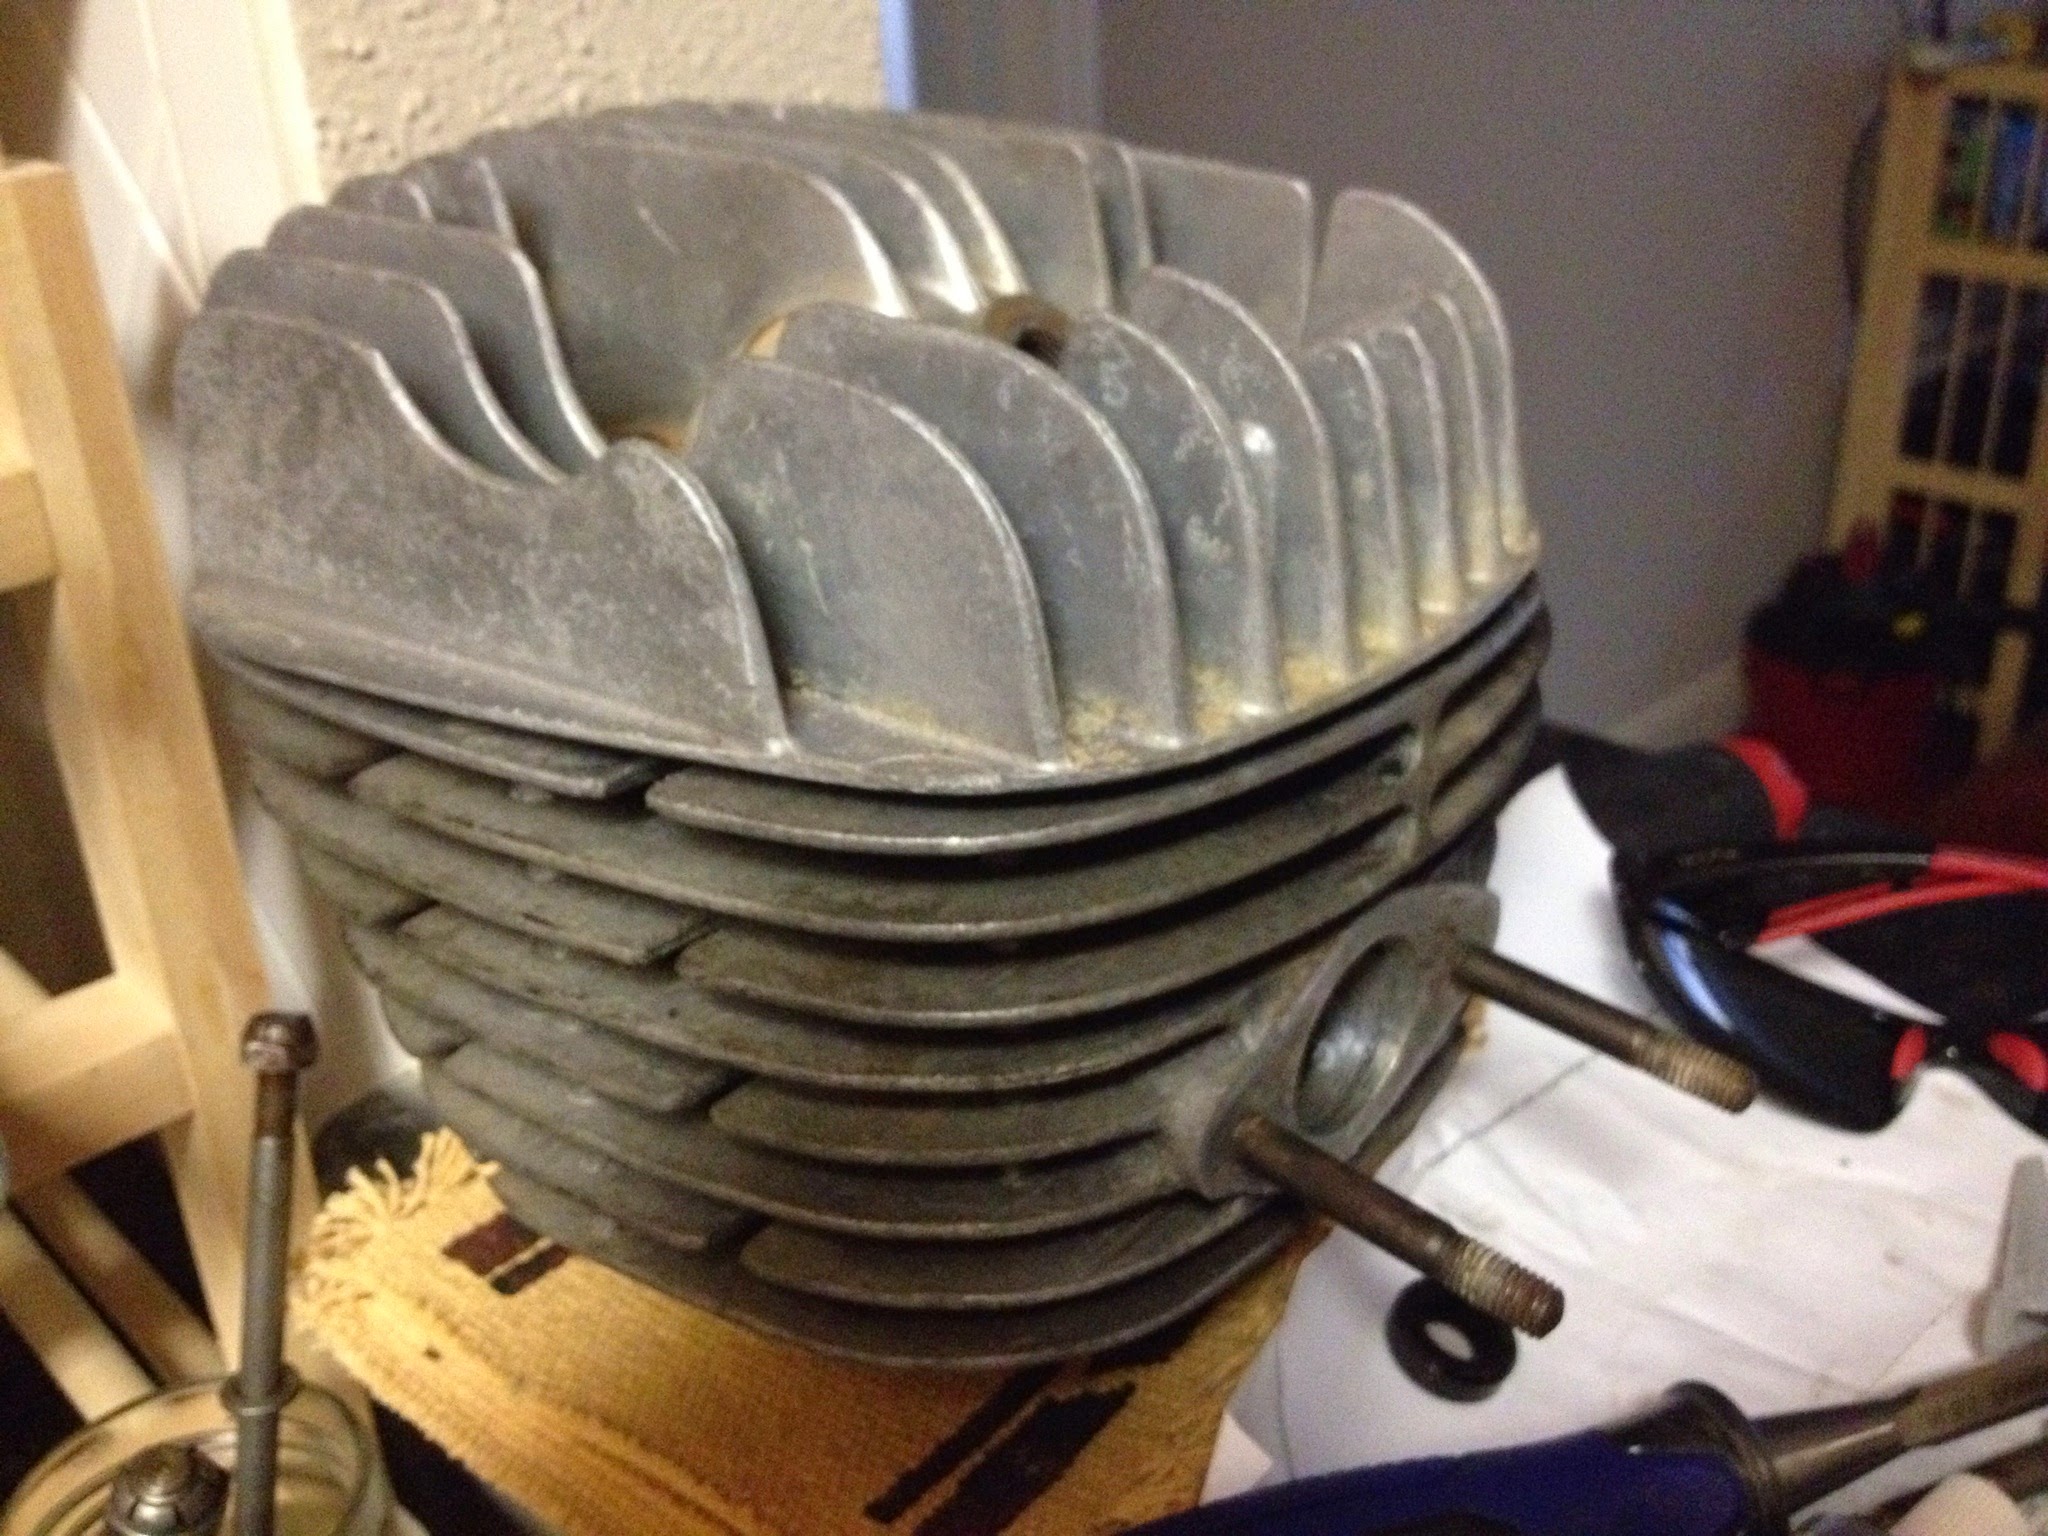
How it looked when it was first opened...
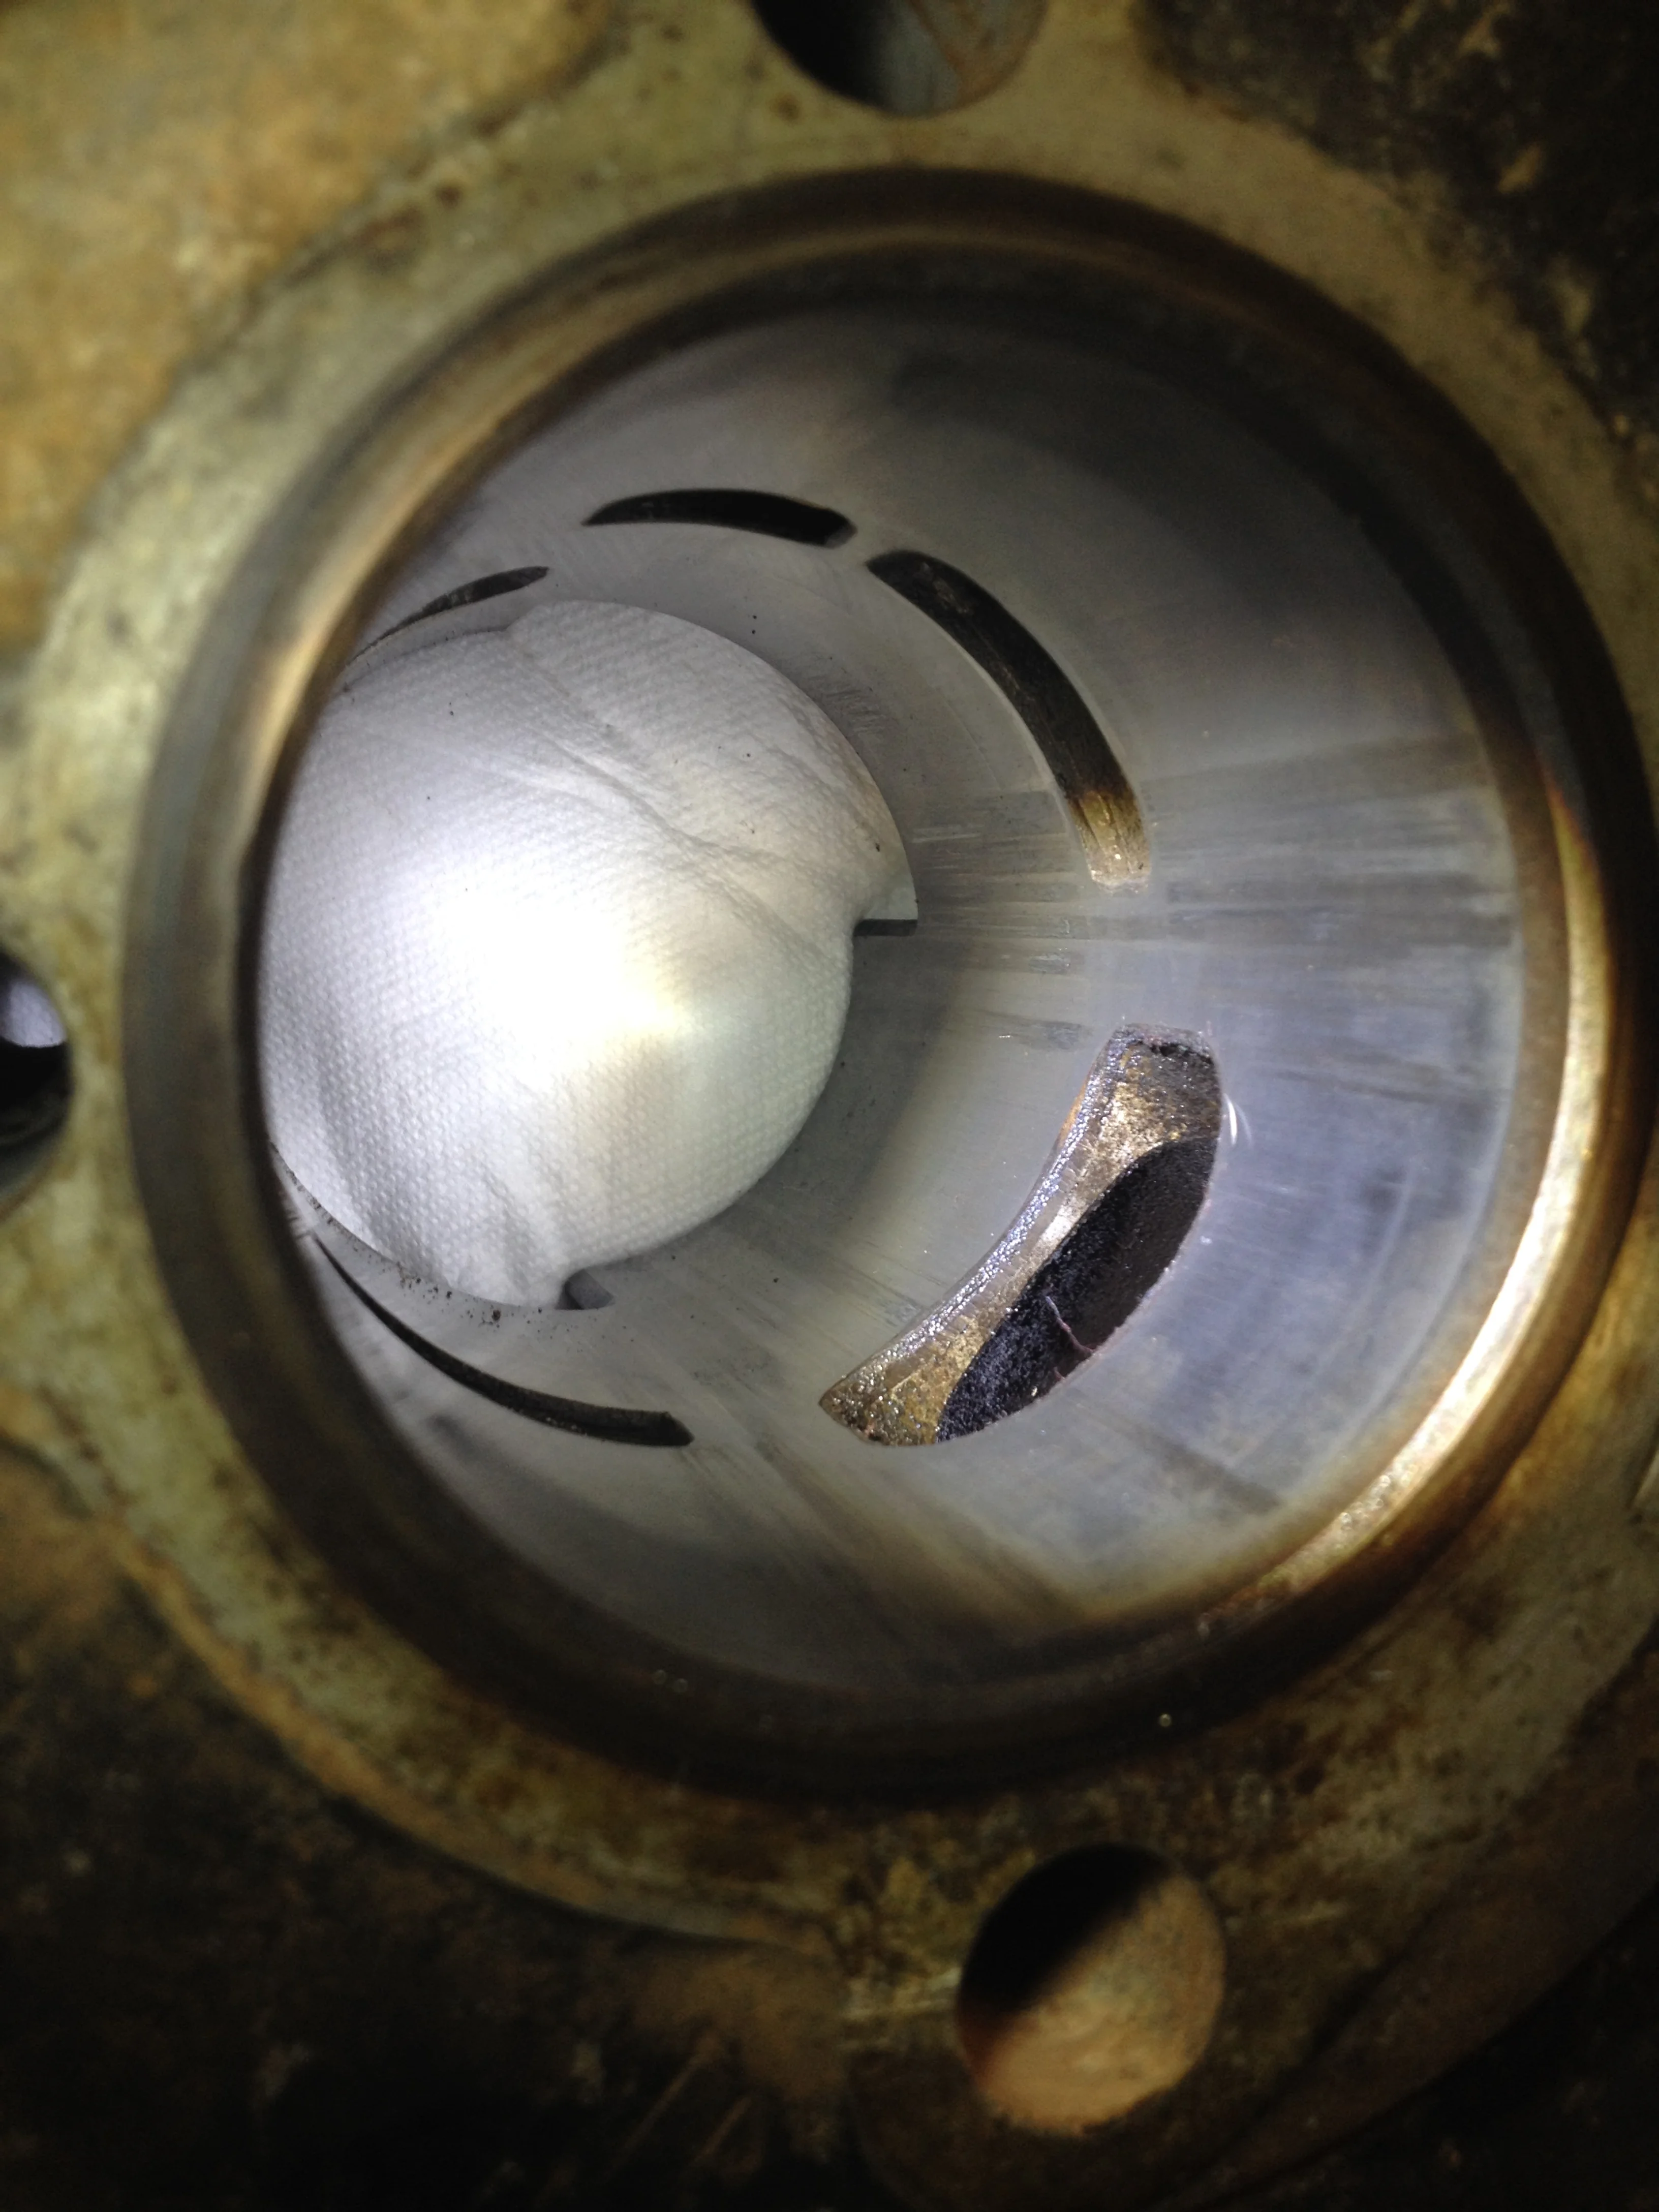
I was going to buy a new cylinder for this engine anyway. The kid before me ran this thing without oil (he tried…he spliced the oil line in 3 places with 3 different kinds of tubing, and he did put 10w30 in the oil tank (not the right oil, kid…)) and the piston did some damage to the cylinder wall. I broke out the dremel to begin smoothing out the transfer ports from the work that was done before. I feel like I did well. I need to do hand sanding, but I didn’t take much off and smoothed transitions where possible.
After looking at prices of cylinders on ebay (and their terrible condition) I decided to seek out a machine shop around Houston that can do the work. Harold’s machine came up as the place from a couple of recommendations, and as of today that is where the cylinder sits.
I’ll need to get a piston before he can finish the work, so there is that. But once done, I can finish the ports by hand, powder coat, and put it all together.
It has dawned on me that I have nowhere to start this thing around here, living in a small apartment. It may have to be transported to San Antonio in pieces and assembled there.