Birth of Motoworks
I’d been waiting for a few reasons. I’d gotten a good routine and method down for powder coating. I felt good about the procedure, even with all my limitations (tiny apartment, small patio. 1 gallon air compressor, small oven that I also cook my food in)The weather forecast was good. Sunny, low humidity. And I had nothing else to do.
I started by testing out my powder coating stand that I’d build last night. Without a doubt, the hardest part about doing the wheel was the fact that I didn’t have anywhere to set the oven rack outside of the oven. These things I am coating are hung from the wire rack with wire…so setting it down isn’t an option. I built a stand out of some 1x2s. Made my life 1000x easier.
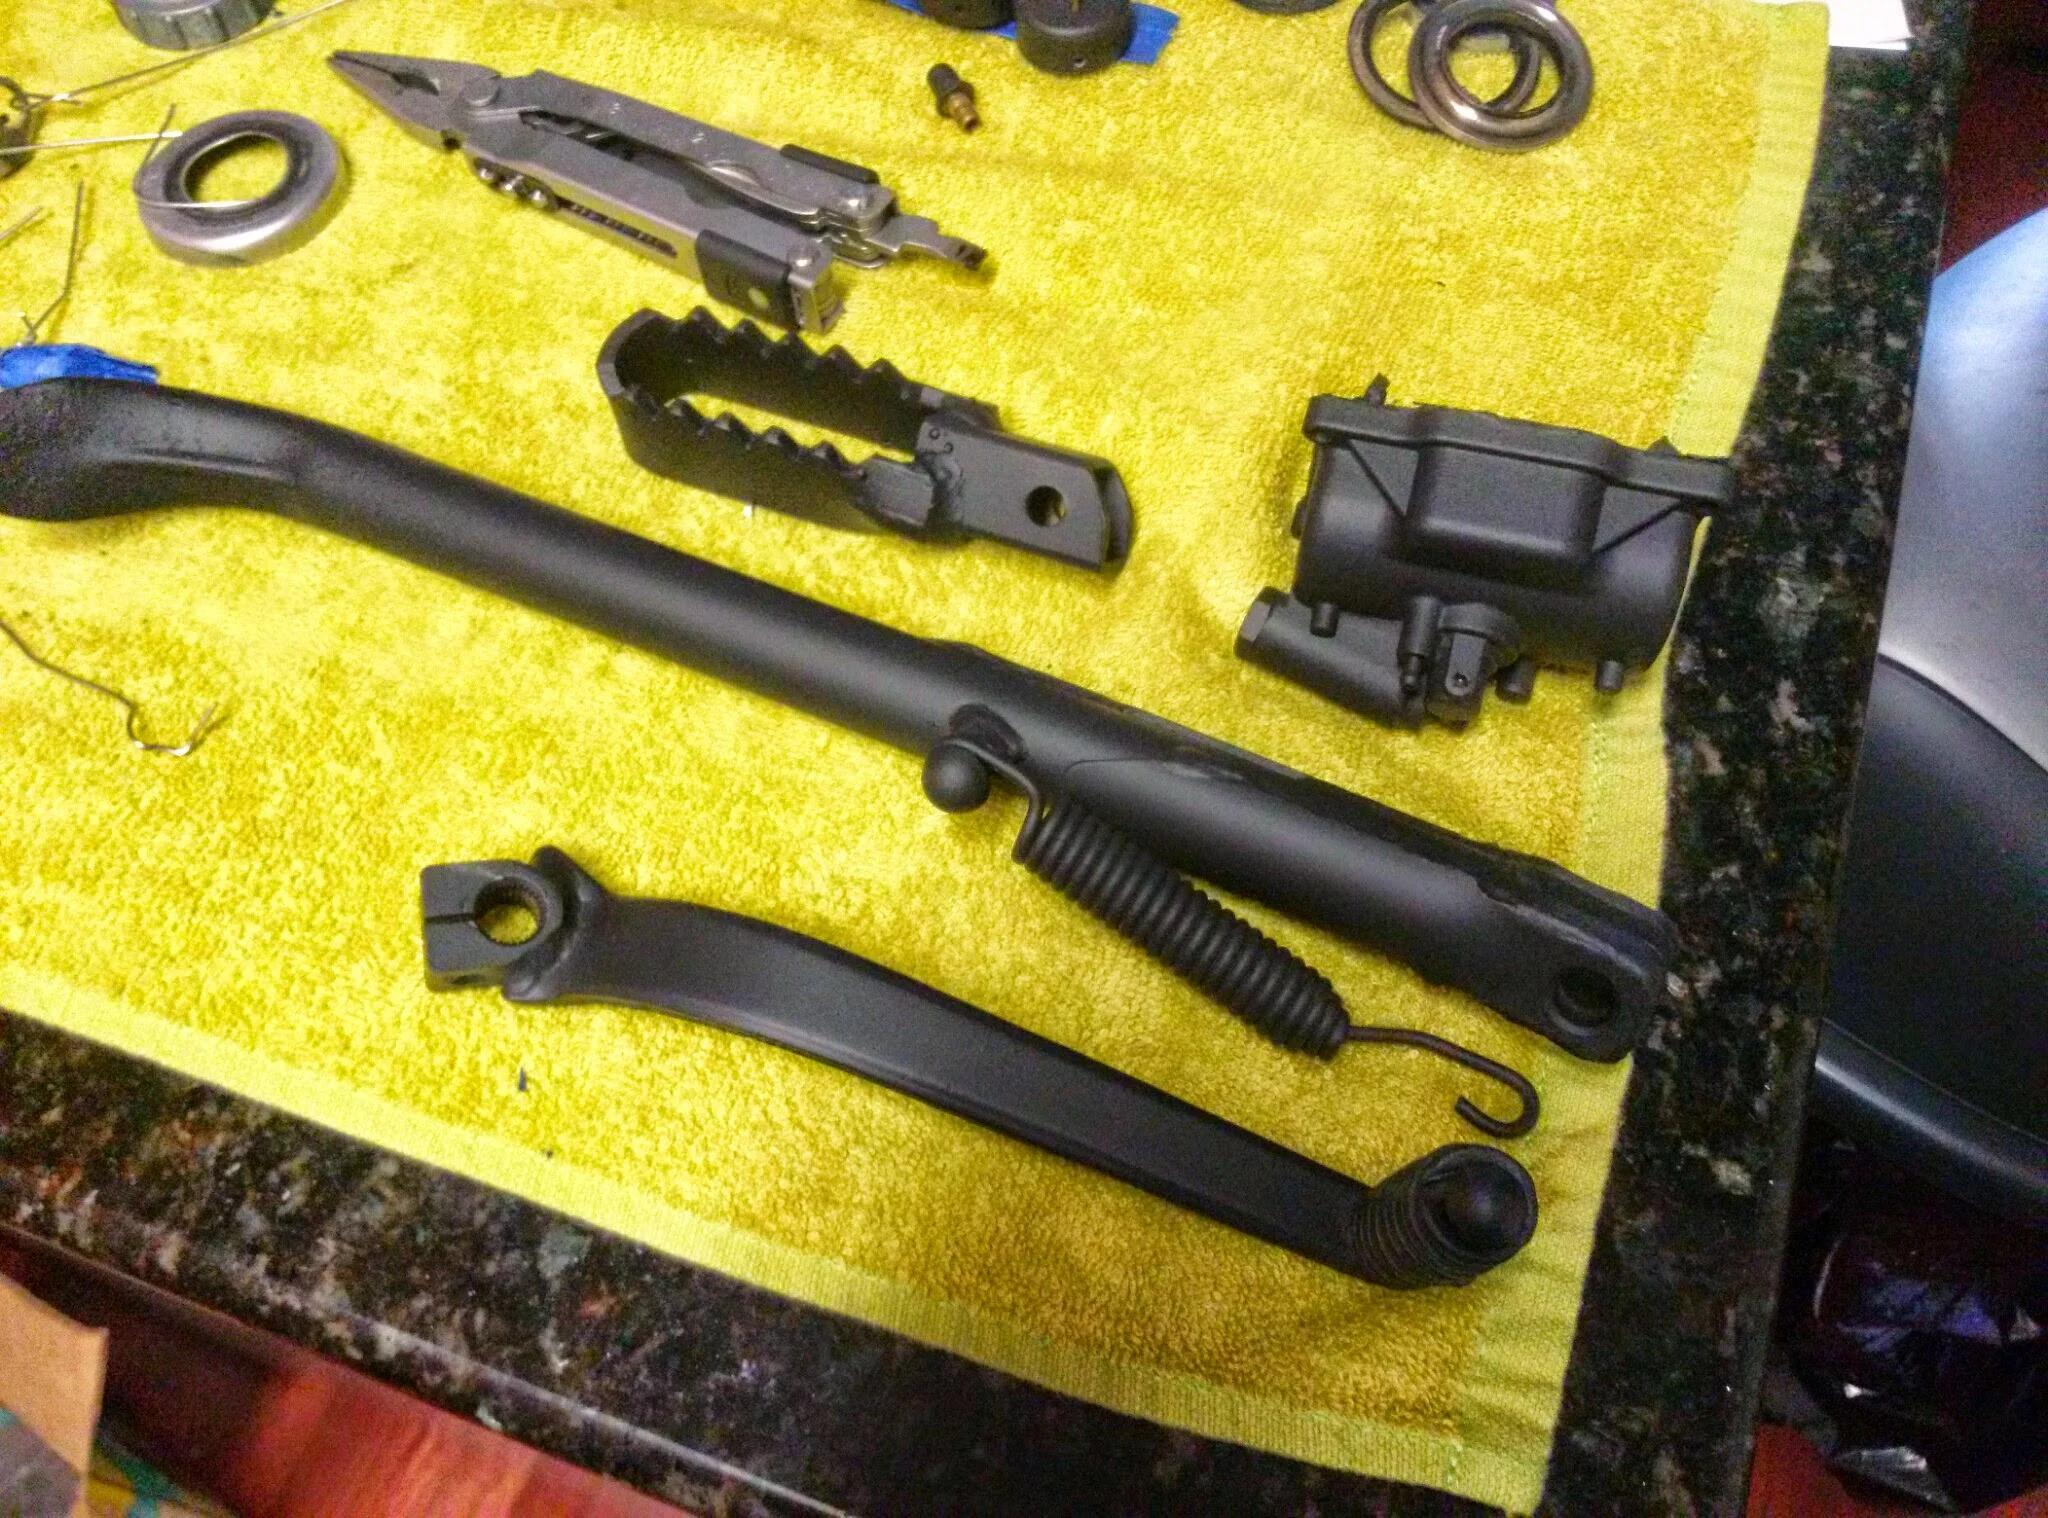
I put the flat black powder jug on the gun and got around to coating some parts I’d been meaning to for a long time. Brake lever, kick starter, shifter, brake rod, and the new tw200 triple trees. I also decided to powder coat the carburetor. The dt2 came with a black carburetor and I’d never seen such a thing. I liked it. I liked it so much that I set it in a can of b-12 chemdip and left the state for a month. When I came back…the carburetor wasn’t in a solid state anymore. So shout out to B-12 Chemdip for being some serious stuff.

Top cap on the carb cooked too long
Carb was the most intensive pre-coating work. So many hole and passages to plug. Floats have to come out, choke lever, gaskets, o-rings. It’s a pain to tape it off but I got there after a while.
I also set aside all the small parts that I wanted blue. Fork bolts, carb bowl screws, brake return spring, etc. I had a nice operation going in the morning. By early afternoon I had some results to be proud of.
Big mistake #1- I wanted the throttle slide cover that threads on to the top of the carb to be blue. All was going well. It was baking with all the other blue parts, but due to its thinness, it cooked faster than all the other parts and I didn’t take not. The finish got bubbly and nasty. One day I’ll strip it and recoat it. It will be hard to see when it’s on the bike, and I didn’t have the heart to re-do it then.
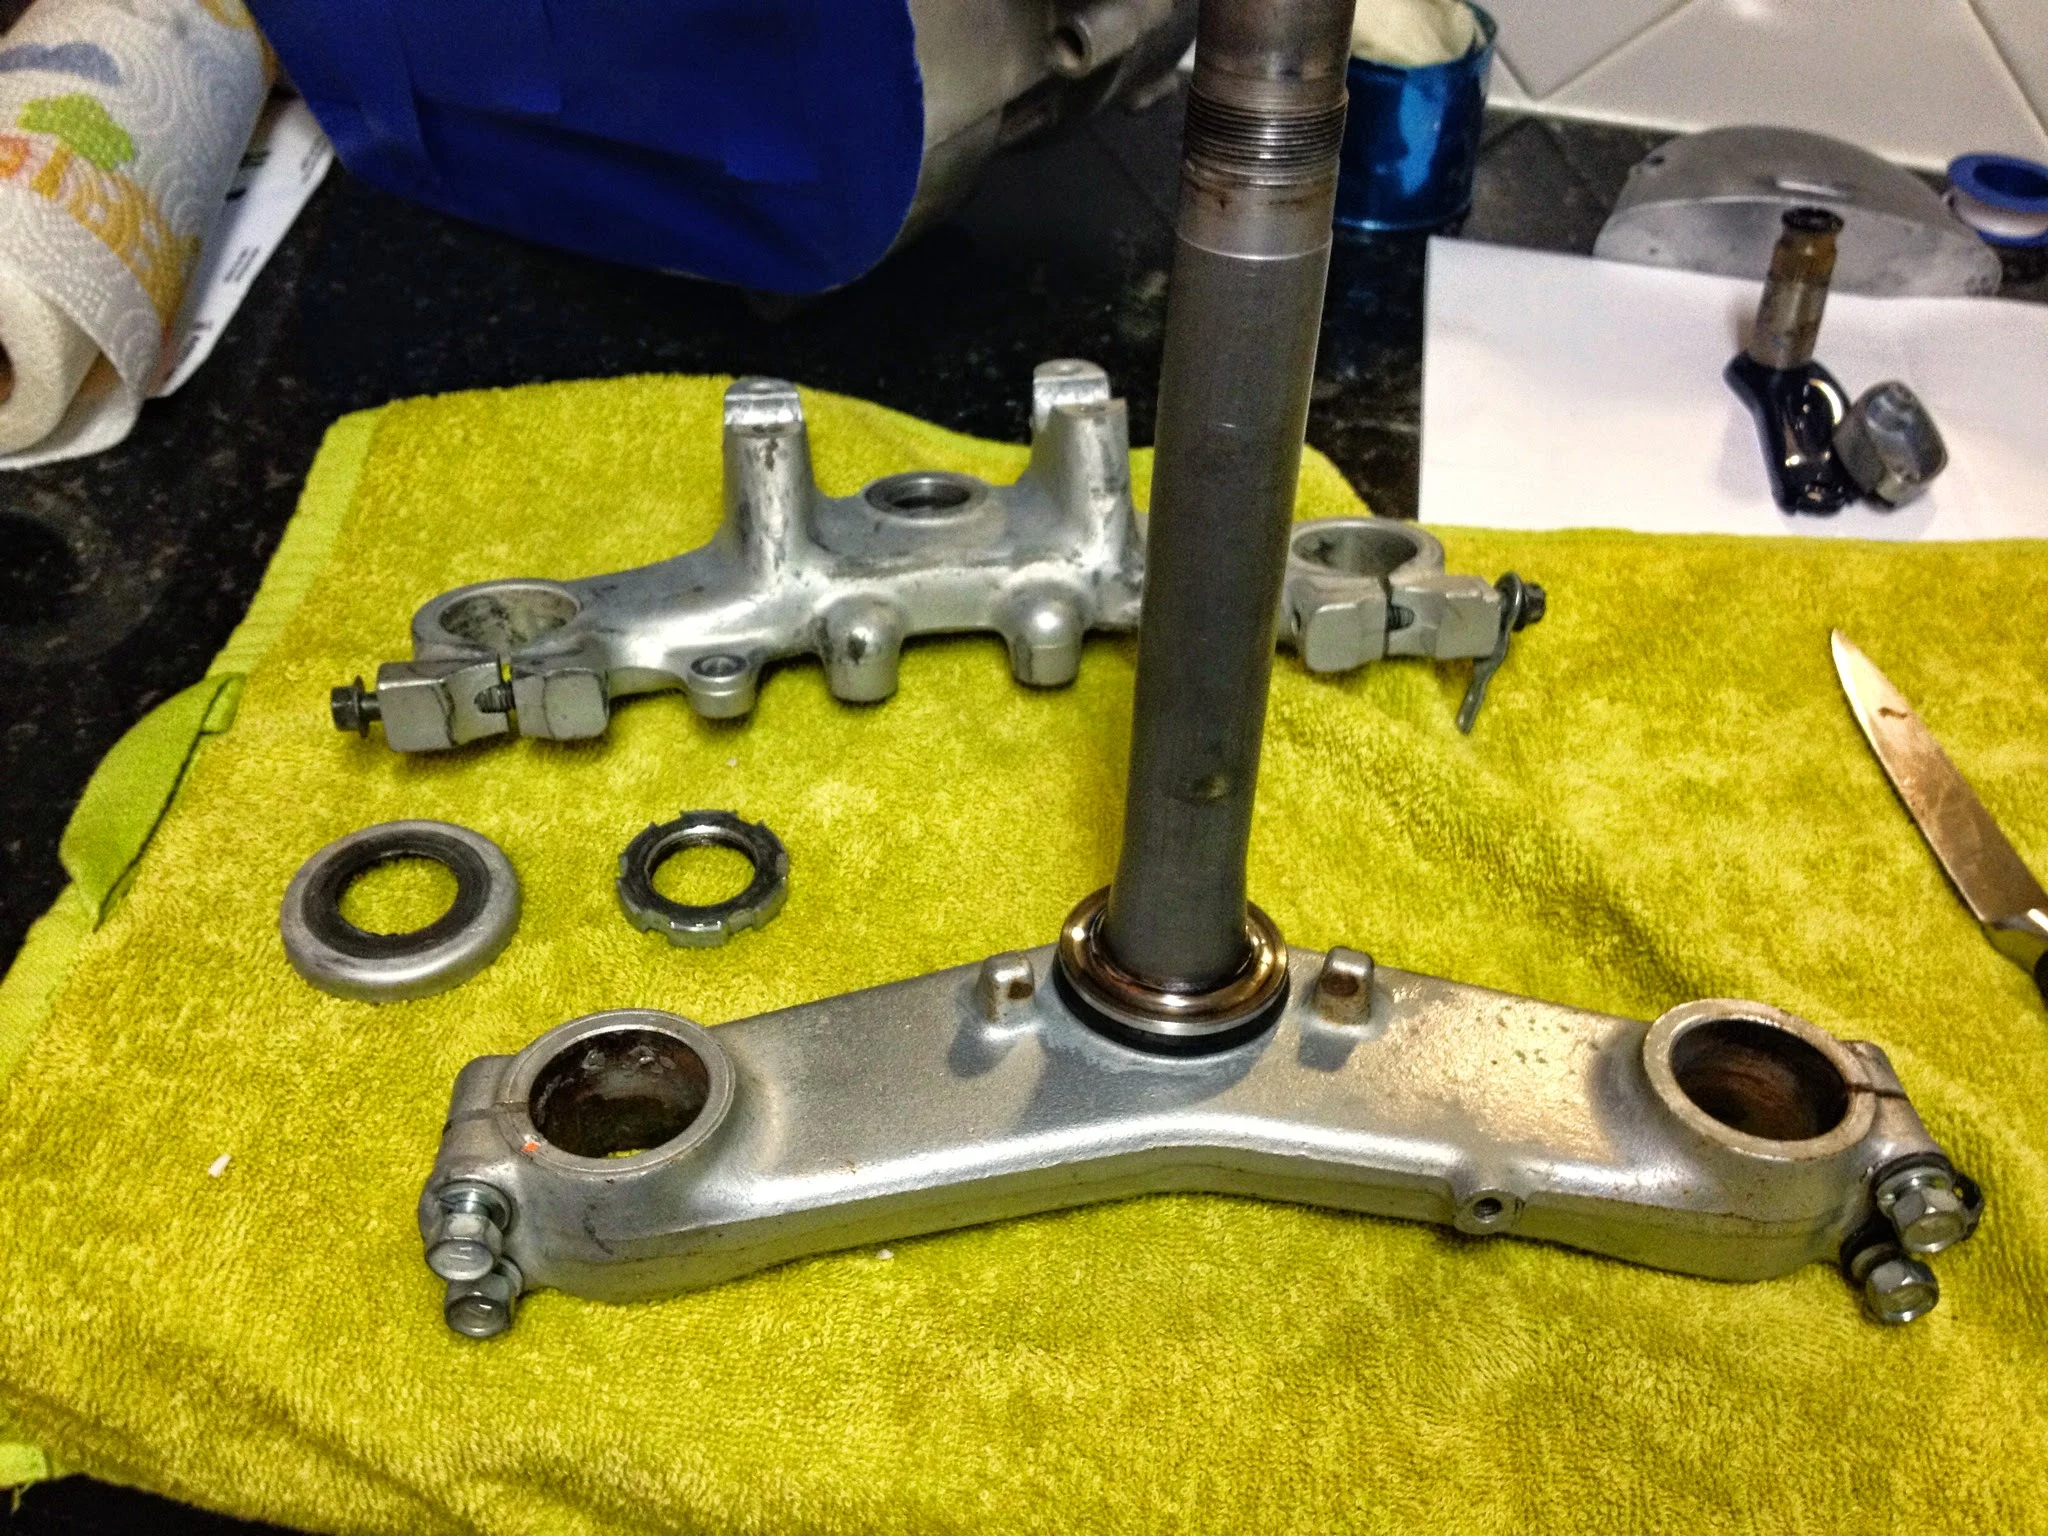
TW200 trees before
Really like how the triple trees came out. They look awesome with the blue bolts. Did some measuring and found out the lower race on the triple tree is a 30mm Inside Diameter…that means I have to order a different $25 bearing. But at least it’s out there, and it’s not one that’s impossible to find.
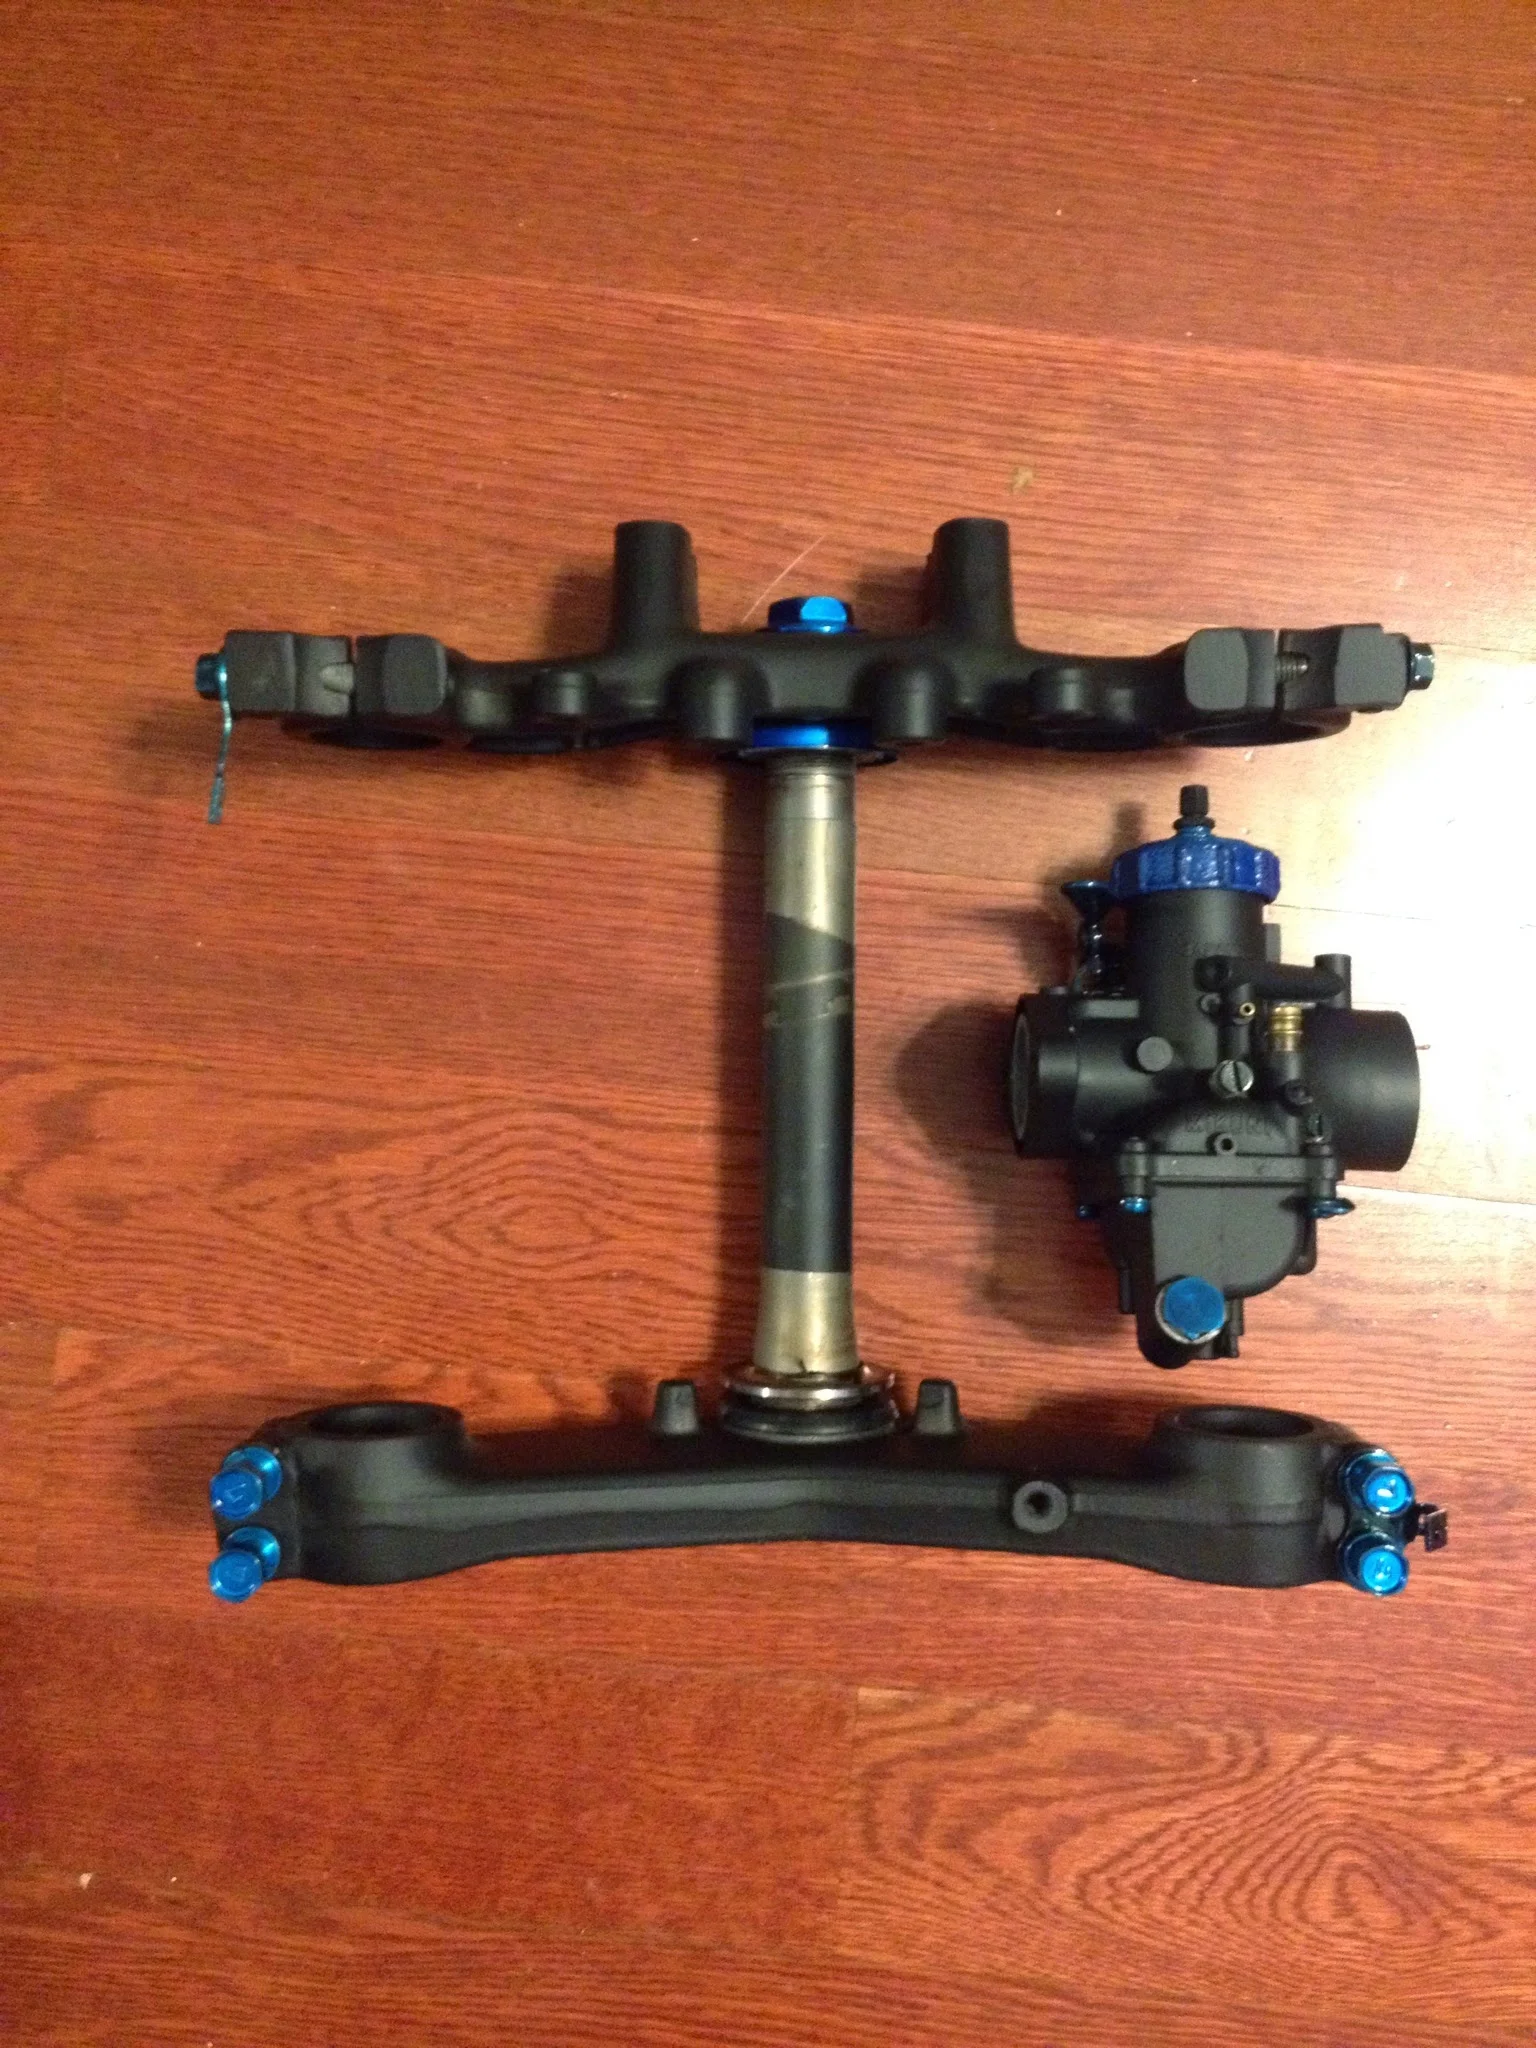
Black and blue
Also scored a deal on eBay for some 1990 YZ80 forks. The Yamaha YZ series is the offroad/motocross style bike. Back in 1990, and on this tiny bike…the fork legs were 33mm. So they’ll bolt in to my triple trees, and they are designed for a disc brake. I really want a disc brake for no real reason.
Bad news is that I’ll need to lace the YZ80 hub (which I’ll have to buy) to a TW200 front rim (which I’ll have to buy) and I’m not even 100% sure that will work. Might have been a better idea to just get an old school YZ80 front end and bolt that on. I may end up not being able to make this work, and so I’ll have to go with tw200 forks if that’s the case. I really want the fat 18x2.50 rim up front, and the same in the back. Developing situation.
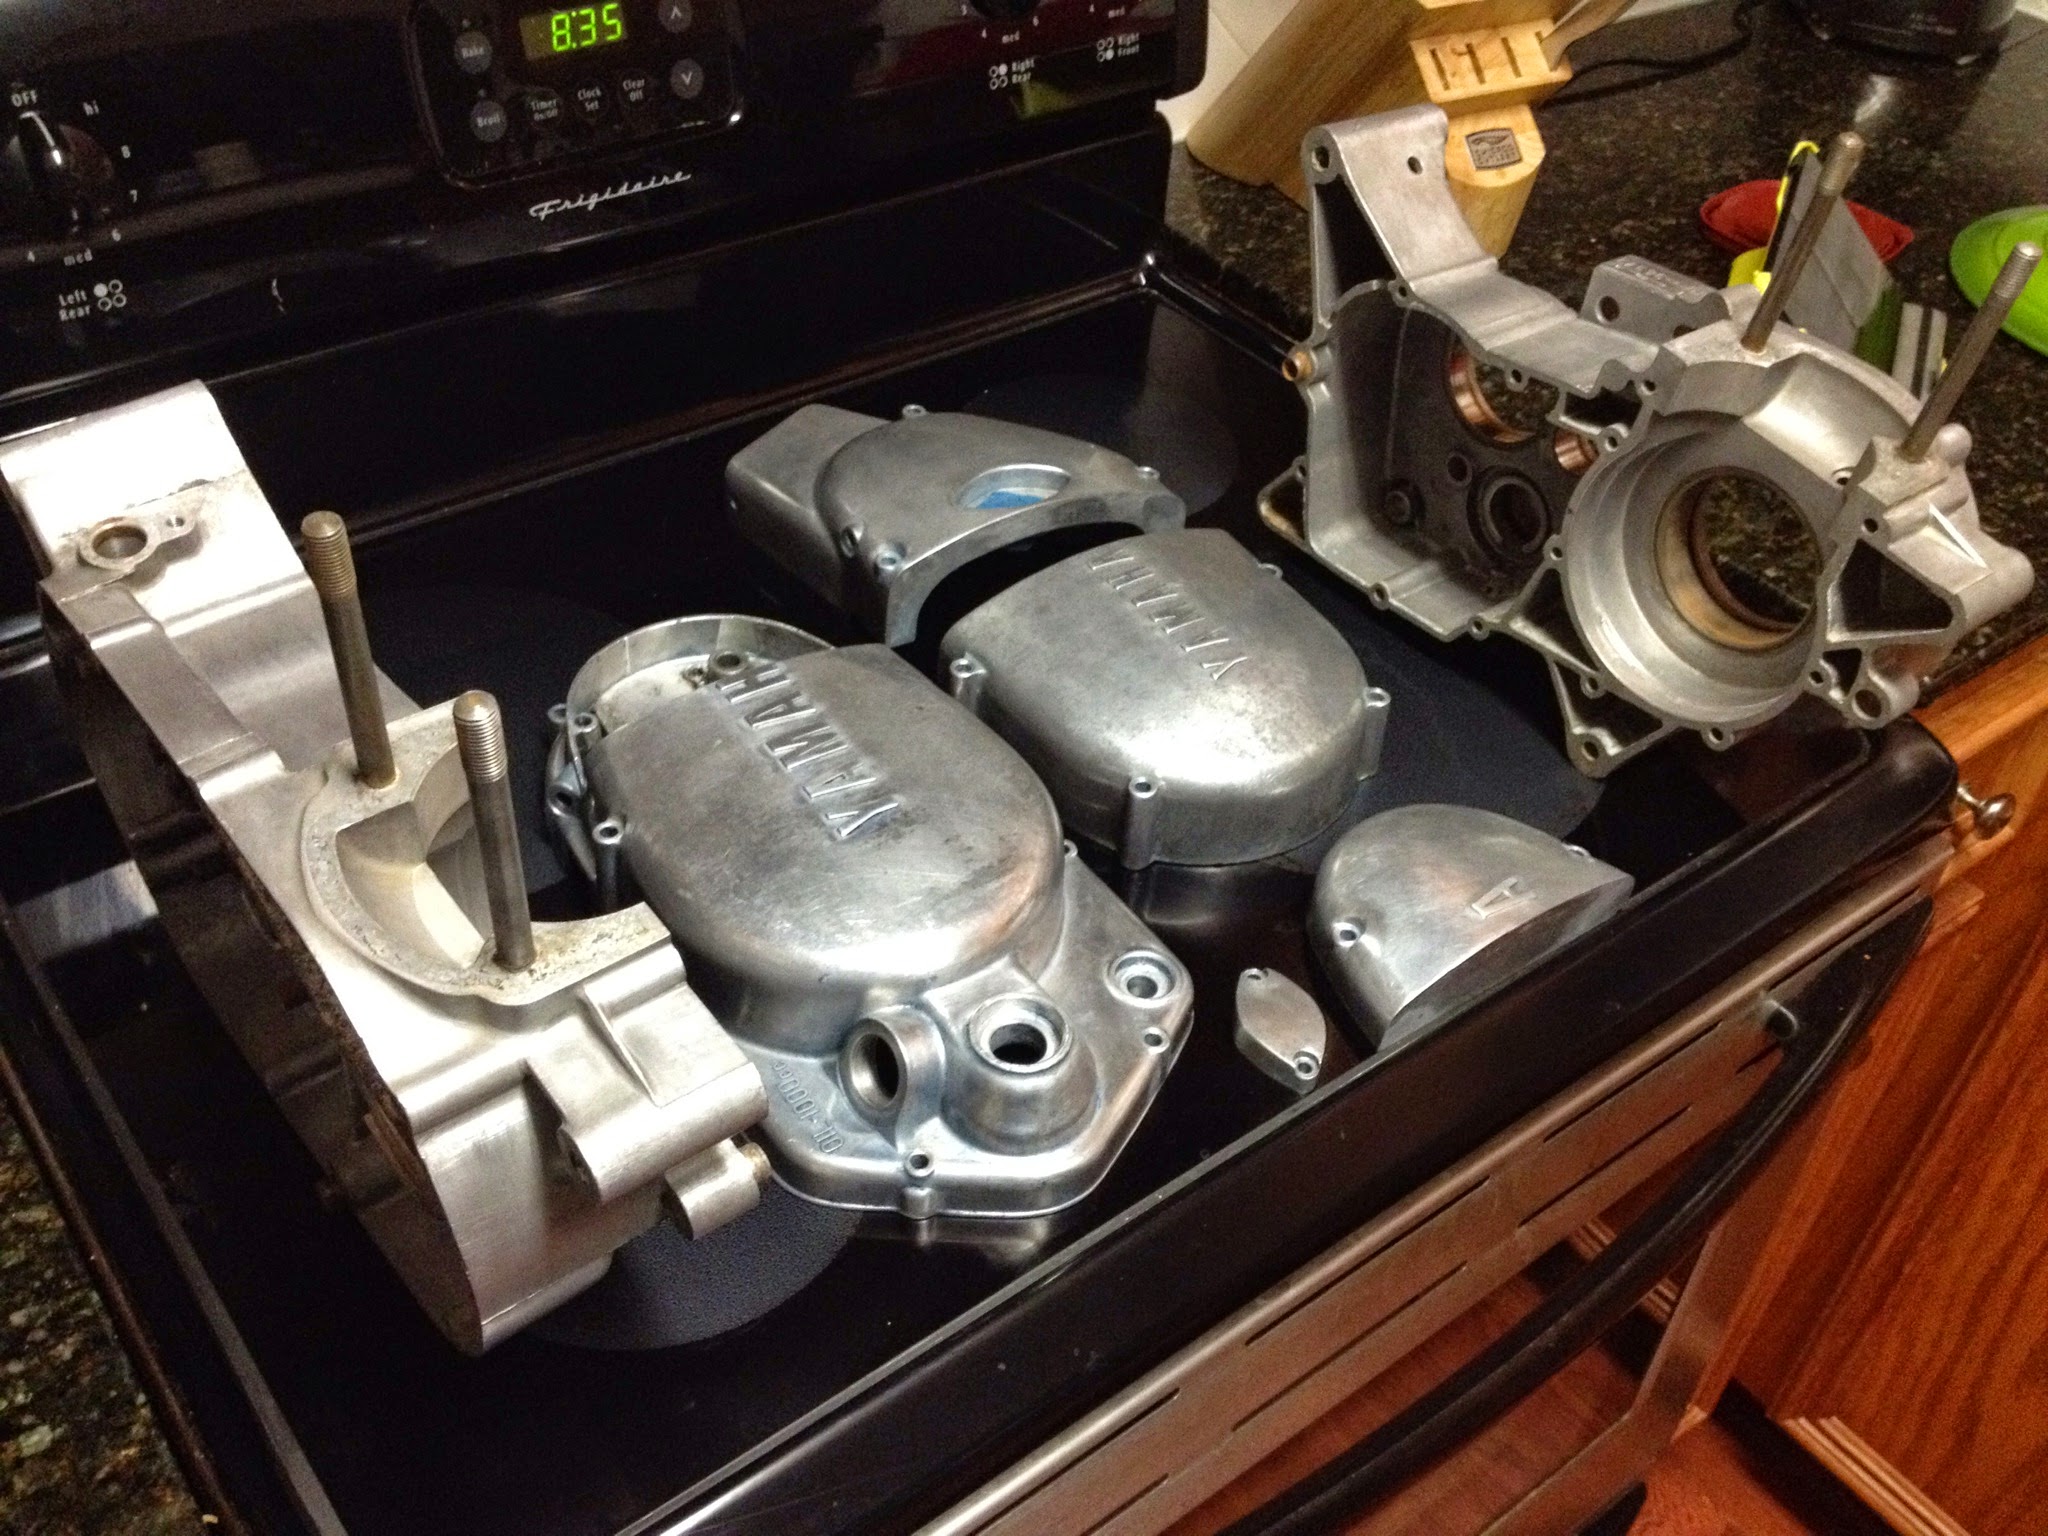
engine bits. Uncoated.
After the flat black coating, I decided I may as well get started on the engine cases. In to the oven they went for preheating. The process for all of these engine parts is this-
Wipe with acetone to remove oil/grease/fingerprints (didn’t do this on the wheel hub, which is why it bubbled)
heat in oven @395 for 10-20 min
Remove and let cool a bit on the powder coating rack outside
wipe with acetone to remove residual oil
Hook up air to powder gun, ground the parts, start shooting powder.
Open door with foot, remove rack from stand, transport to oven
watch for the powder to flow/look like it’s wet
Set timer for 20 minutes.
remove parts when done, set on rack outside. Allow to cool slightly.
Refill air compressor tank
Change out powder colors
Coat parts while they are hot, but not too hot.
Open door with foot, remove rack from the stand, transport to oven
watch for the powder to flow.
set timer.
Remove parts when done, allow to cool all the way.
Sticking on a buffalo that was hand cut with a Feather brand razor blade. (the kind made to shave hairs, not a utility blade)
I had enough parts to warrant doing this process 3 times. The first rack was the engine cases. The 2nd rack was the side covers, and the 3rd rack was the whole engine loosely assembled.
I powdercoated from 9am to 9pm today. But I really like the result. It’s almost exactly what I imagined.
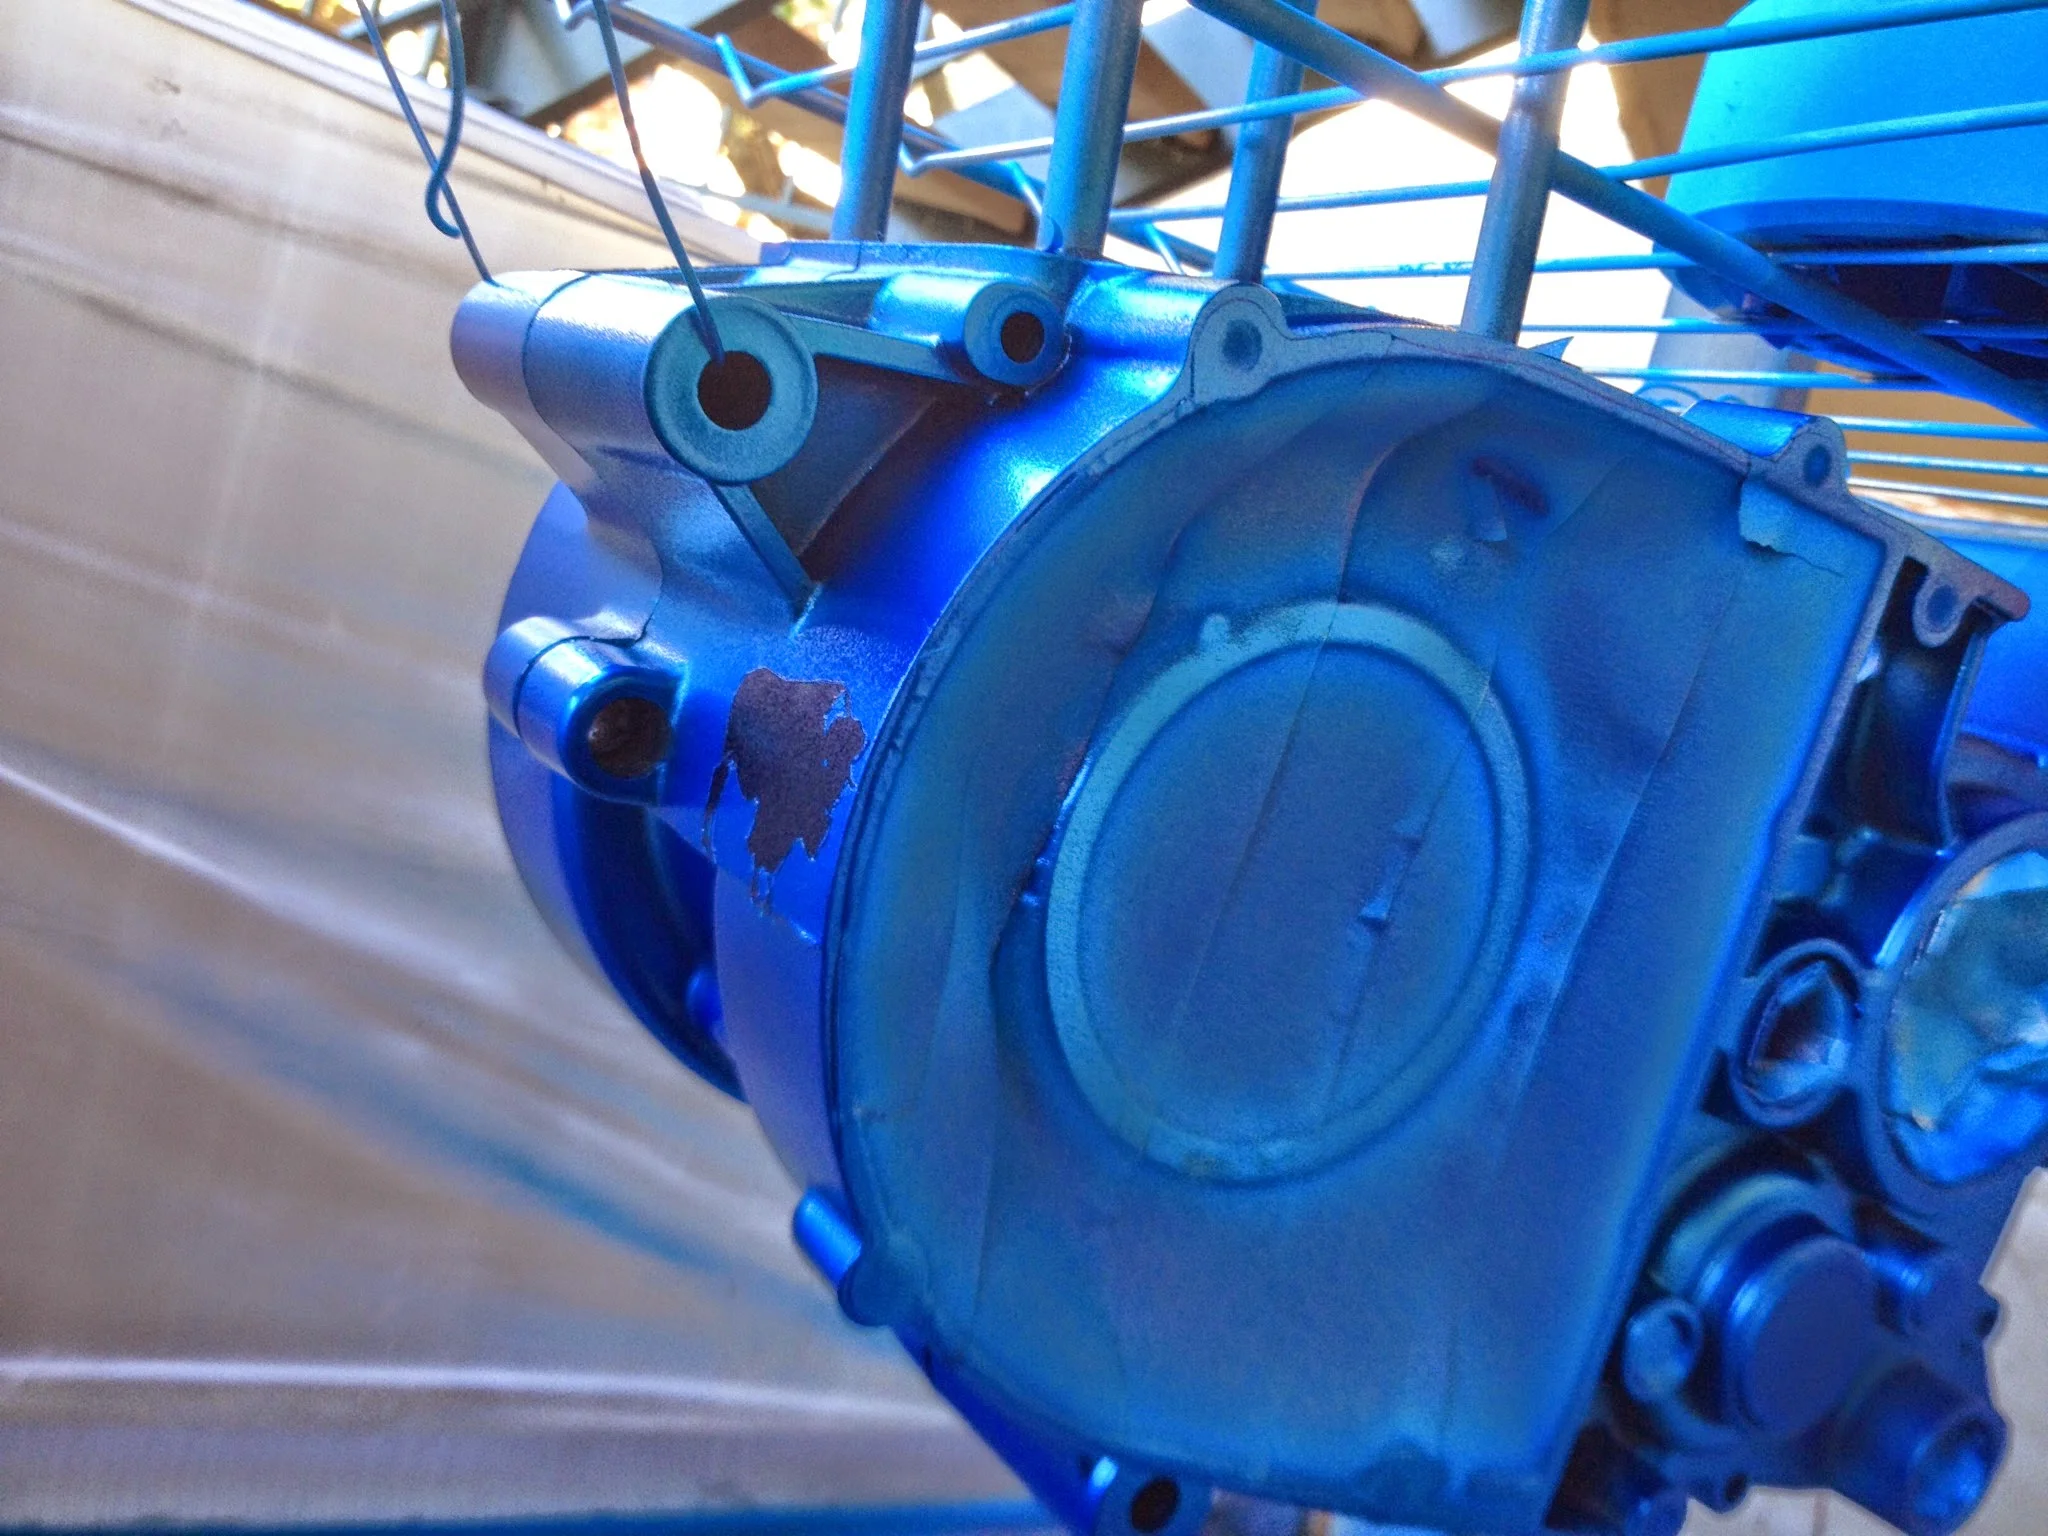
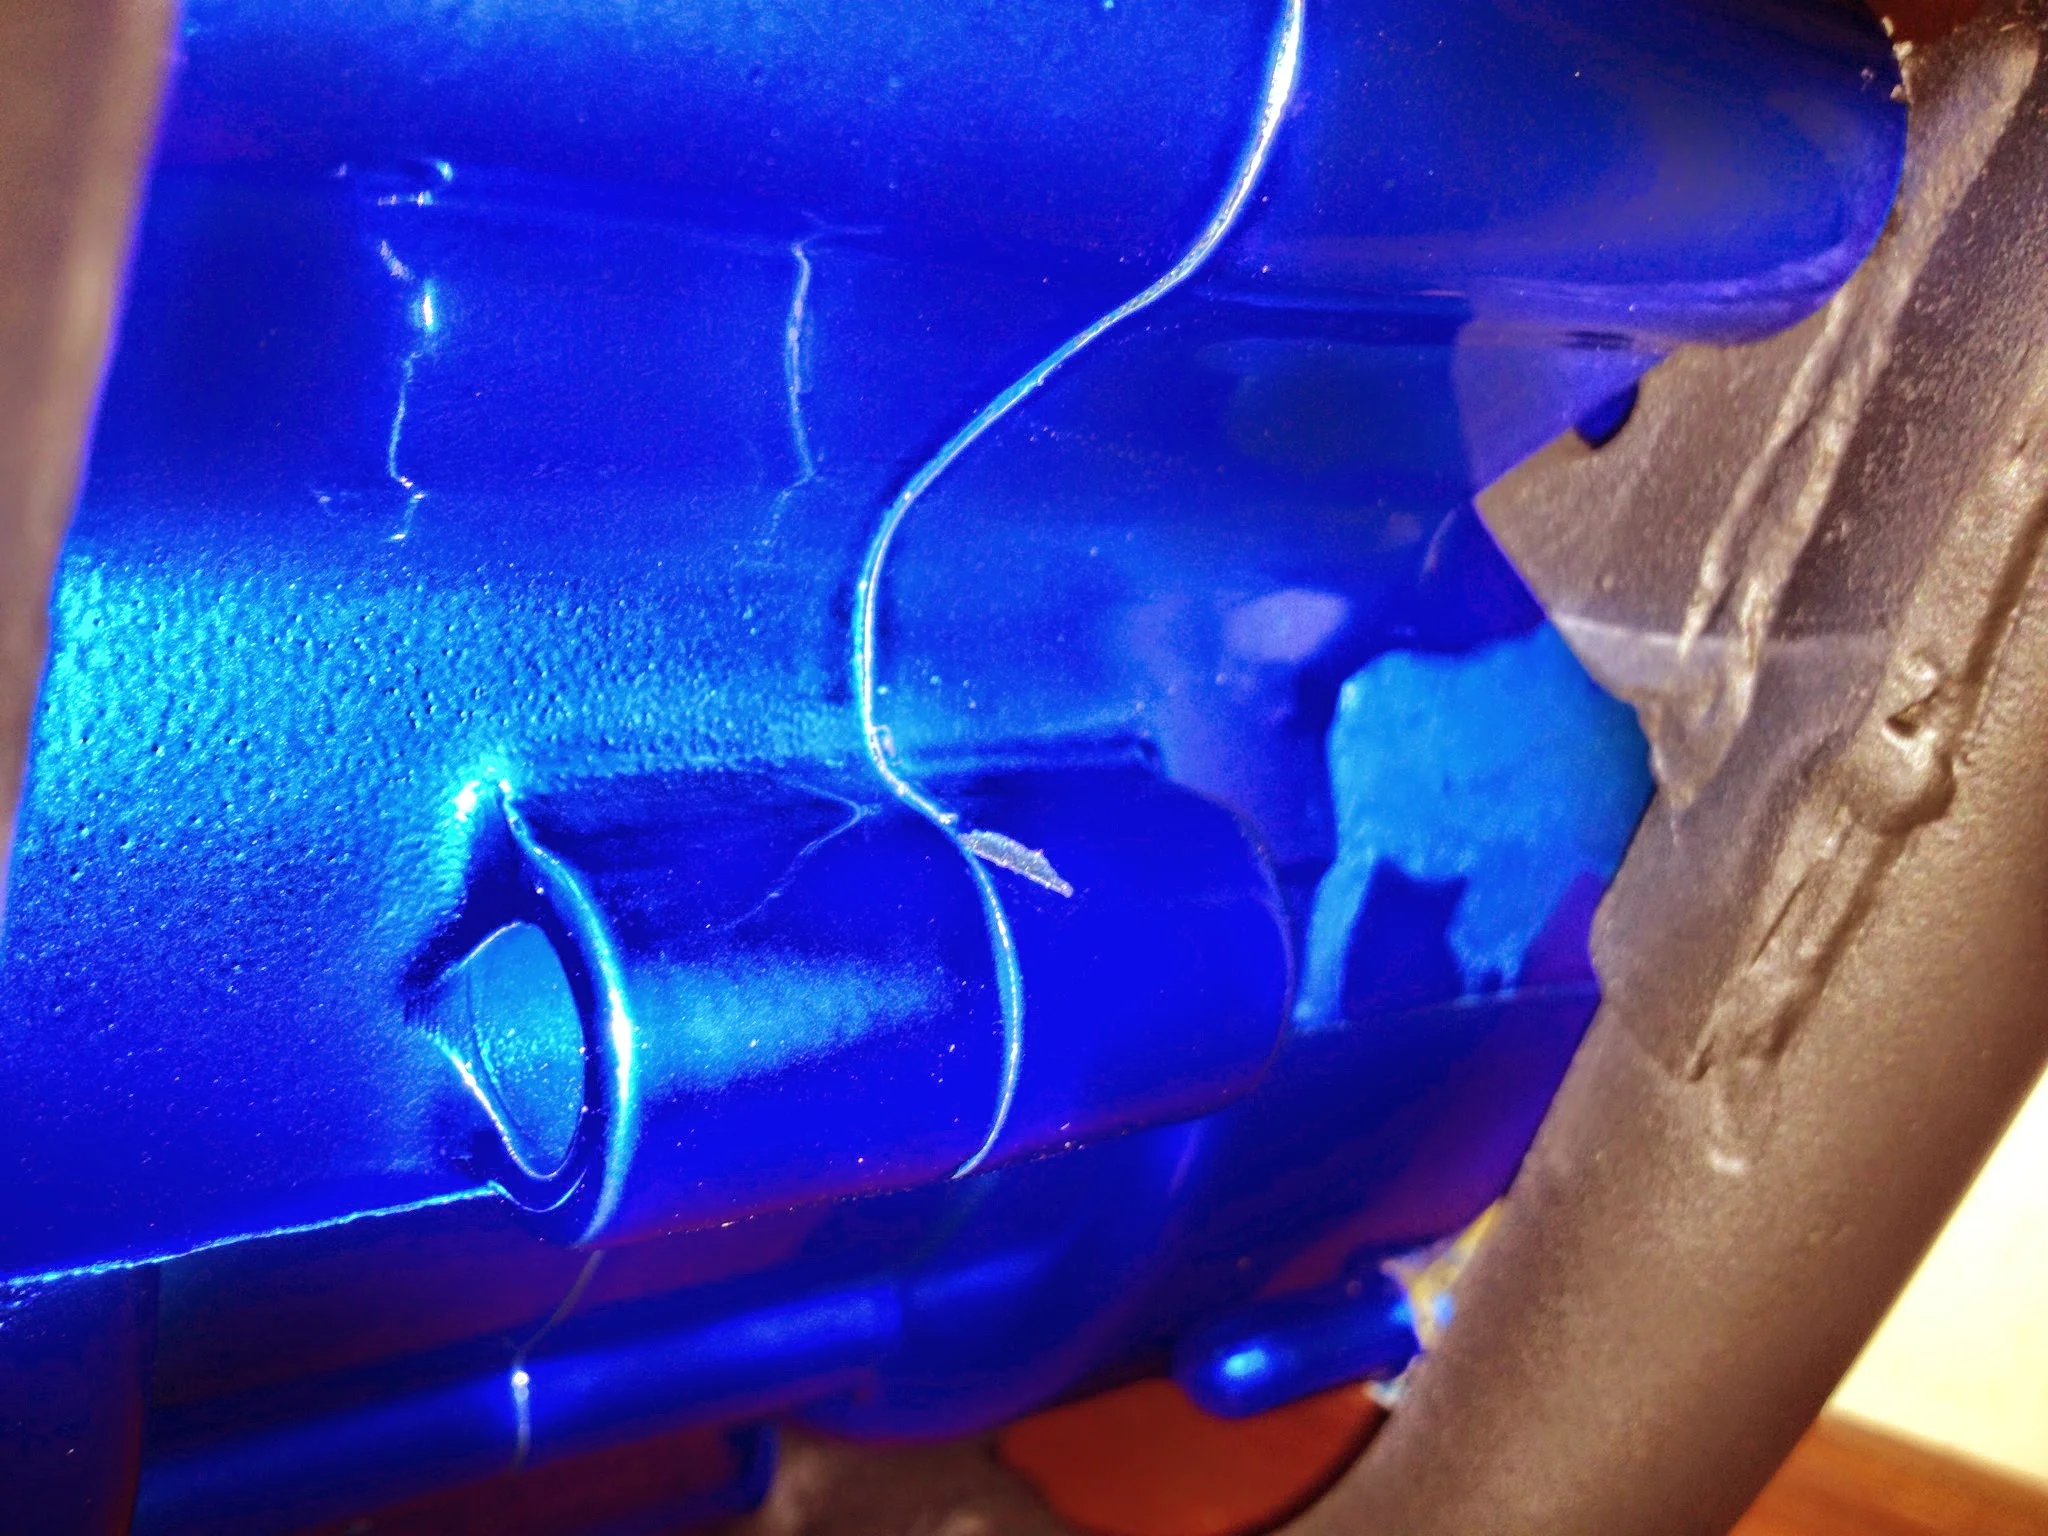
2nd big mistake came when laying down the chrome base on the engine covers. I’m using a 1 gallon pancake compressor…not ideal. 2 times it delivered powder in a huge avalanche. I didn’t want to wipe it off and redo the entire thing all over again so I let it ride. After baking, it smoothed out a bit. They look like odd bulbous mounds. Again, not very noticeable, but not perfect.
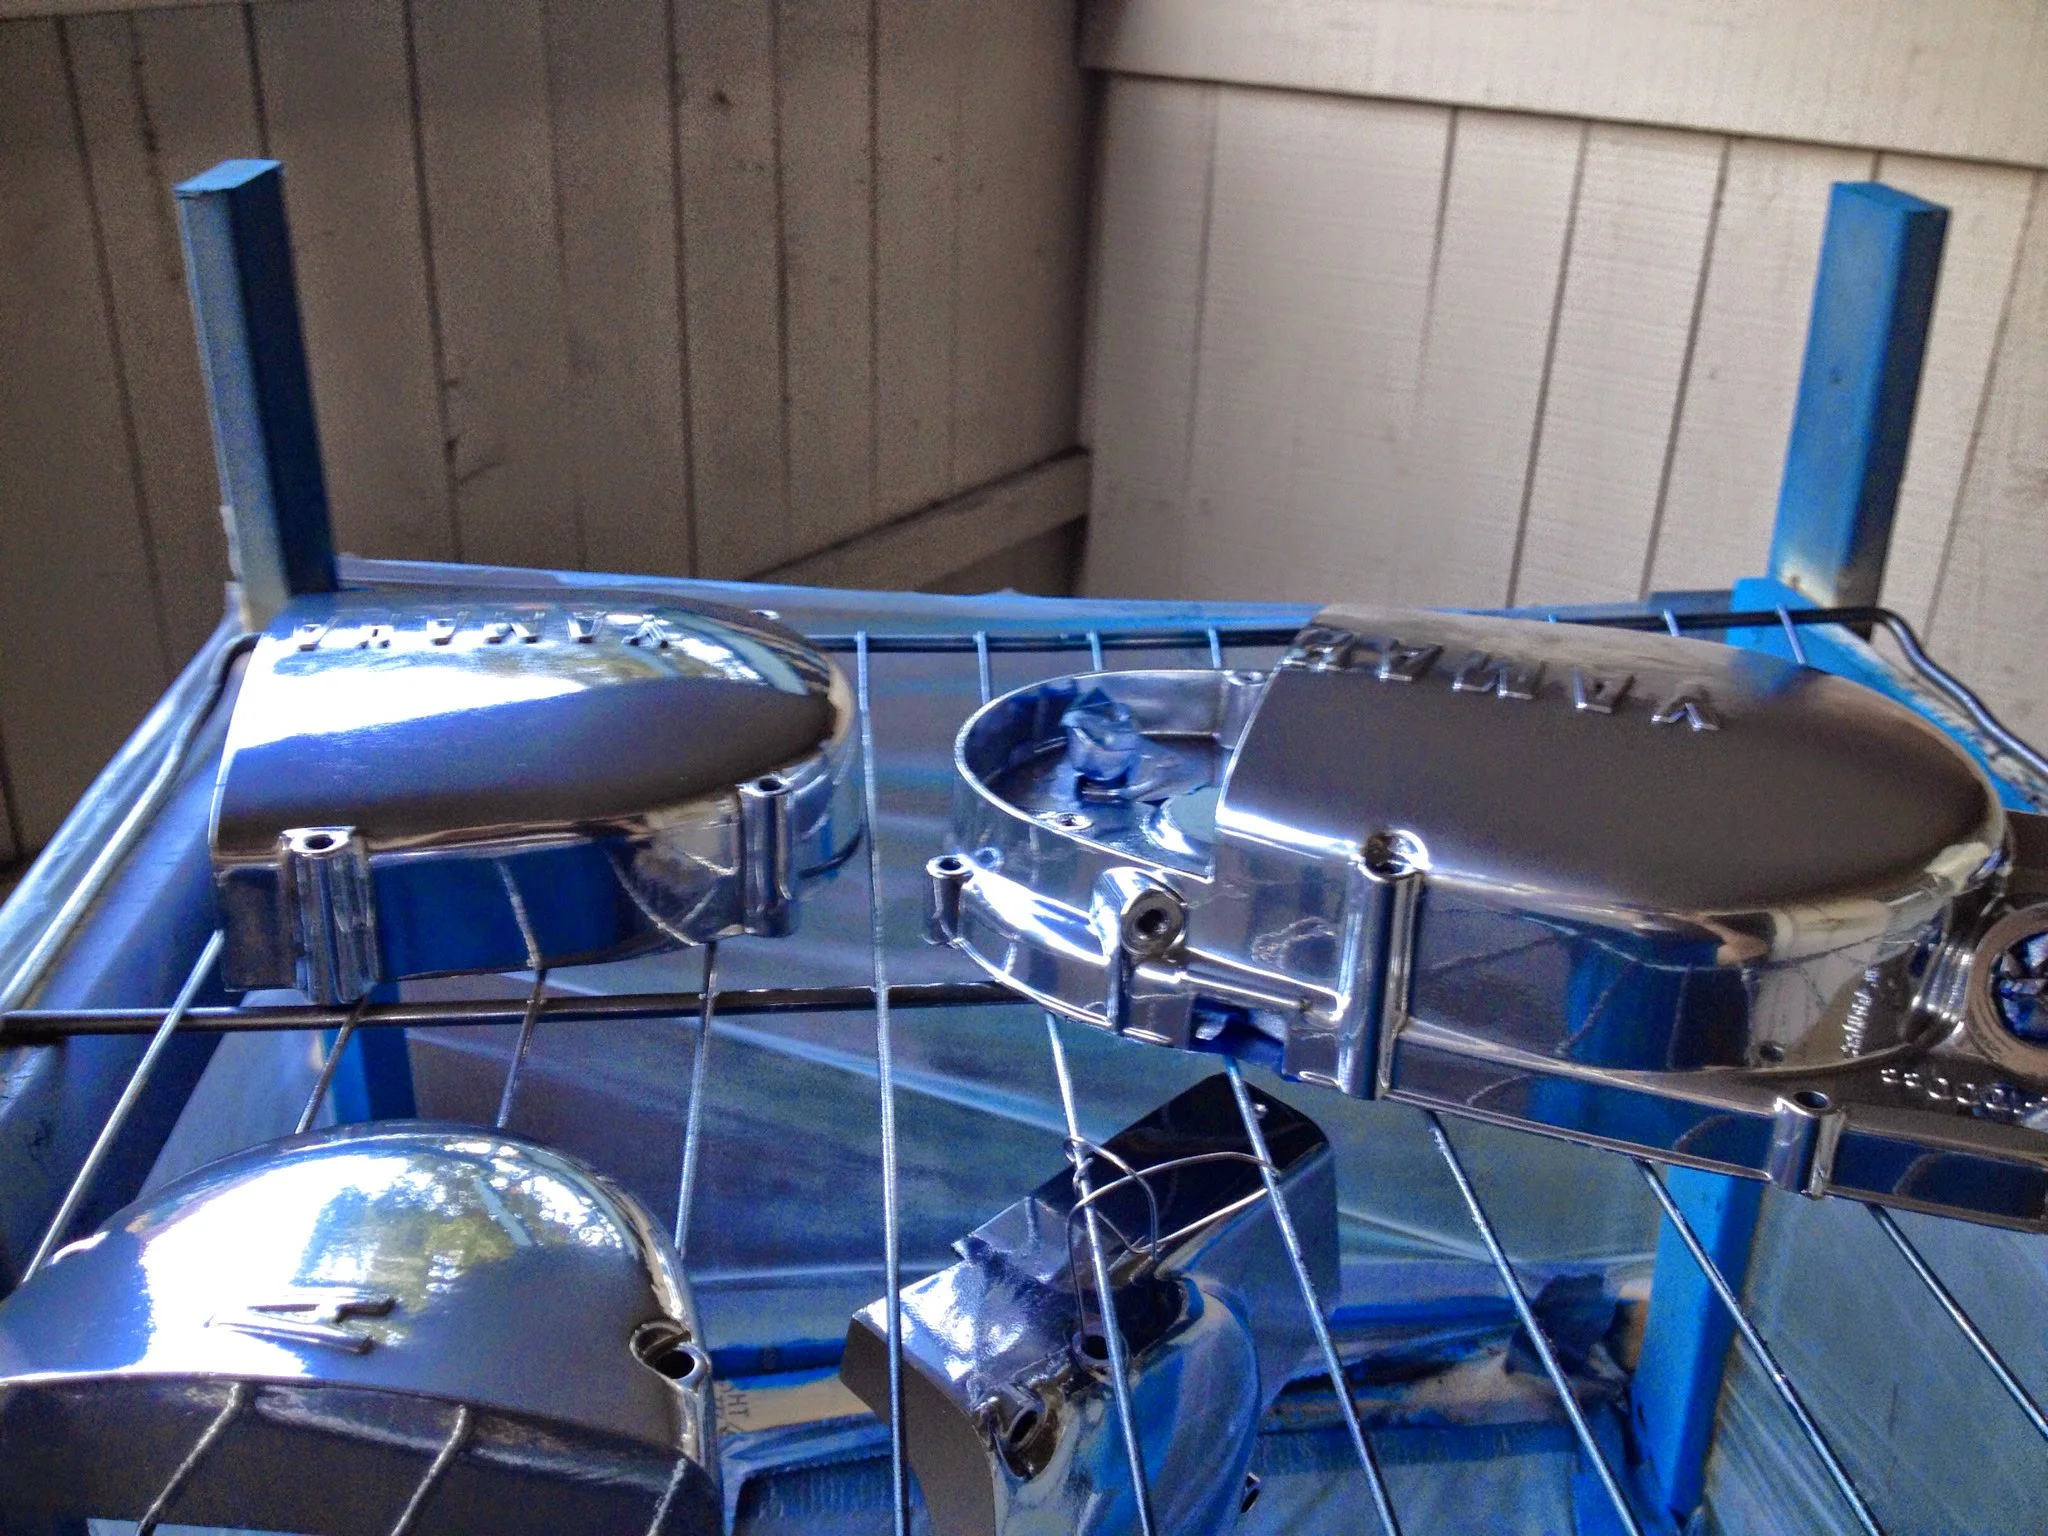
Chrome
Having worked out minor details and kinks on the engine cases (which was the plan, since the cases aren’t as noticeable as the covers) I started on the side covers around 5pm and was aiming for perfection. I taped everything off that needed to be and began with the chrome base layer.
It was the sweetest looking thing I’ve ever seen. Looked very good except on the oil cover side. I don’t think I got enough powder on it, but I could live with that.
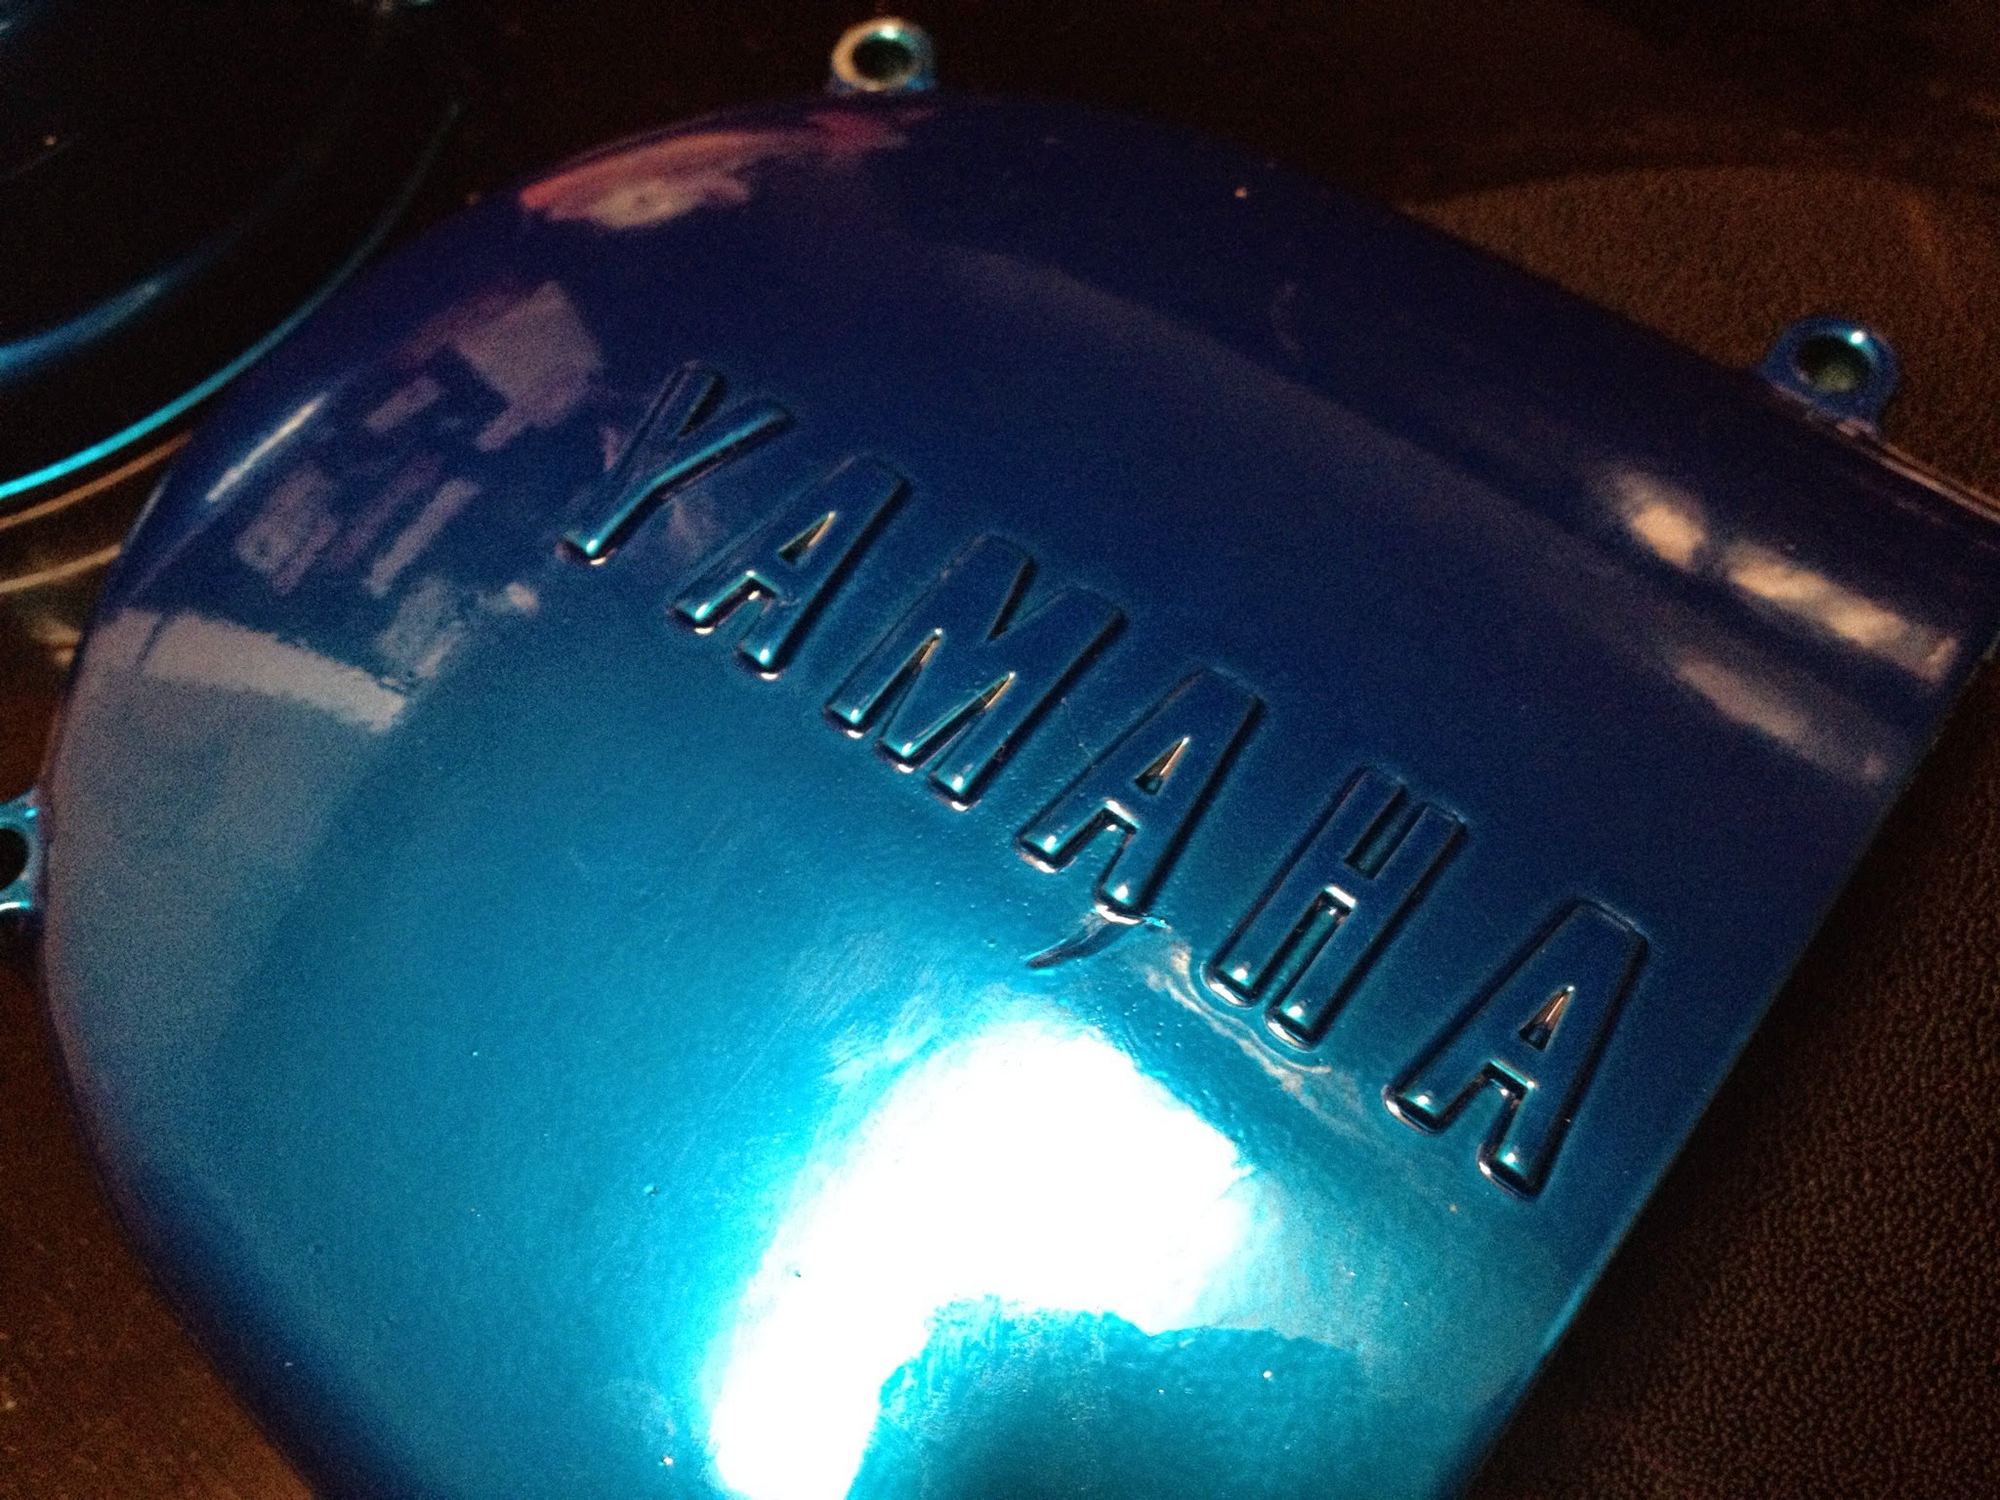
Letting the chrome layer cool is a tricky proposition. The blue will not adhere to a chrome-coated part. I’m thinking this is because of some metallic properties of the chrome powder. The top coat will only stick when the chromed part is hot enough to promote adhesion. Powder the top coat when the chrome is too hot- it’ll clump and glue itself together. Let the chrome cool too much- the blue won’t stick at all no matter what.

Before the last layer of blue
I let the chrome cool too long. I started laying down blue powder and it wasn’t sticking to all of the parts. So I did my best to coat them ones that let me, and then I put the whole thing back in the oven to heat it back up. Right when the powder started to flow, I popped it back outside and finished laying down the blue.
After it all cooled, I put the side covers on the engine, heated the whole thing up, took it outside, sprayed a last layer of blue on it, and baked it.
That took me to the end of the day. And I’m really happy with it.
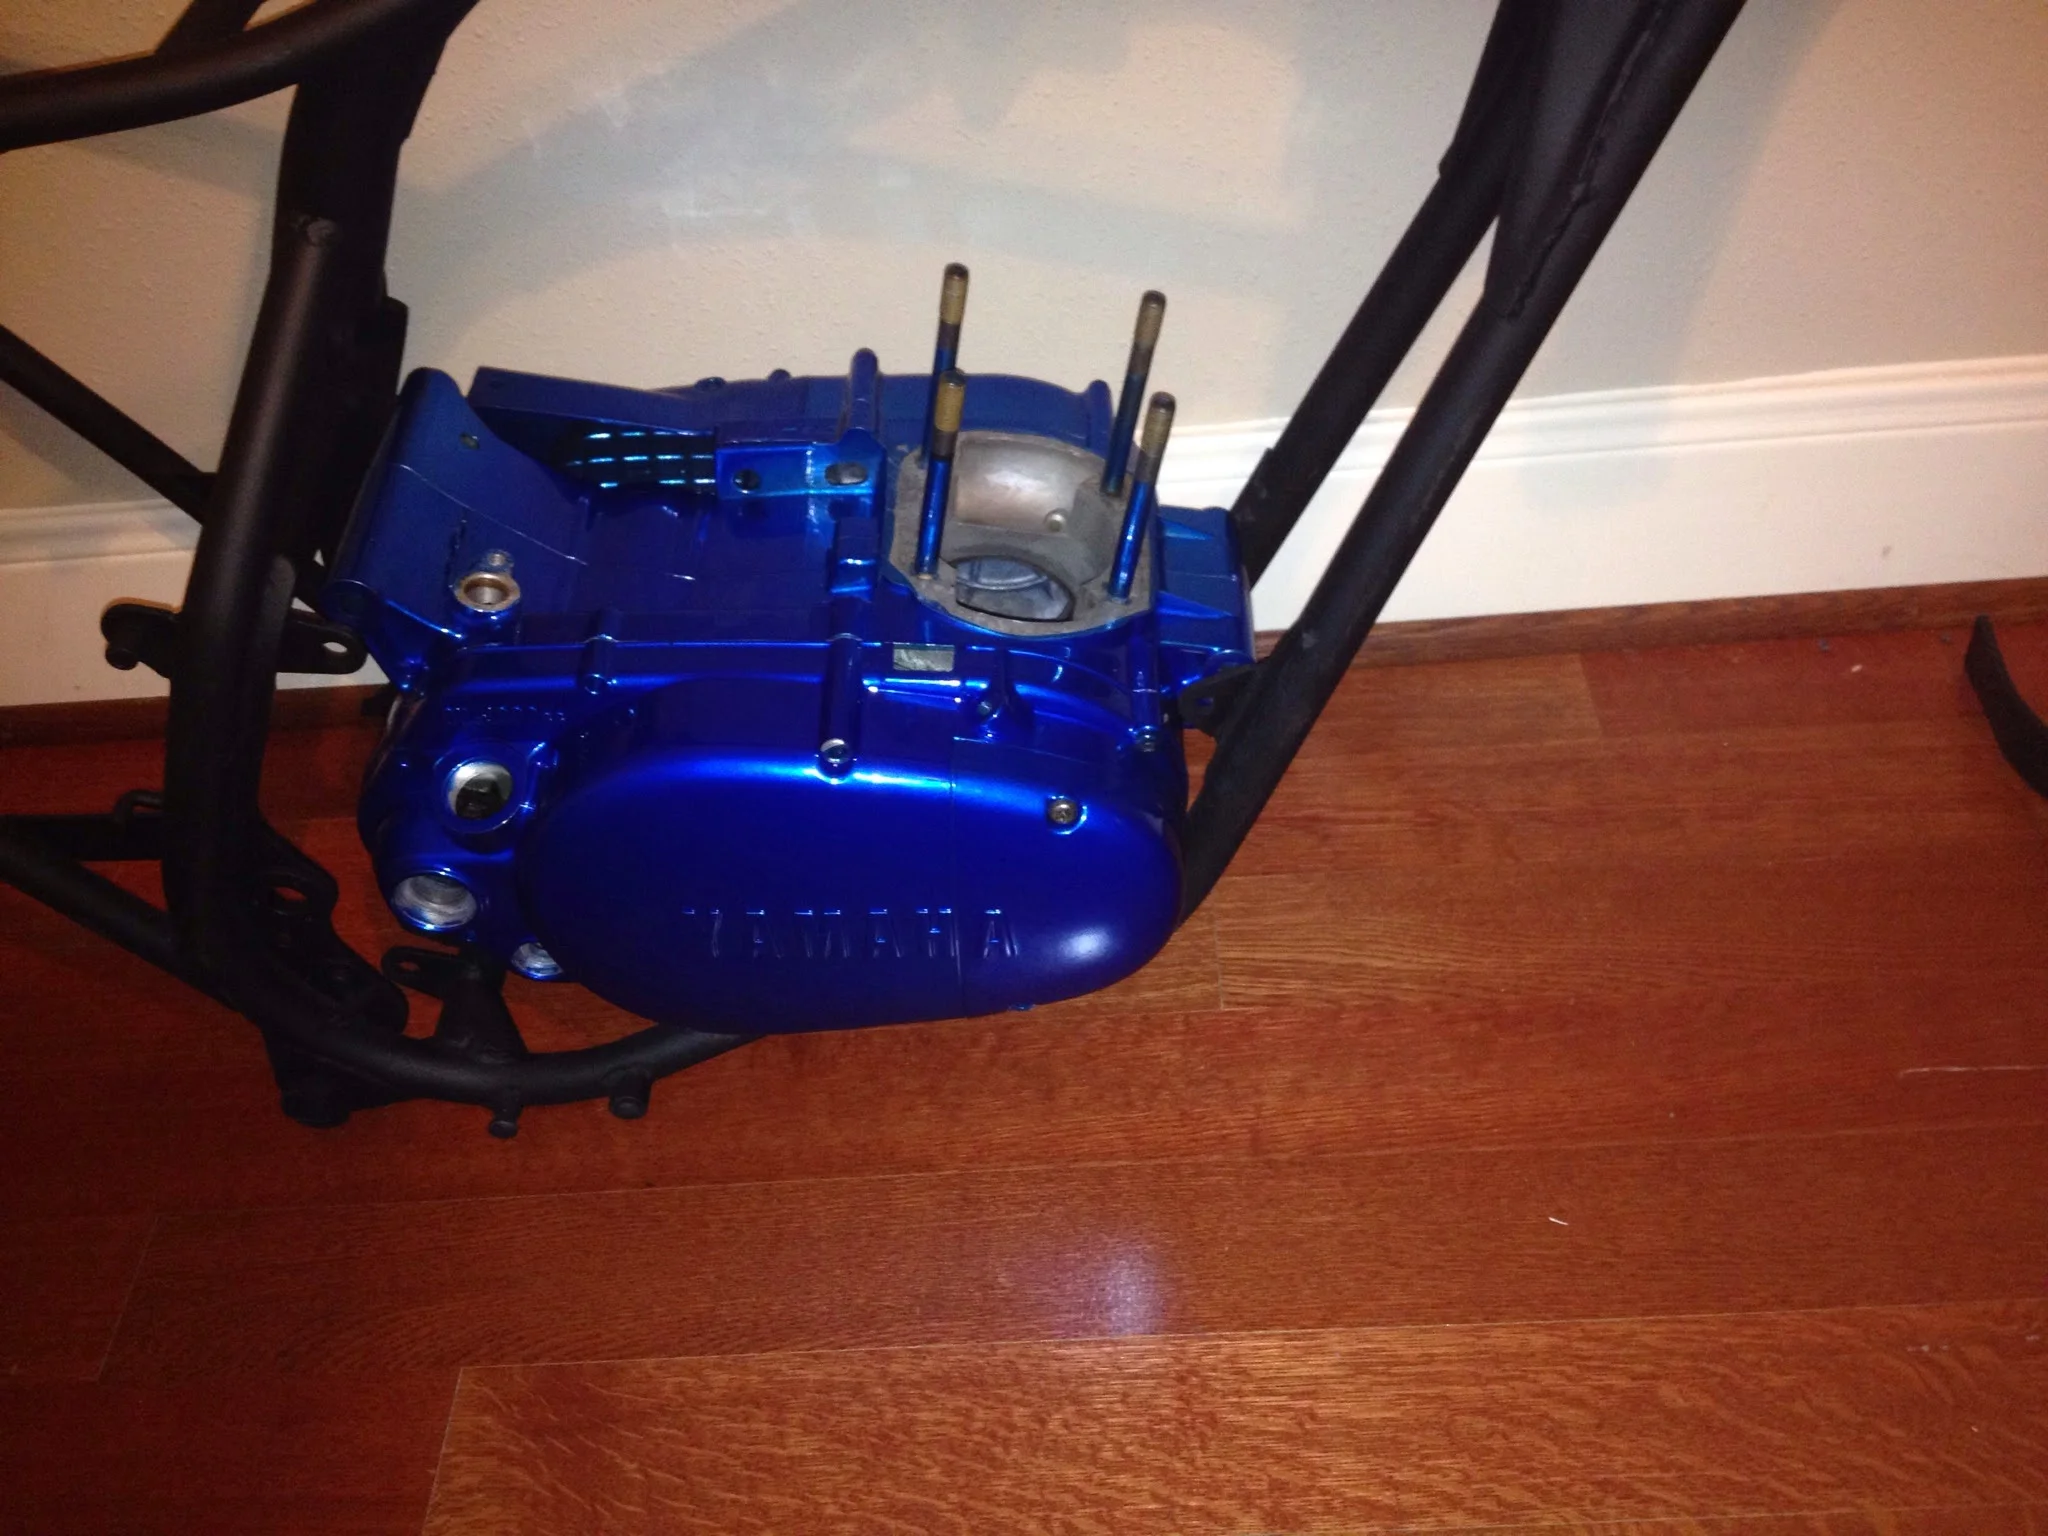
Cylinder will be matte black. The head will be black with one blue fin (that’s the plan for now…not sure how I’ll make it happen)
The engine is ready to be built as soon as I get my crankshaft back. It’s in Minnesota right now getting inspected and trued by Bill Bune (http://www.billbune.com/) If all goes well, I’ll have it back in a week. Bearings can go in the engine, and the bottom end will be back together in short order.
Bison on the right, behind the frame
Bonus notes…I powdercoated the flywheel blue for the hell of it. There’s a ghosted buffalo (same one on the homepage of this site) on the magneto side case. It’s going to be covered by the skid plate but it matters that it’s there. It’s all about details…
I lost the engine bolts. Have no idea where they are….really hope I didn’t leave them in friends garage, because they sold that place….
Once the crank comes in, engine building will start. New gaskets, seals, yamabond, and clean internals await their home.