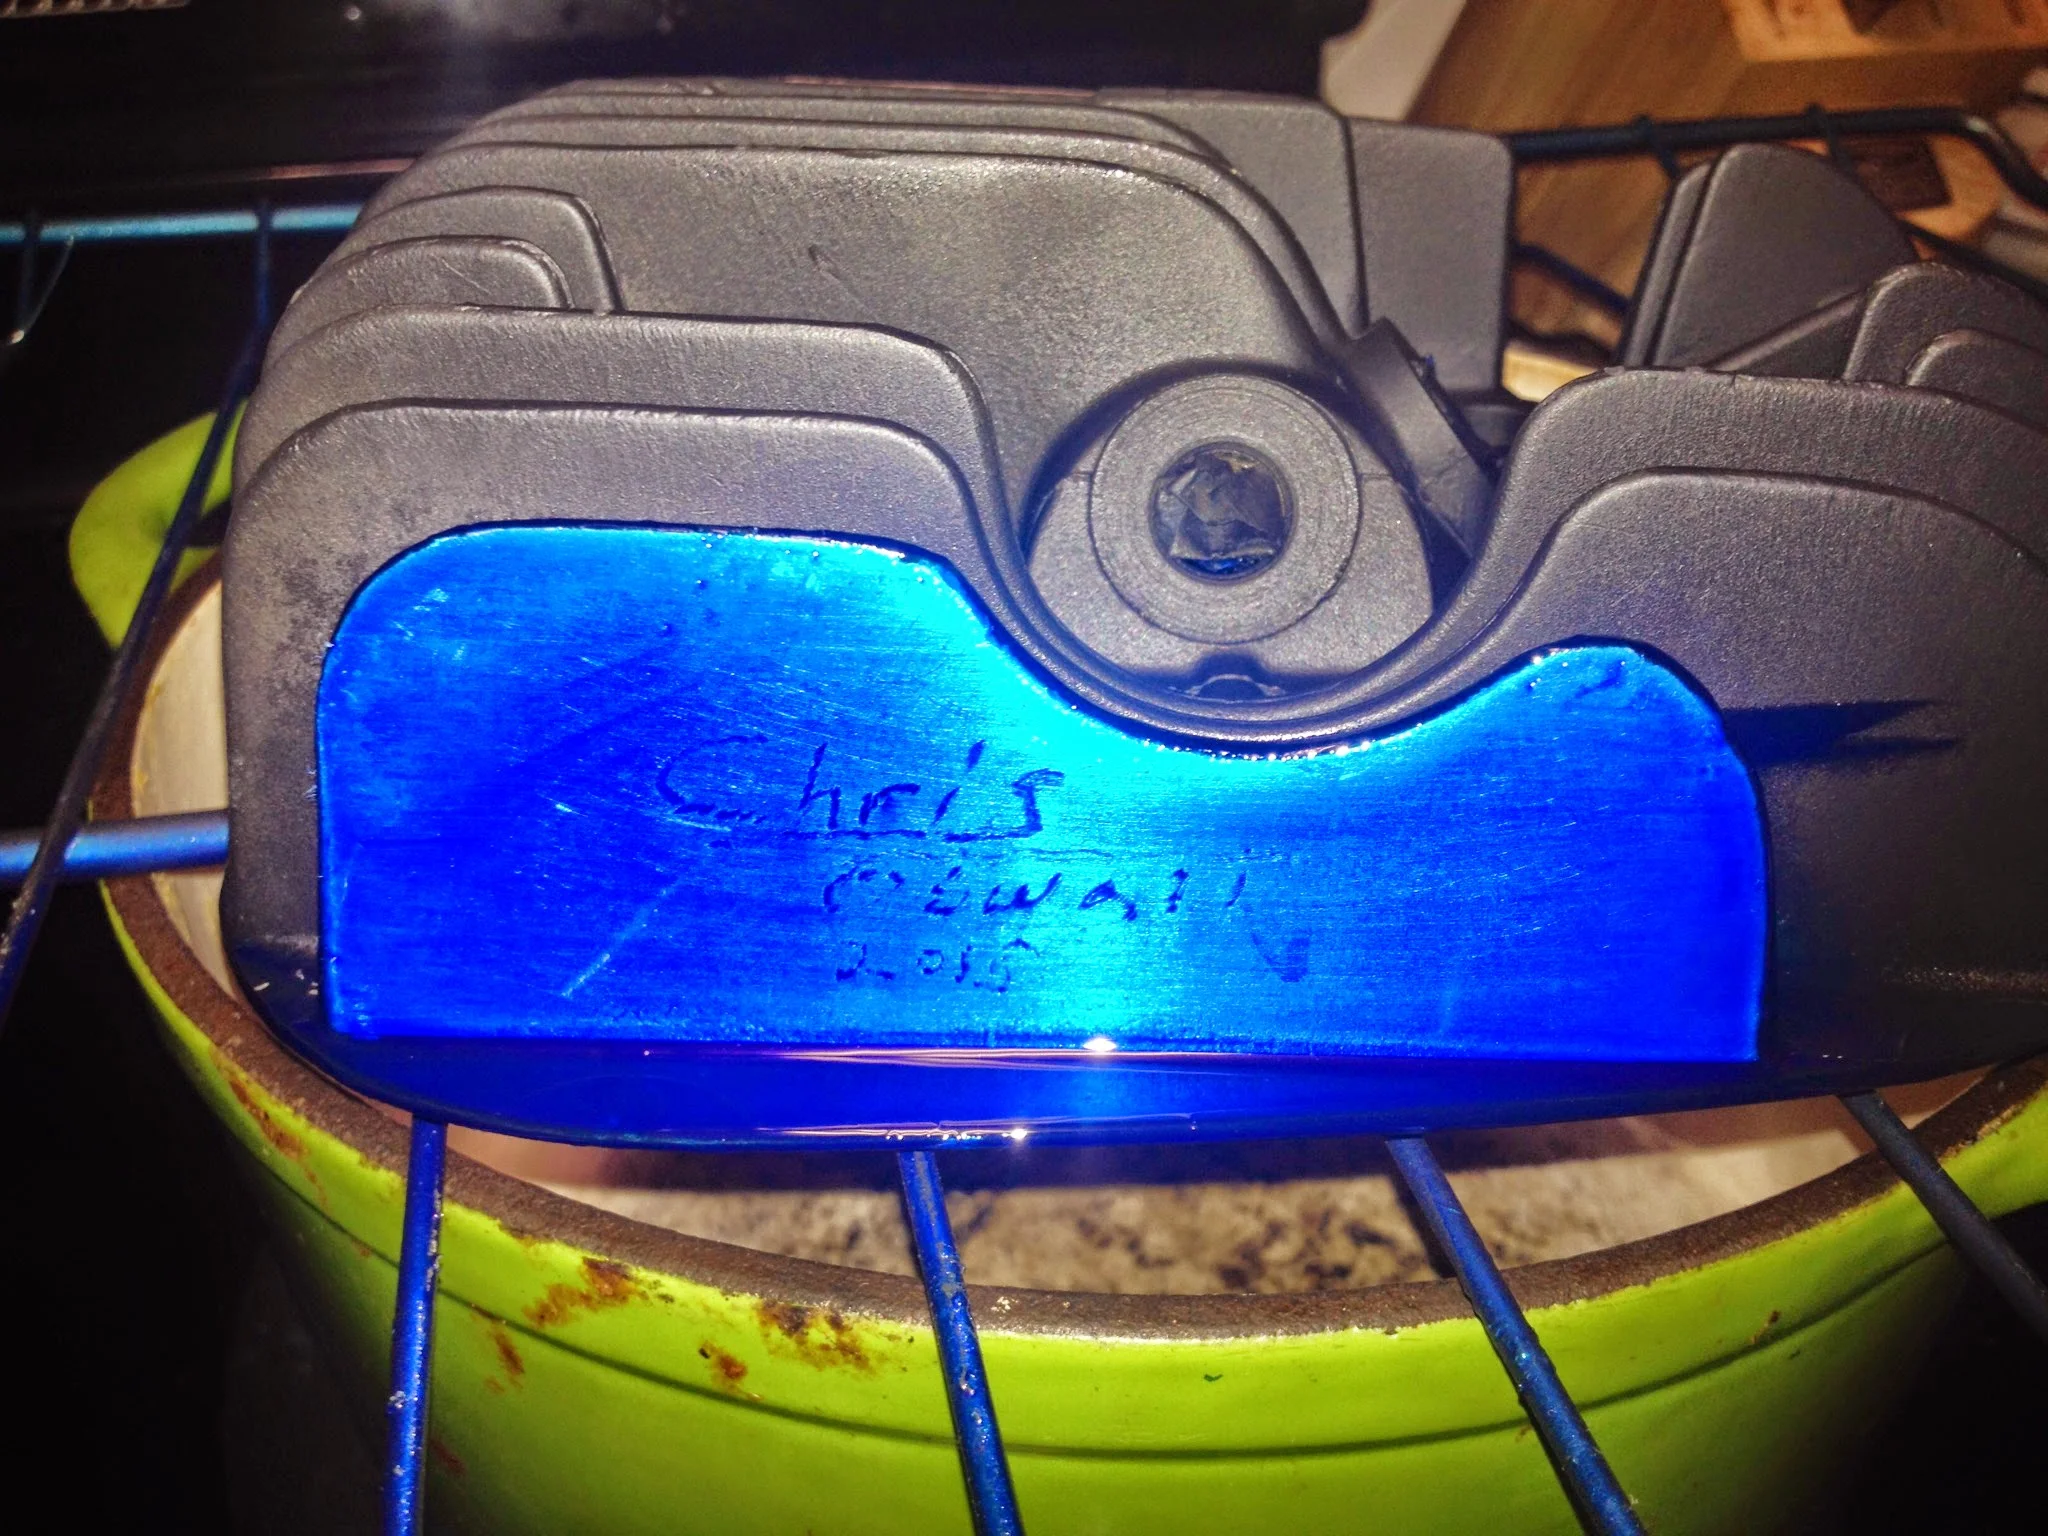
Lost my head
Not sure why I pulled the engine out of the corner It has been sitting in for weeks. This evening I did, though.
I’ve had all that I need to complete assembly on the engine. What I’ve been waiting on is powder coating. Powder coating has been covered here before, and it’s not particularly hard but it is tedious. Clean the part, heat, clean the part, hang the part, electrify the part, coat the part, repeat, carry to oven, bake, take out, repeat the process, find time to keep the 1 gallon pancake compressor full of enough air to spray the powder. If I had a shop or better set up, it wouldn’t be such a pain in the ass.
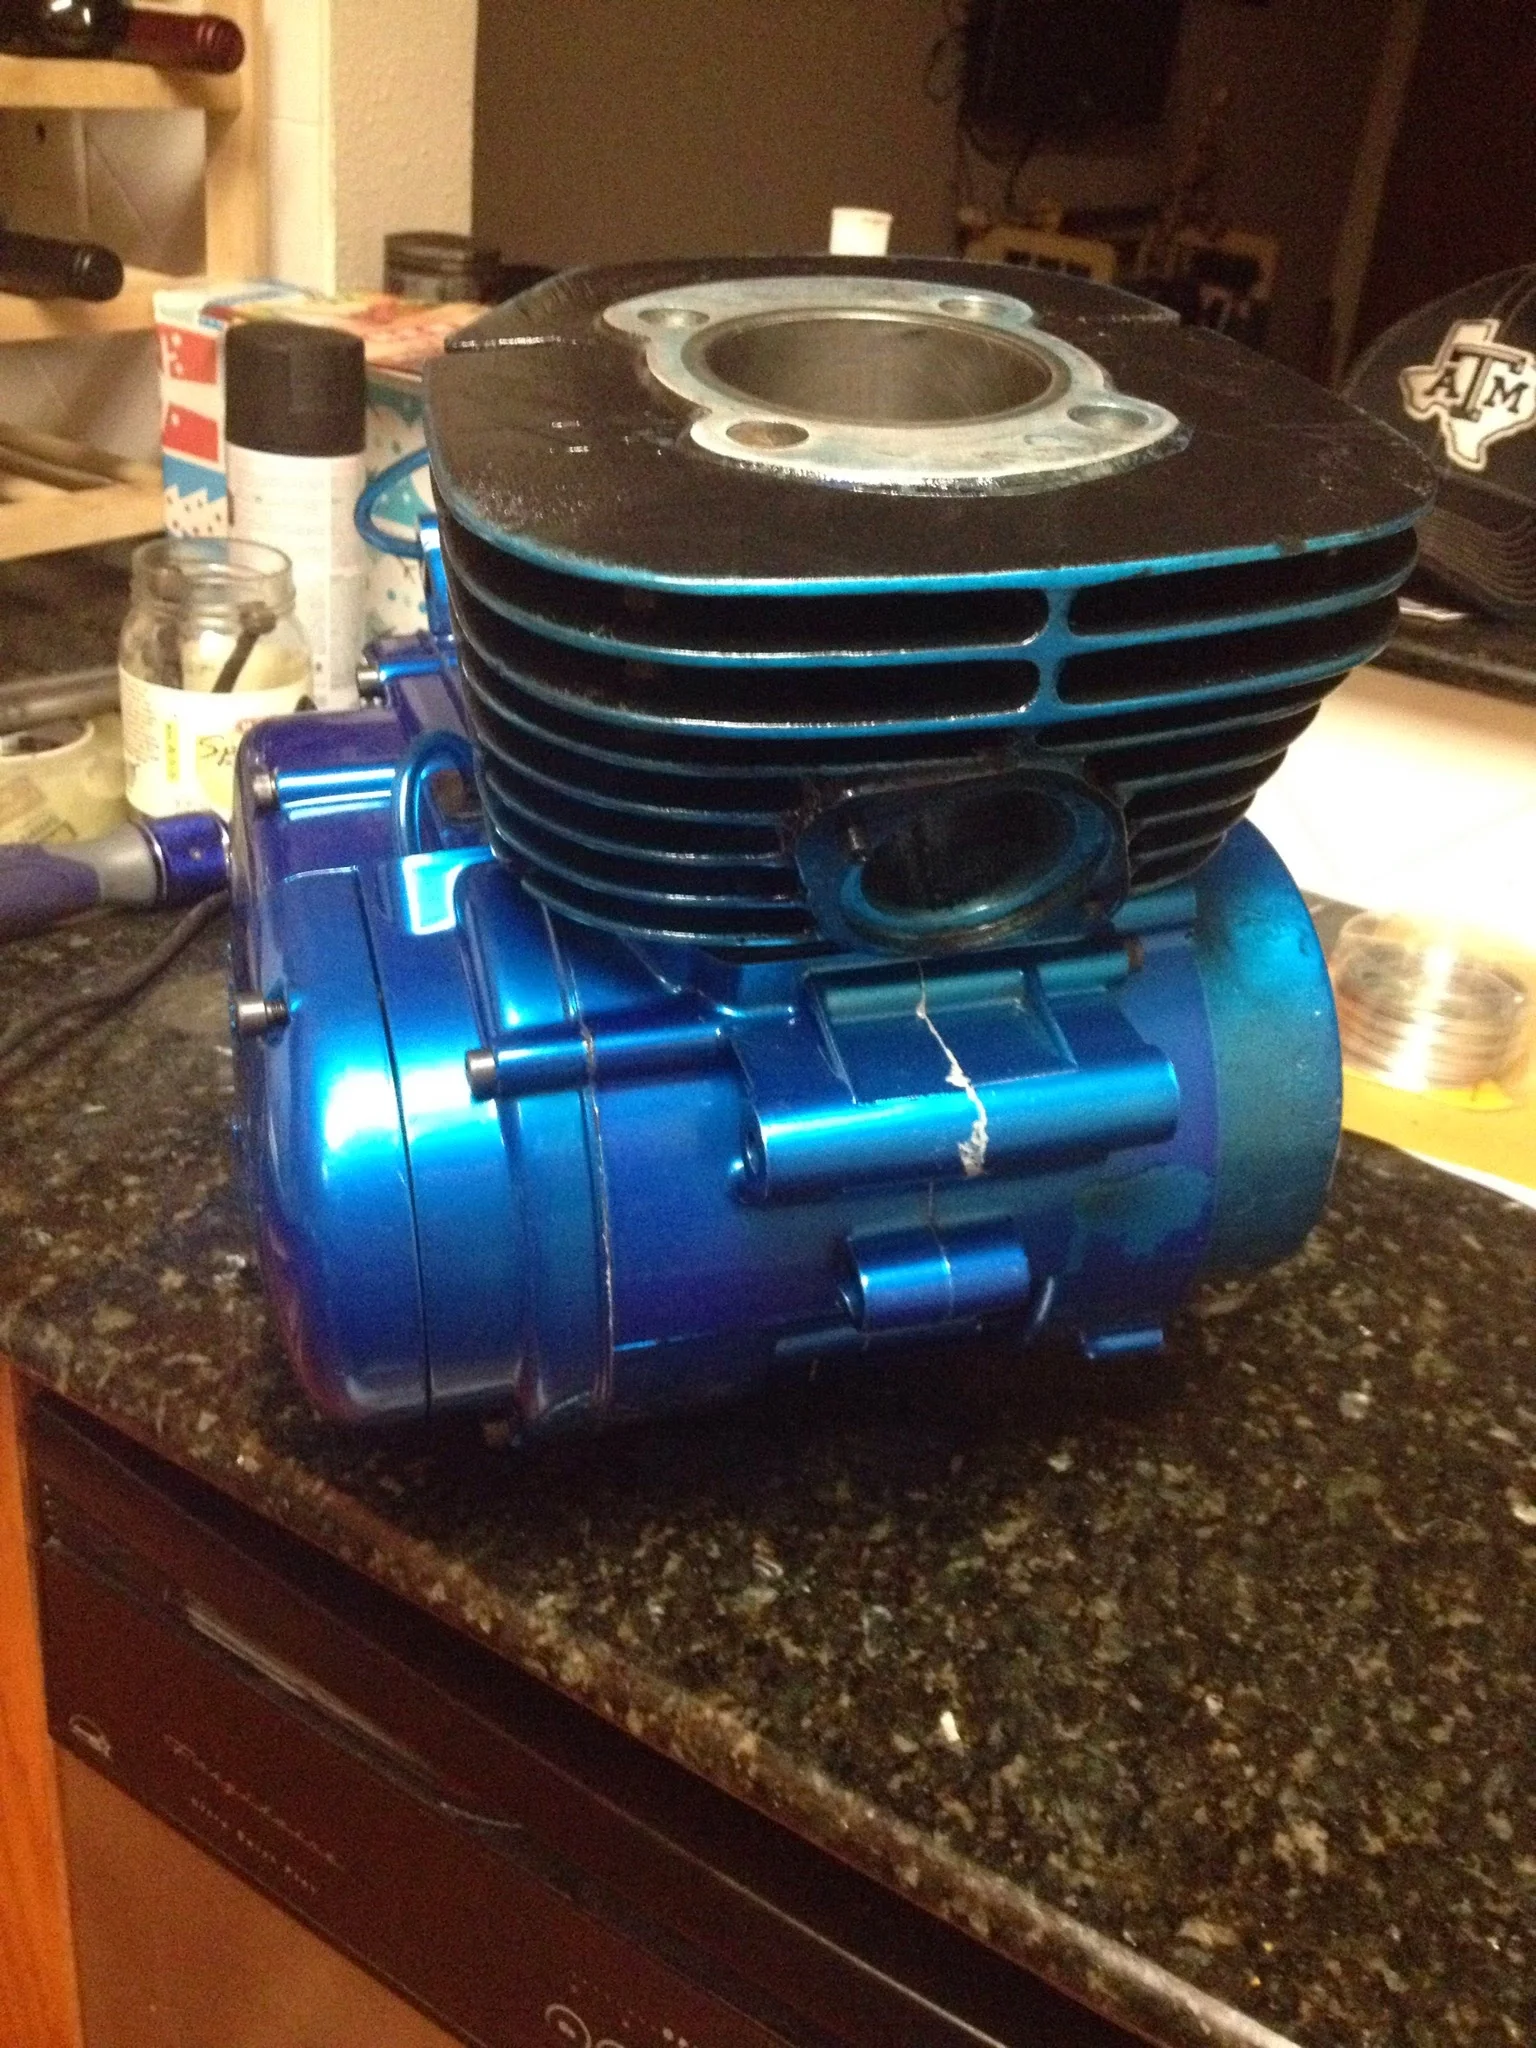
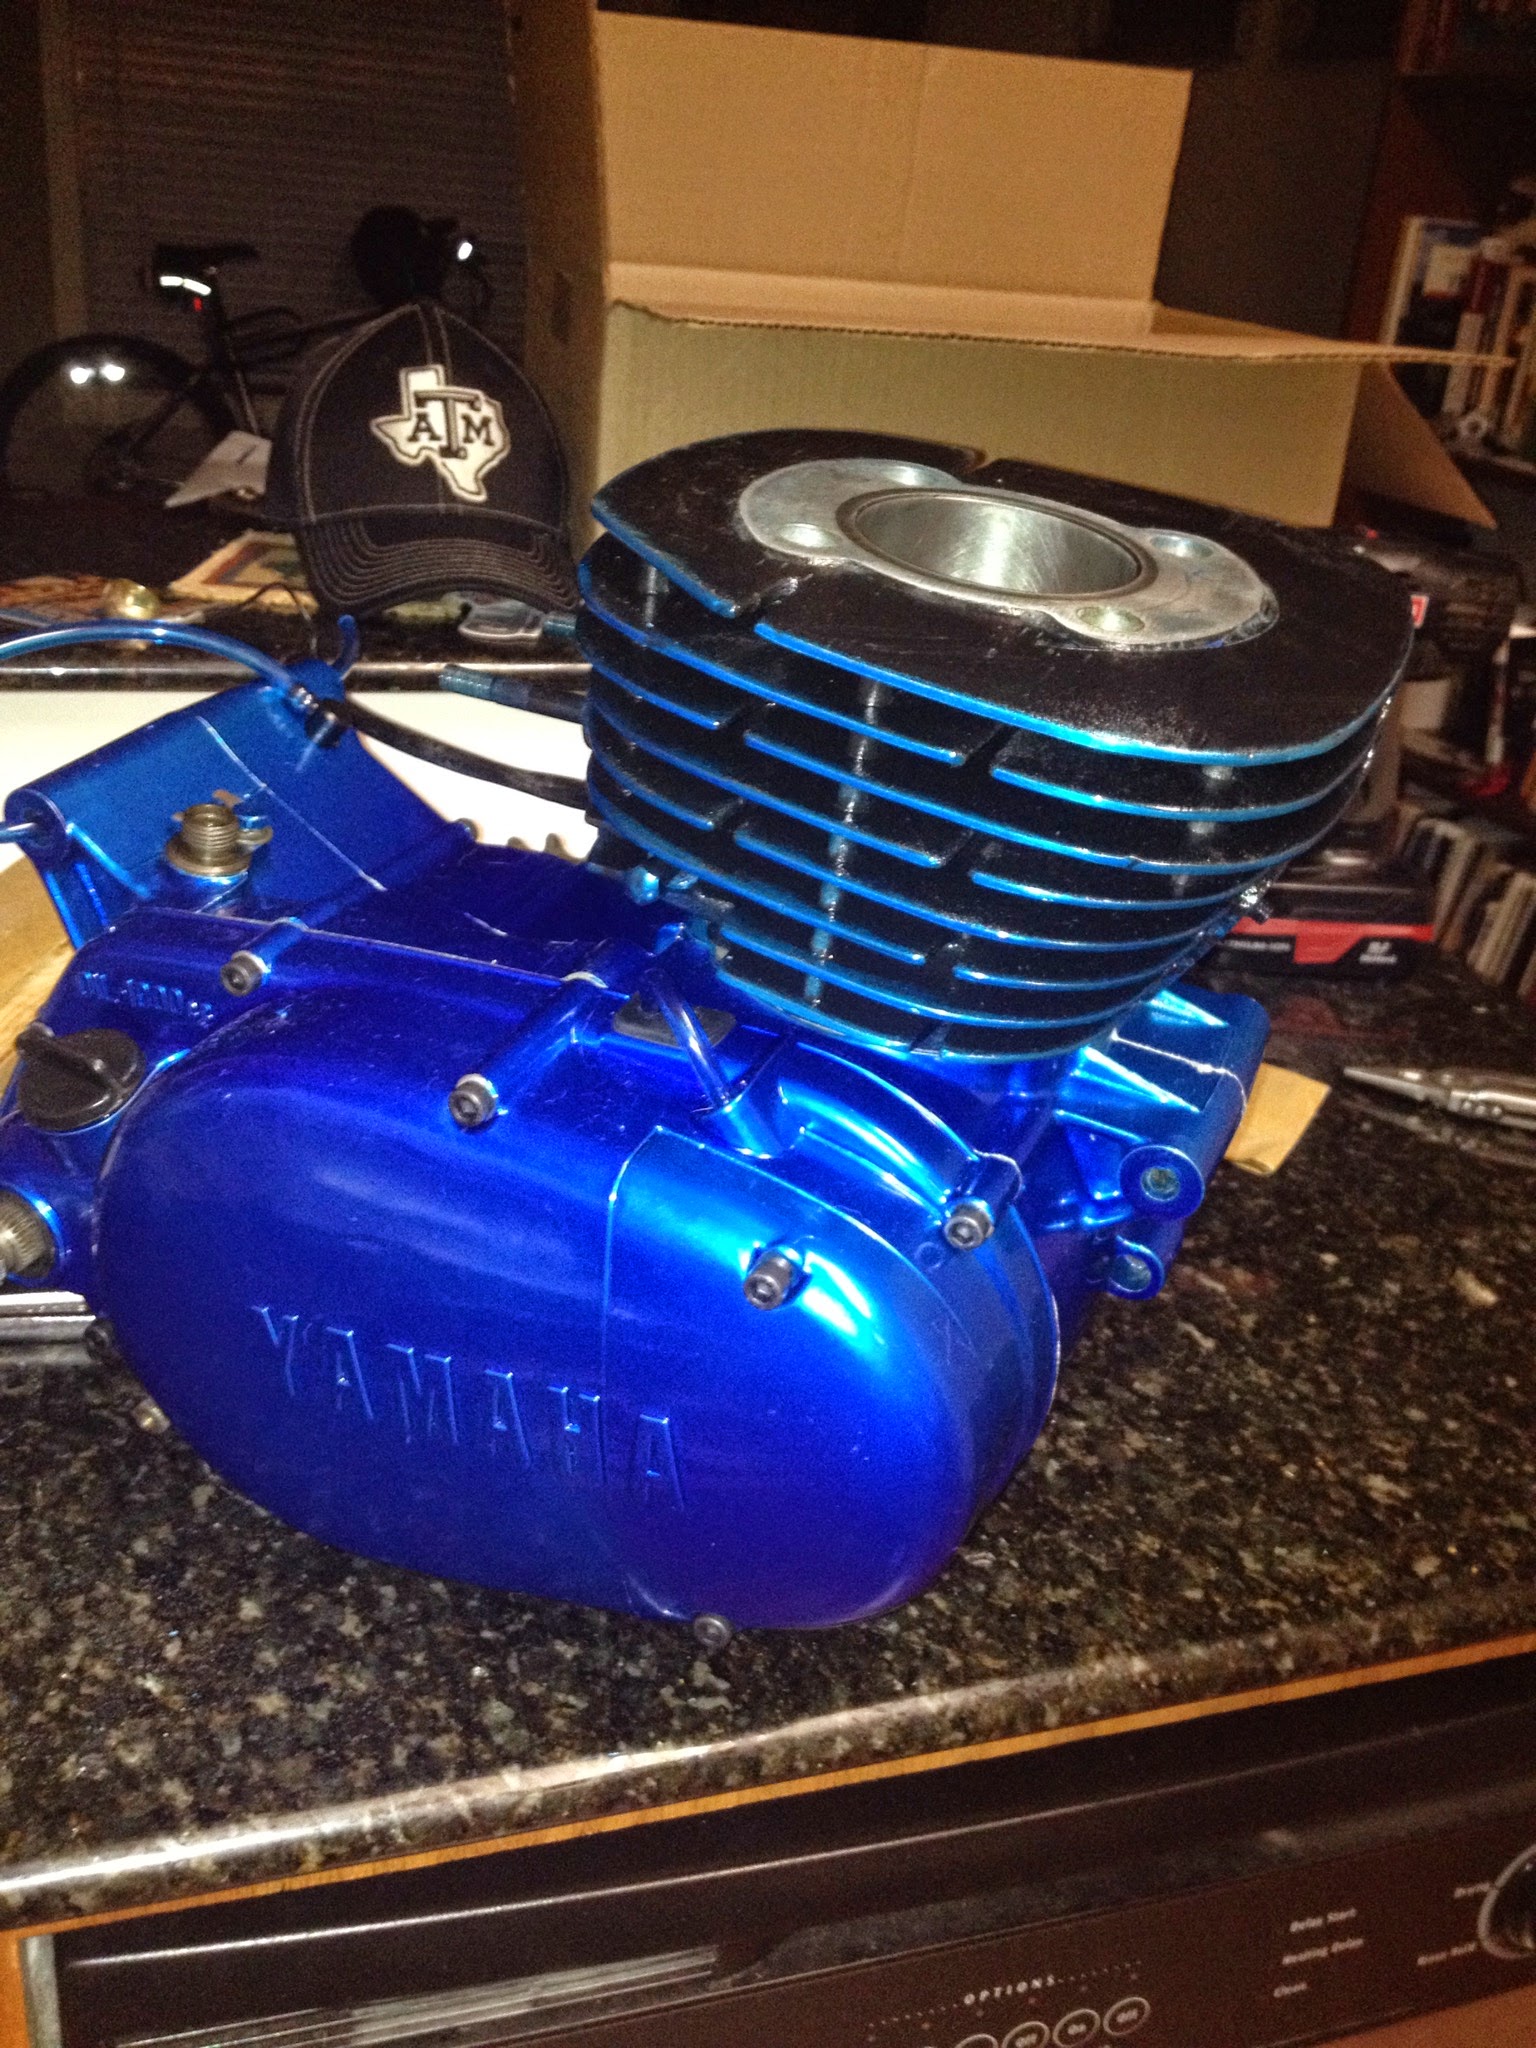
The color scheme for the head/cylinder came to me long ago. Back in the day, these used to be black with the paint sanded off the fins so that they were natural.
Okay, cool idea. I like contrast, but I also like blue.
So I sanded all the cooling fins with 80 and then 120 grit to expose a bright metal surface. The blue powder looks like crap on tarnished, rusty, stained metal. It only shows up well on a bright base. So sanding the fins was required.
Then I did a quick light powder. The electrostatic powder wanted to stick to the bare, freshly exposed metal fin edges anyway.
Bake.
Change powders, go plug in air compressor to refill
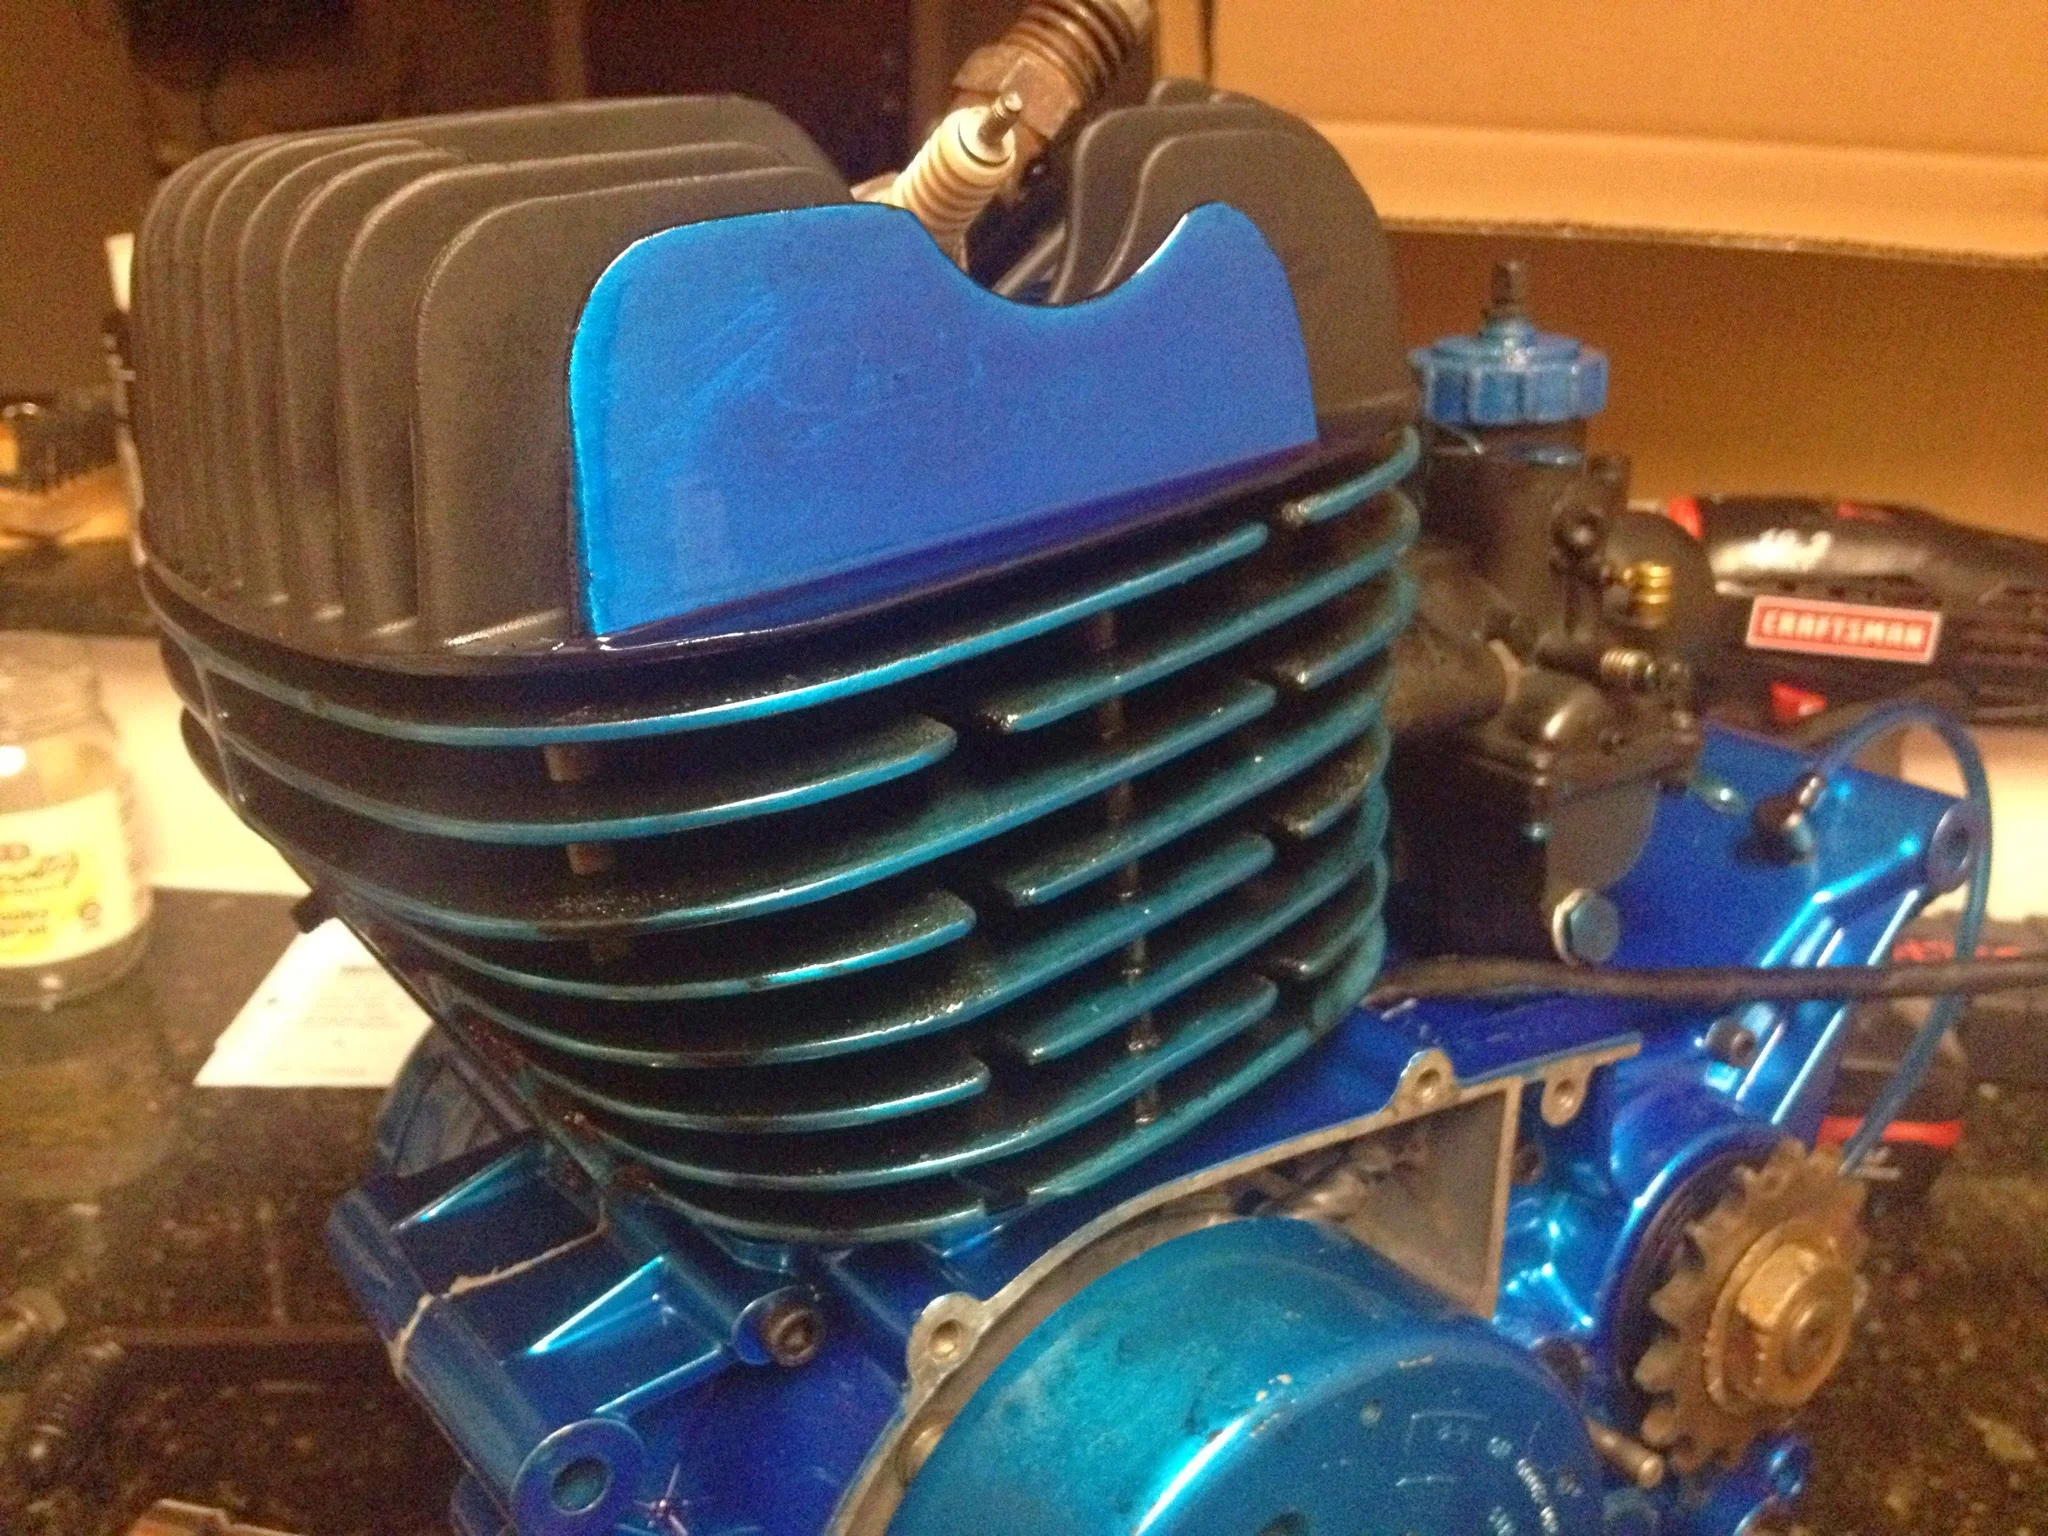
Tape off 2 fins on the head (because I always liked the idea of a blue fun on the head)
Spray the cylinder and the head flat black.
Gently wipe off ridges of the cylinder with a Swiffer cloth before baking. This exposes the blue powder coat that’d been baked on just prior.
Cook. Remove. Cool.
Remove tape from the cylinder head and tape off the freshly coated black. Spray the exposed fins blue.
Bake.
So that’s the sort of boring process of how powder coating happened. Took a few hours.
Here’s the more important mechanical details
-After porting the cylinder and getting to bored, there were some sharp edges on the exhaust and transfer ports. Bad news for a single ring piston. Two-strokes are sort of notorious for breaking rings while running because they get hung up on a ridge.
I took a stone grinding wheel on the end of a Dremel and chamfered the transfer and exhaust ports. Intake port is never in contact with the piston ring but I was able to give it a 45 degree bevel where the port enters the steel cylinder.
Motorcycles pistons are installed the opposite of cars: Piston goes on the rod first, and then you drop the cylinder on the piston. This makes compressing the ring or rings on a motorcycle really really important and a pain in the ass.
I put the ring on the piston way back when. Not any real trick to it, but I’m always afraid I’ll break the ring trying to get it on. It happens.
I put assembly lube on the upper crank bearing as well as on the wrist pin. When it was all lined up, the old wrist pin clips locked everything in securely.
All motorcycle cylinders I’ve come across have a huge bevel on the bottom to funnel the rings in to the cylinder. This helps, but I’ve still snapped rings. Having the engine on a kitchen countertop is a luxury compared to working on it in the frame at near-ground level. Having it close to eye level lets you get under the cylinder and see what’s happening. With proper alignment and some squeezing from fingers, the piston ring goes where it should, the cylinder slides on, and we’re one step closer.
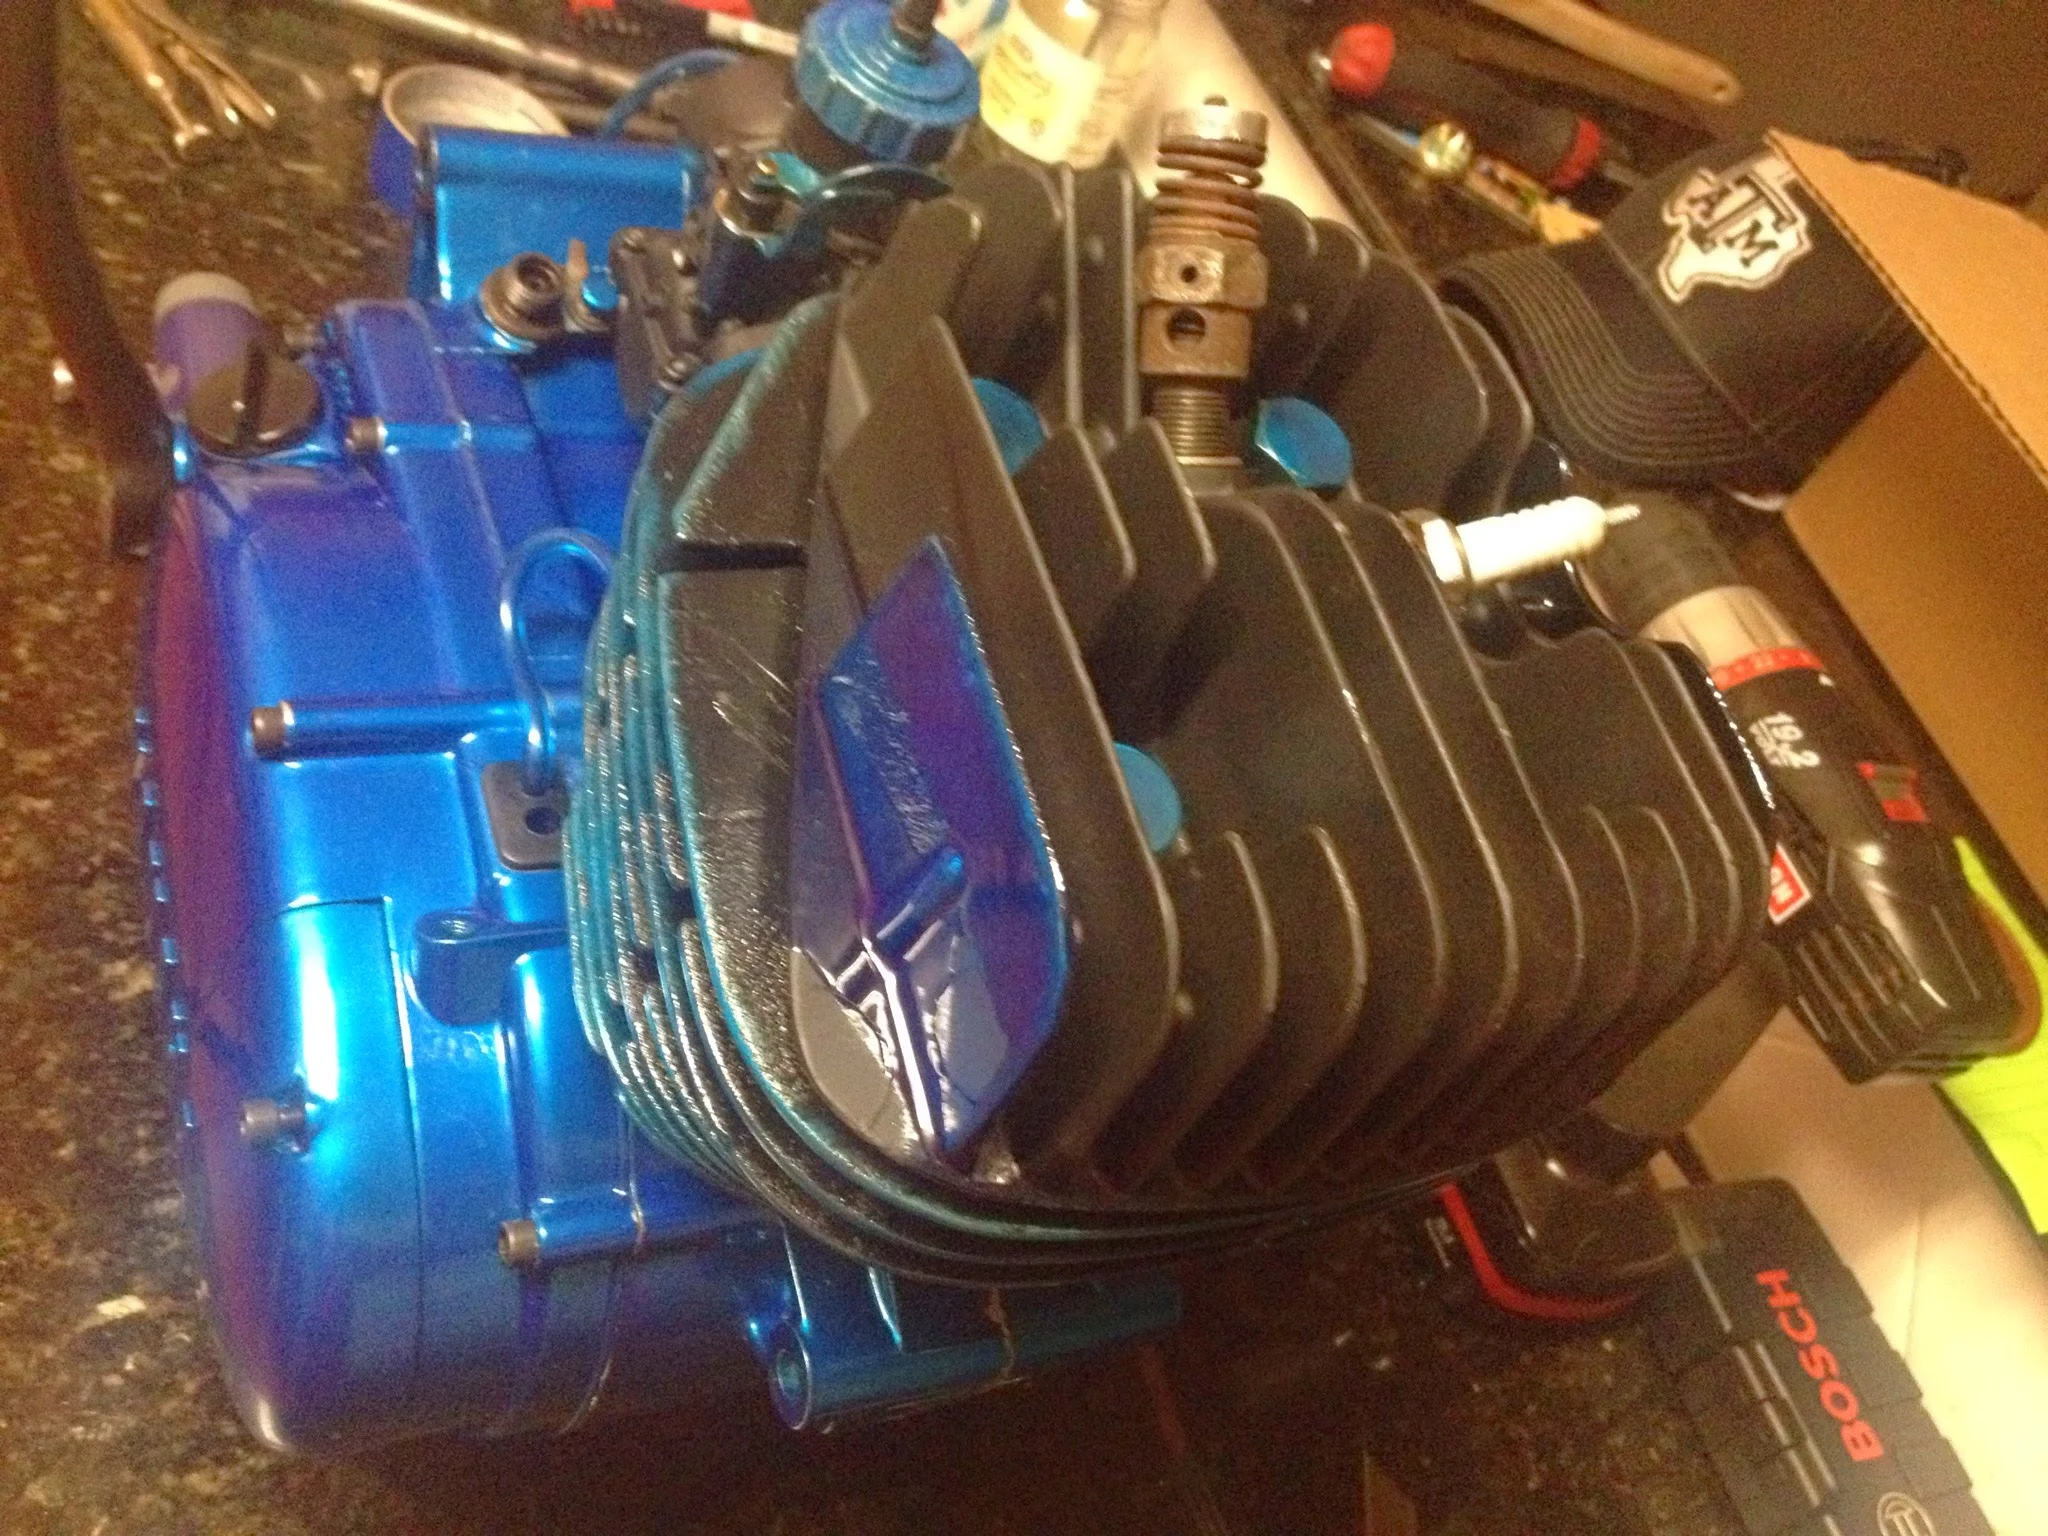
I received a new head gasket in the gasket kit I bought, but I didn’t like the look of it compared to the old one. Both were copper, but the original was a tad bit thicker and had more material on the exhaust side.
Carb Spacer went on the cylinder and I checked to see how well it lined up with the reworked port. It was 50% dead on, but some work with the die grinder and it was about 90% perfect. This should help get the most out of the intake port. If it translates to power, who knows?
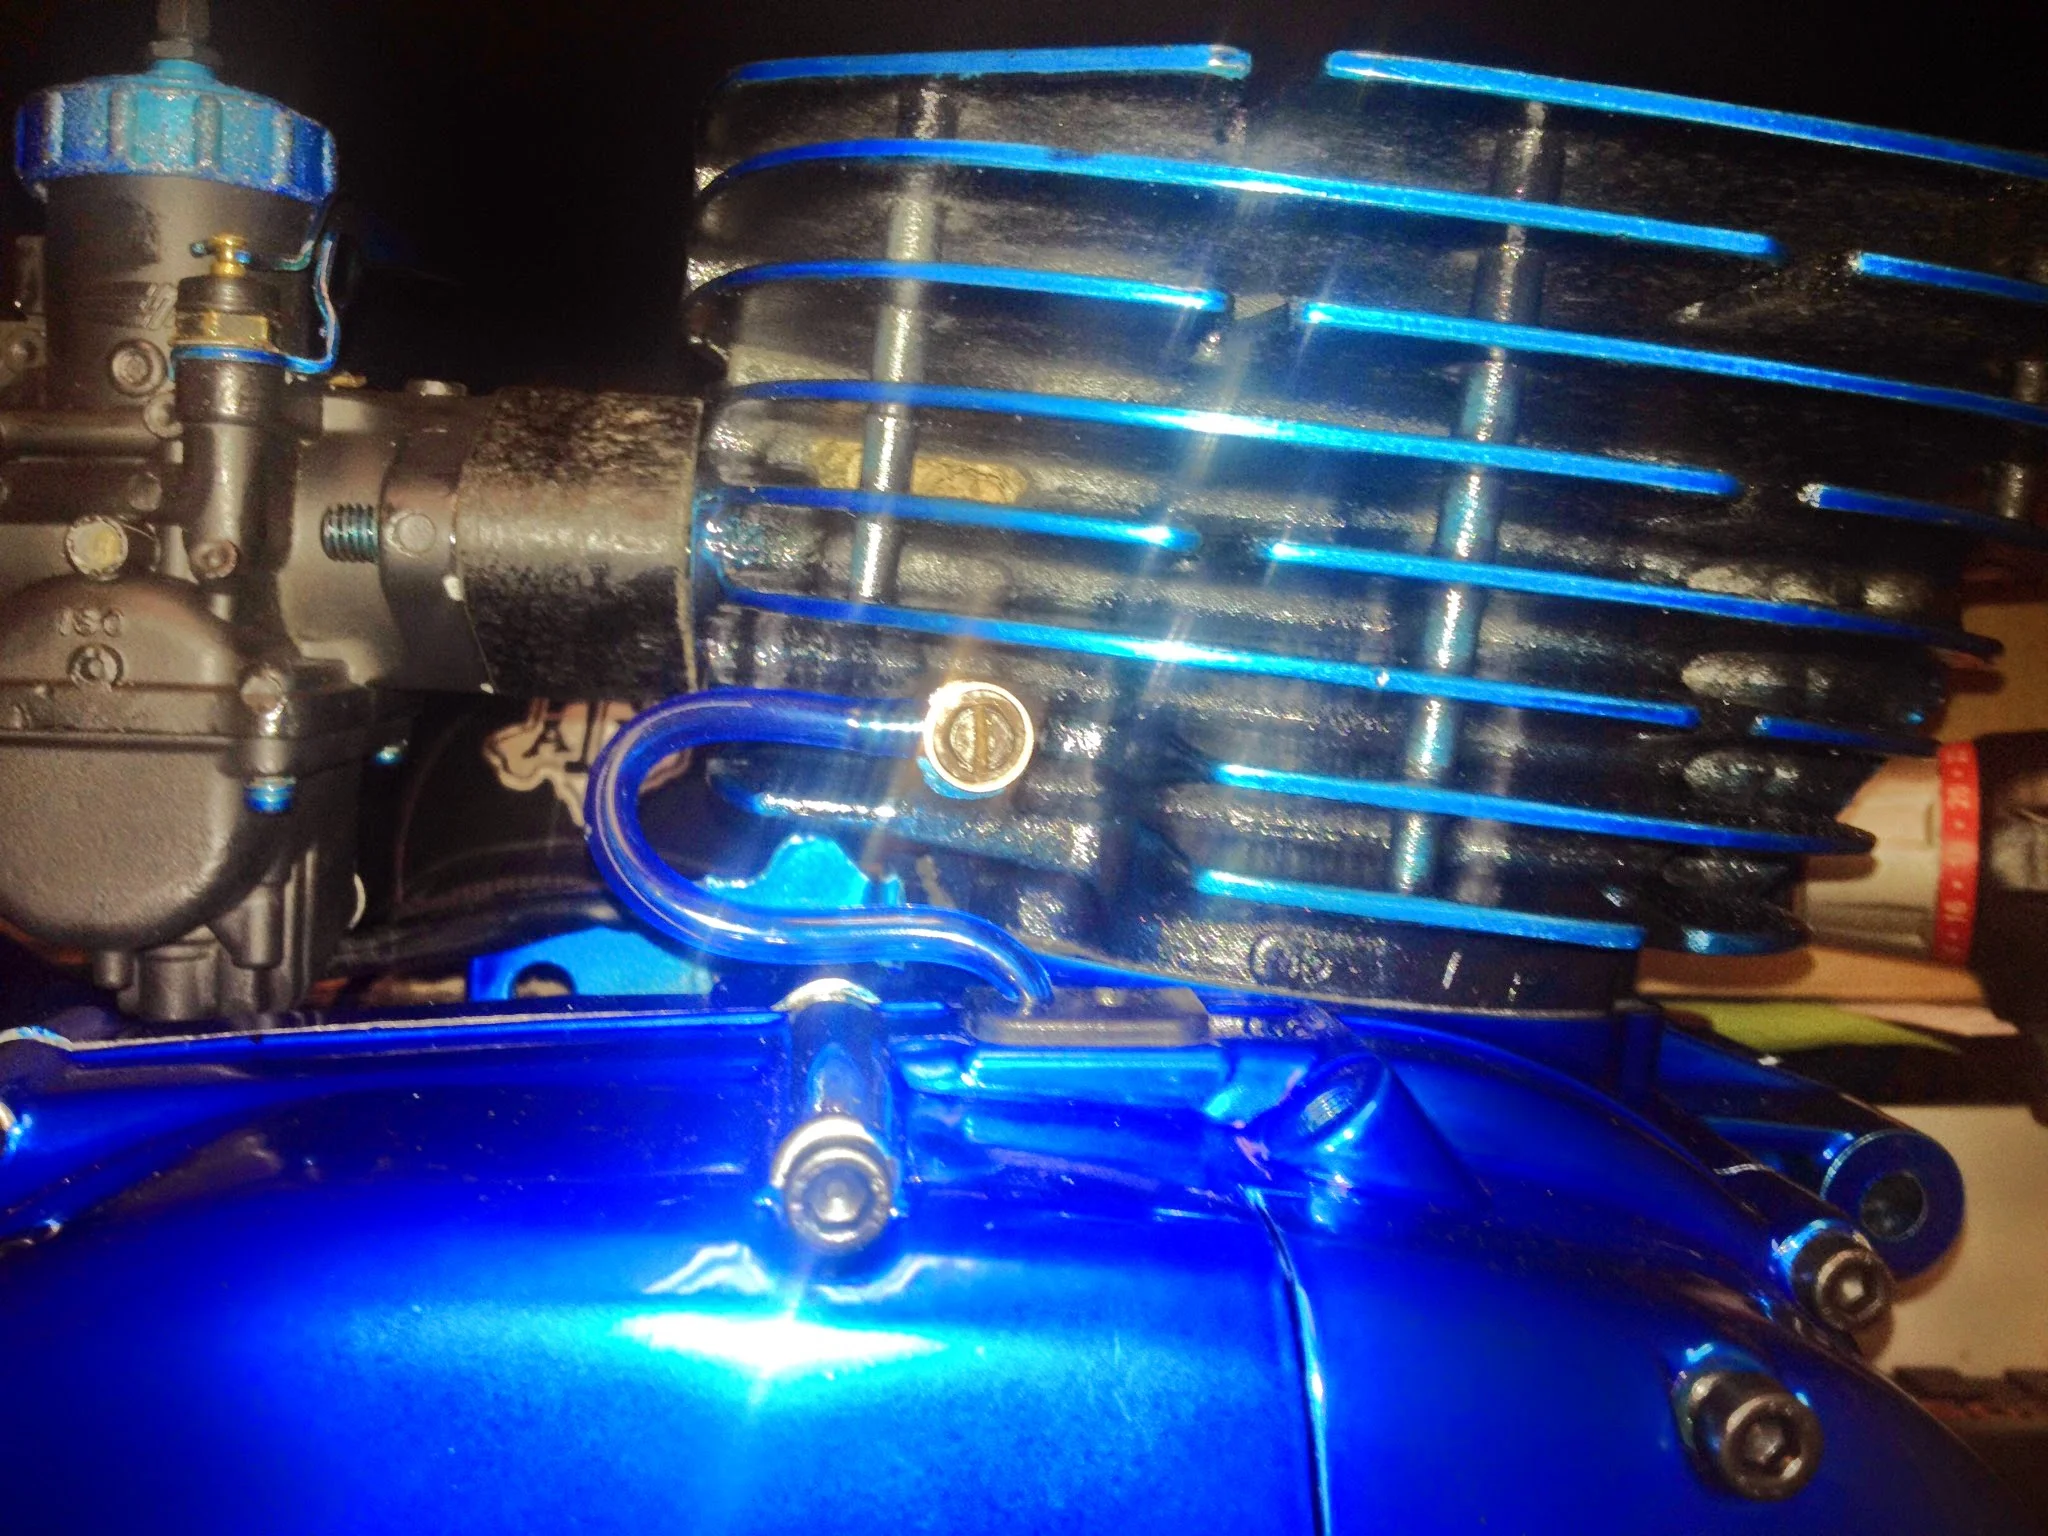
I hooked up the oil supply line from the oil pump. The original tubing was in good shape, but I’m not sure this oil pump is going to perform. For kicks, I ordered some clear blue line so that it’d both look cool and let me see if oil is flowing. The plan for initial startup is pre-mix, regardless.
With the head off, I was able to see the piston so I figured it’d be as good a time as any to time the motor. Seeing the piston at top dead center isn’t at all required, but what the hell…
As the piston winds its way to the top of the cylinder, a set of adjustable points open which release stored electricity and causes the sparkplug to spark. This explodes the air/gas/oil that’s been squeezed to the top of the cylinder, and the explosion forces the piston downward. Process repeats. The rotation of the crankshaft spins the transmission which spins the wheel. Pretty neat.
Points are a contact breaker. Take your index finger and thumb and pinch them together. Those are points. When they’re closed, nothing happens. When you open them and your thumb and index finger break contact, that’s when the engine gets its spark. Timing (when this spark happens in the 360 degrees of the pistons’ travel) is really important. There are always marks and indicators to indicate where timing should be (roughly) but timing can be advanced/retarded based on tons of other variables. In later years, engineers would strap mechanical advance mechanism that would change timing with the rpm of the engine. Really awesome idea.
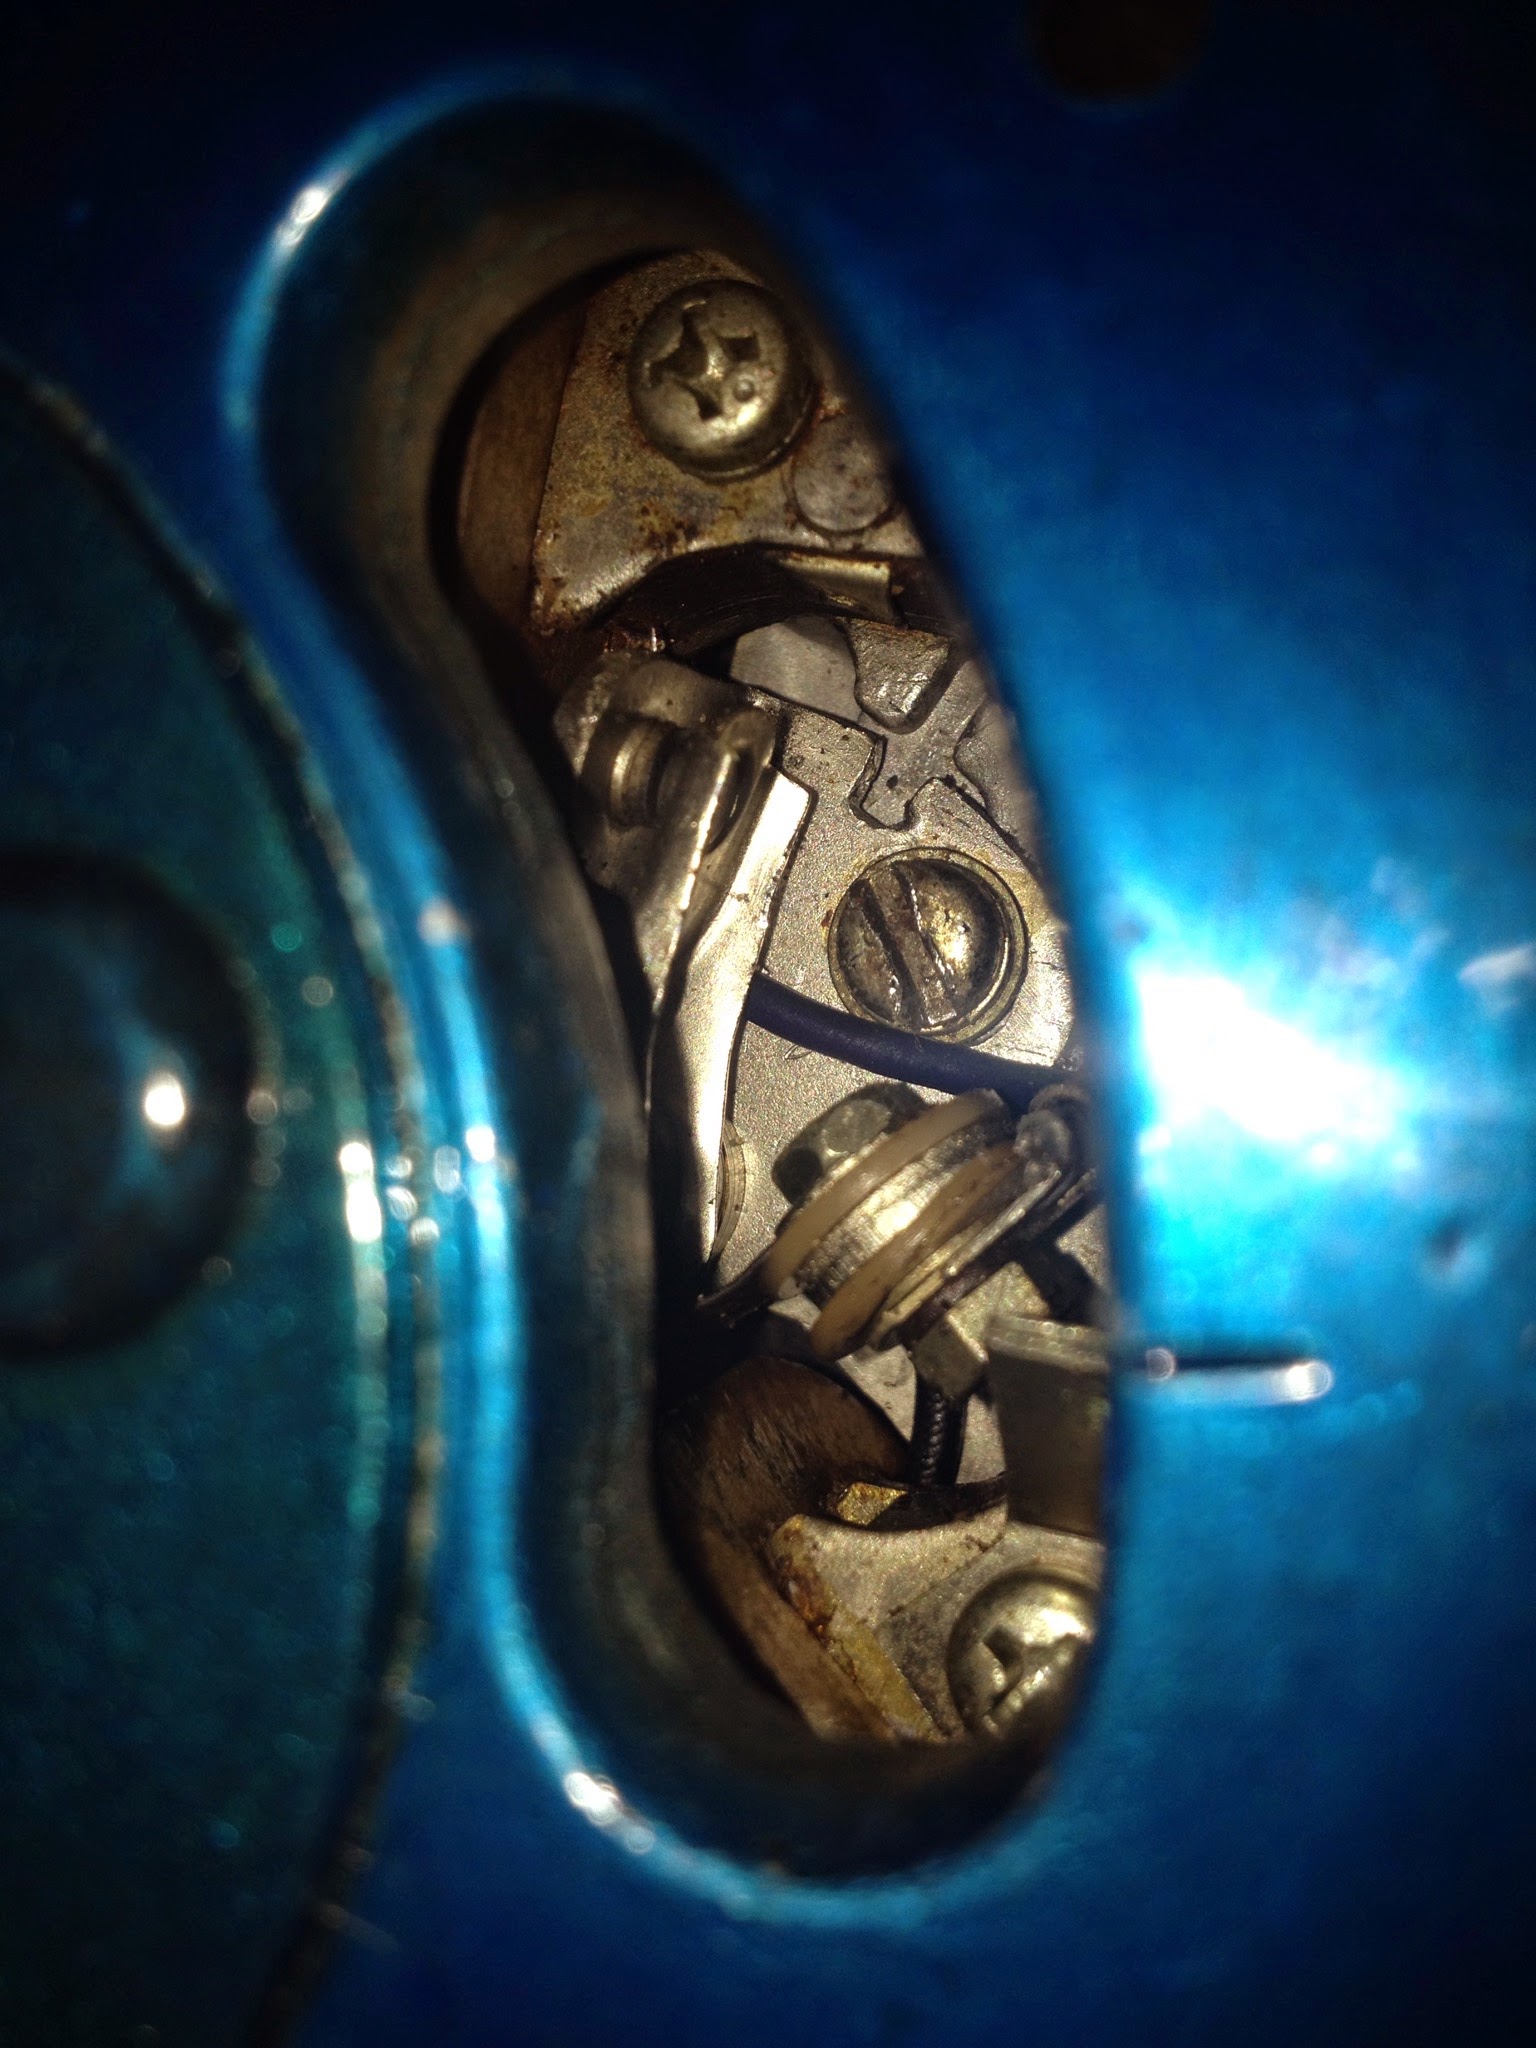
Blury notch on the blue flywheel is the timing mark. It is supposed to line up with that metal tab that's held in with a phillips screw. The points are open here. They're adjusted by loosening the straight screw
For this bike…not really important. There’s a mark on the flywheel, there’s a mark on the stator. The points should be opening at that point. The trick is adjusting the points themselves. I got it locked in where I want, or near enough. I’m confident it’ll fire without adjustment.
I bolted the head on and kicked it over a few times to make sure everything was spinning and that I had compression. I did, but only when I kicked it fast (should have compression when kicked slow) So I tried to tighten the head down some more and I noticed it that the bolts were tight, but there was about 1/16th inch of space that the head could wobble up and down. It wasn’t getting tight.
Head bolts. Now ft 100% more washer!
Then I remembered there are washers that go under the head bolts.
That proved to fix the compression problem.
Compression. This thing has it. Lots of it. Or maybe it’s in my head. It was loud, forceful, and smelled like assembly lubricant though. It was magic.
I’m as confident in my skills as the next guy, but this think was broken down to its pieces and has been that way for nearly a year.
Will it start? No doubt.
Will it run? We’ll see. I have some concerns about the port timing, but I didn’t change any of it so it should work out.
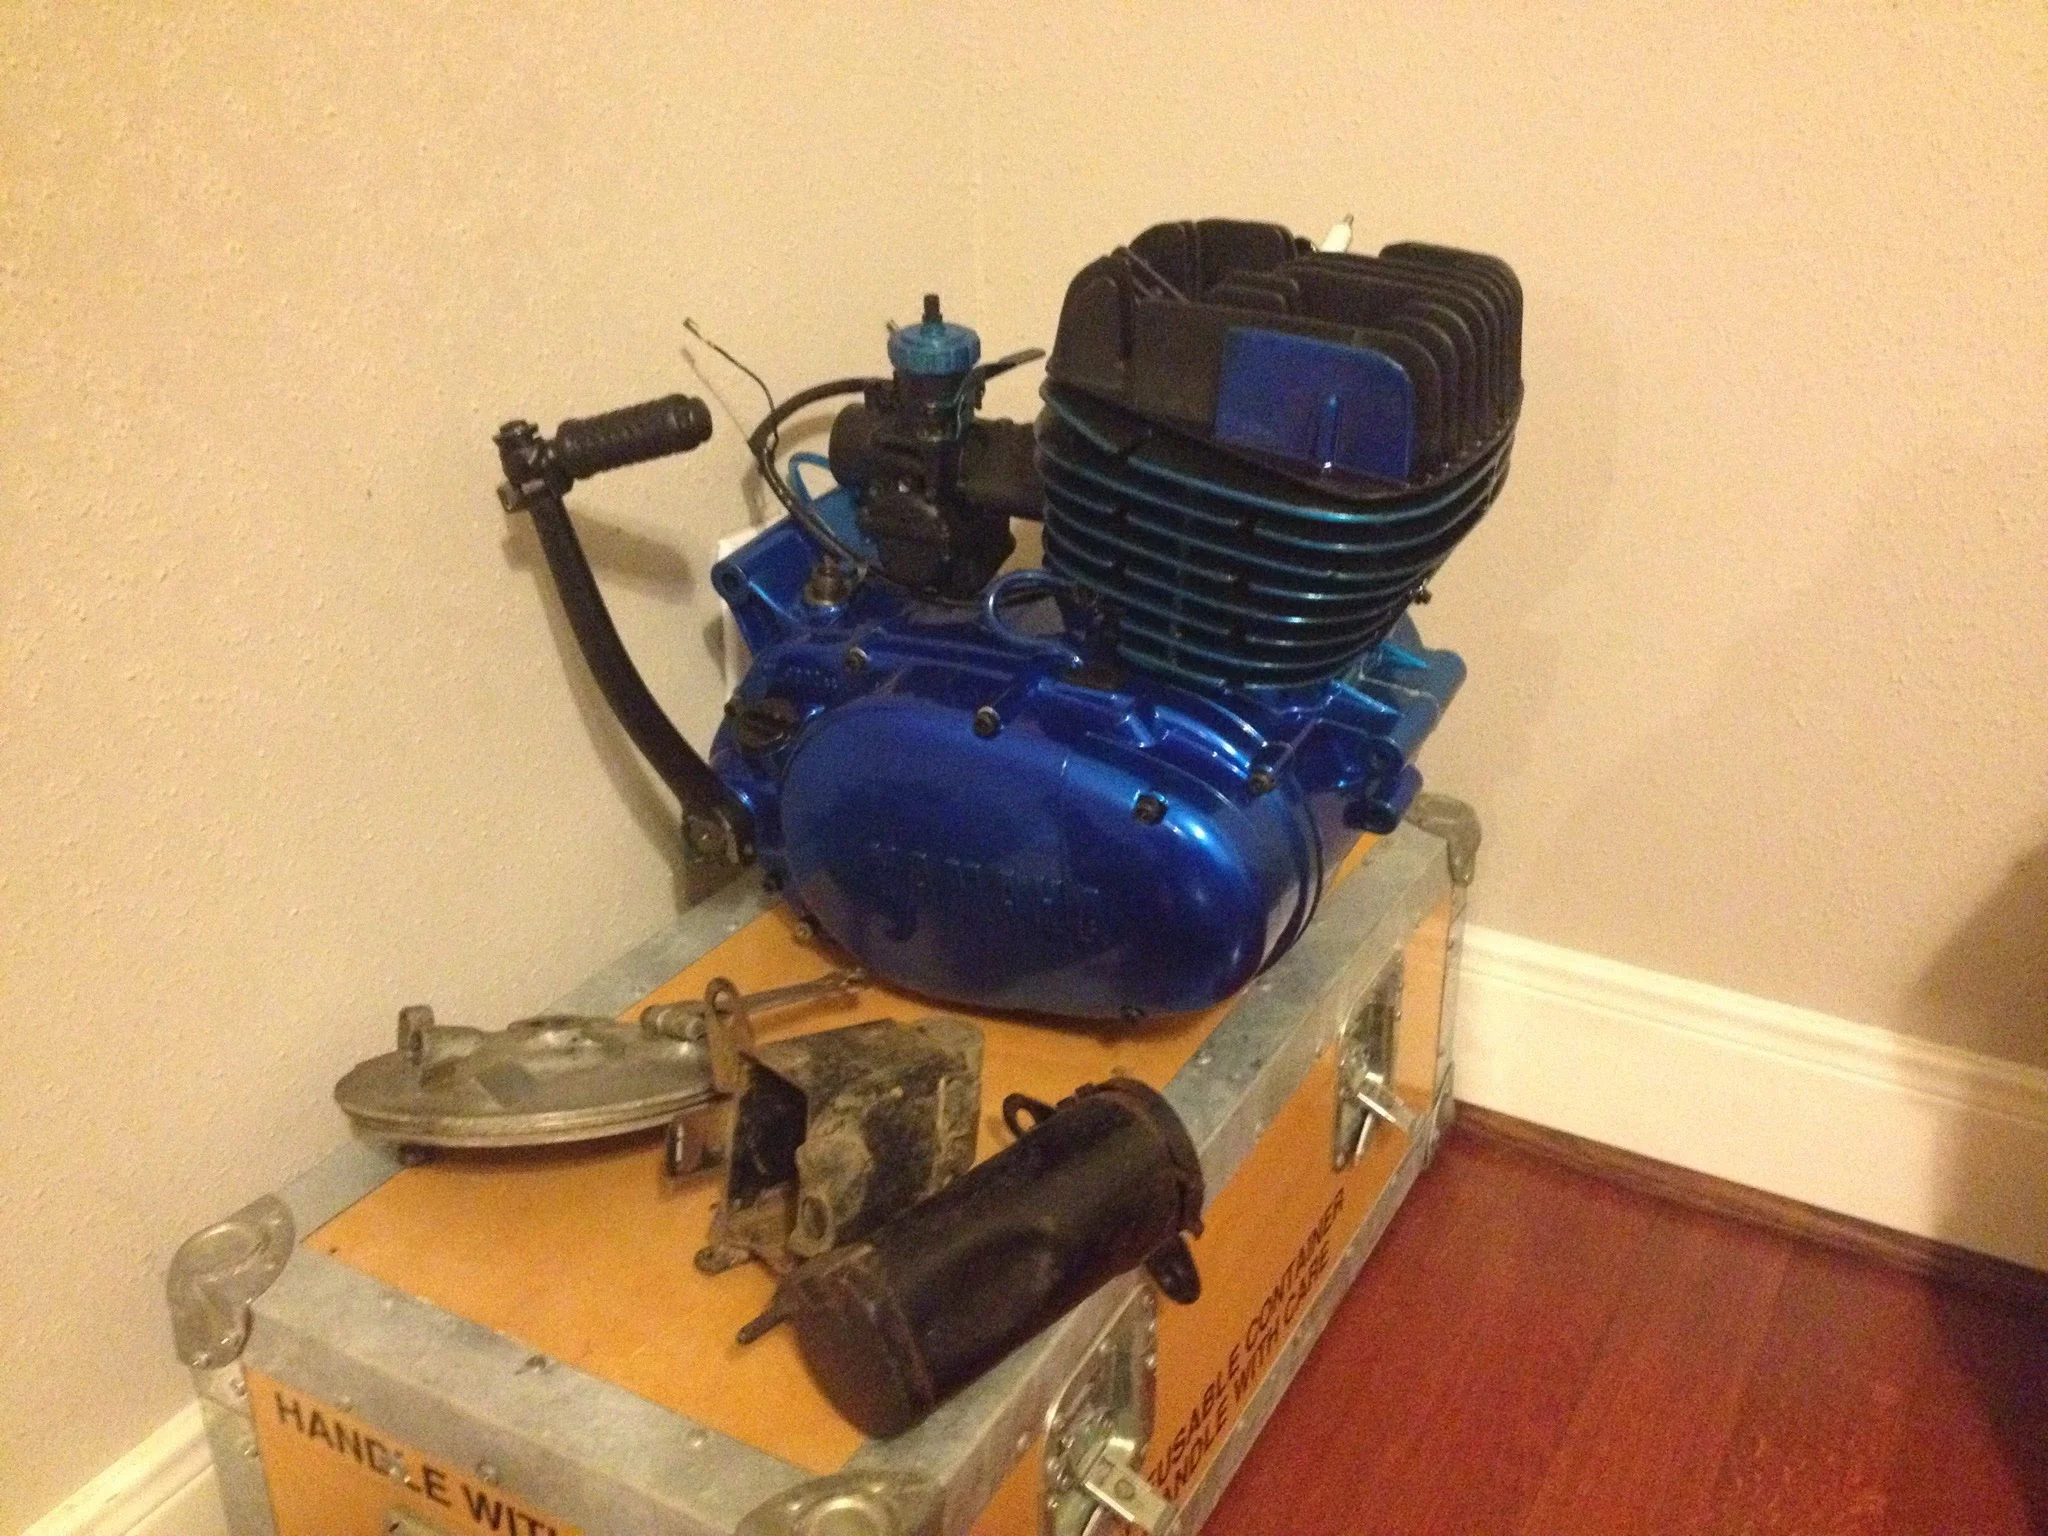
It’s sitting back in the corner where it came from earlier…but now it’s all together.
Need intake spacer gaskets, carb o-ring, and a decompression valve (or a bolt) for the head. I need 6 screws to put the clutch side cases on, and this thing is going back in a frame.
Big news on the frame…is USPS ever gets here, I’ll tell you about it…